Archive for January, 2023

Drawing Tablet for Digital Painting in Paint Tool SAI

Tuesday, January 10th, 2023

If you’re searching for good digital painting software, you’ve probably come across PaintTool SAI. This is a rather old digital painting and drawing program developed in 2004 for Windows.

It is widely used by anime and manga artists, but you can use PaintTool SAI for almost any kind of project. many digital artists combine the PaintTool SAI with popular programs like Adobe Photoshop or Adobe Illustrator to optimize their creativity.

PaintTool SAI is a popular digital artist software due to its simplicity and variety of tools. Its intuitive user interface is simple and easy to learn yet powerful. The popularity can also be attributed to how the lightweight painting software has been optimized to run with minimal resources and rarely crashes.

Drawing tablets are essential for artists painting in Paint Tool SAI. The possibilities they offer are simply immense! With a drawing tablet, an artist will no longer have any limitations.

What is Paint Tool SAI used for?

PaintTool SAI is a graphics design software that helps artists create and edit different types of illustrations like cartoons and anime.

It is an editor and painting tool with anti-aliasing capabilities with which you can smooth out jagged edges and minimize distortions in low-res drawings and images.

It achieves this by averaging the colors of the pixels at the boundaries of different shades. This has a greater impact when there is a high contrast border between pixels.

PaintTool SAI allows you to view entire brightness ranges of different colors on one platform. You can then combine portions of different drawings or images and transfer them or erase what you need.

It has multiple robust tools for specific tasks needed to achieve this. There are raster drawing tools like a marker, airbrush, watercolor and pen. It also has selection-based tools like a magic wand and lasso, which can be configured to enable anti-aliasing, and works well with its zoom and rotate functions.

There are layering tools, Lineart tools, transformation tools, linework layers, brushes and erasers for removing hard edges.

PaintTool SAI enables you to draw smooth curves and diagonal lines without jagged distortions, remove unsightly jagged edges and smooth the edges of your digital images or graphics.

It also softens the color transition between edge pixels and background pixels in Adobe Photoshop to make it appear smoother.

It is compatible with MultiMedia eXtension (MMX) technology, an Intel processor architectural extension that enhances the performance of multimedia algorithms, enabling the processor to handle data faster and more efficiently.

It also has 16bit ARGB color channels in line with photography and Photoshop advancements. This enhances image manipulation because there is more flexibility in handling colors. Editing is easier even in photoshop projects with glaring differences.

The tool provides full digitizer support so you can process all kinds of images and convert analog to digital. You can export your images in their native SAI format or through BMP or PSD.

You don’t have to keep jumping from one application to another. PaintTool SAI also has a data protection function that protects the integrity of your multimedia images and backs them up just in case there is abnormal termination.

The lightweight painting software only requires 1024MB of your system memory and 512MB of storage. This memory footprint and CPU utilization are low compared to the tasks it accomplishes. It is currently priced at approximately $52 per software license, which is a steal for a wholesome digital painting tool like this.

Advantages of drawing tablet for digital painting in Paint Tool SAI

A stylus provides more control and interactivity than a mouse because it gives you the most responsive digital painting experience by allowing your hand and brush to work fluidly as one.

While a mouse is a great pointing device, it is not particularly convenient for painting. A mouse can only move on a flat, two-dimensional surface.

This tool has also been cited as the cause of the aptly named mouse arm syndrome, specifically repetitive strain injury (RSI) and carpal tunnel syndrome (CTS).

A tablet stylus, on the other hand, has the ability to sense the motions of your wrist, hand, and arm. This gives you an authentic feel, accuracy, and control.

Drawing tablets work with commonly used digital art programs such as Paint Tool SAI and Photoshop, turning your computer into a digital canvas. You can draw as naturally and comfortably as you would with pen and paper.

Want to undo? Tab, copy, paste, command, shift, spacebar, and more. You can do this by assigning custom keystrokes or actions to the express keys on your pen or drawing tablet. This enables you to work faster and eliminates the tedium and strain that come with performing seemingly repetitive tasks.

Pressure sensitivity is the key to creating dynamic digital art. With pressure sensitivity, you can vary the width of your strokes and control how dark you would like your lines.

Many Paint Tool SAI brushes respond to stylus pressure. Depending on the variant settings, greater stylus pressure can increase the width of a brushstroke, the penetration of color, or the degree of other effects.

The most significant aspect of a drawing tablet is how sensitive it is to pressure. When you use a pressure-sensitive stylus or pen tablet, the amount of pressure that you apply controls the opacity and width of your strokes.

In theory, a mouse has no pressure information because a mouse button is either “on” (button down) or “off” (button up).

How to Turn on Pressure Sensitivity in PaintTool SAI

In PaintTool SAI, you can easily turn on and adjust your pressure sensitivity through the brush settings and minimum pressure.

Method 1: Use the Brush Settings

In PaintTool SAI the Min Size slider in the brush settings menu “changes the brush size when pressure is 0.” This affects the size of your brush depending on how much pressure you apply while drawing.

Find Min Size under Brush Size in the brush settings menu. Adjust the slider to your preferences. Default PaintTool SAI brushes have Min Size values ranging from 0-50%.

As a general rule, the higher value % your minimum size is, the less pressure sensitivity your brush will have. Therefore, if you want to have a more reactive brush, it is better to choose values 50% and below.

The benefit of using this method to turn on and adjust your pressure sensitivity is the ability to customize the brush to your comfort and preferences.

Method 2: Change Minimum Pressure Settings

Another way to turn on and adjust the pressure sensitivity in PaintTool SAI is by changing the minimum pressure settings in the Pen Tablet section of PaintTool SAI’s options.

In Pen Tablet section find the Minimum Pressure for Brush Stroke. Use the slider to adjust the minimum pressure you desire. keep your values low if you prefer a more reactive brush. The default settings for minimum pressure are usually 0.

3 Good cheap drawing tablets for Paint Tool SAI

A drawing tablet is something you can make great use of whether you’re are an experienced artist or just starting.

Non-screen drawing tablets are some of the most beginner-friendly drawing tablets out there as they are very inexpensive. You use them by drawing on the tablet while looking at the monitor screen.

The Pen Display Monitors come with a built-in screen and support for pen input. Draw directly on the screen is very engaging and enjoyable. They are considerably more expensive than normal pen tables and mostly used by intermediate and professional artists.

With so many drawing tablets out there, it’s hard to know which one to choose if you’ve never used one before.

The pressure sensitivity of a drawing tablet is among the top characteristics to consider before making a purchase. The greater the sensitivity, the more control you have over your strokes.

Drawing tablets come in varying sizes. Generally speaking, you’ll want the graphic tablet size to be close to the size of your monitor.

It’s not as comfortable to draw on a small tablet, so if you have a comfortable working space, it’s a good idea to get a bigger tablet.

The number of hotkeys differs by tablet, but the ones that include more hotkeys allow for greater customization options, which is particularly convenient for pros!

Wacom has been at the very top of the drawing tablet game for a long time. If you’re looking for the best overall and budget-friendly graphics tablet, then the XPPen brand is a must-buy for you. It feels like a premium build device with the wonderful price.

1. XPPen Deco LW
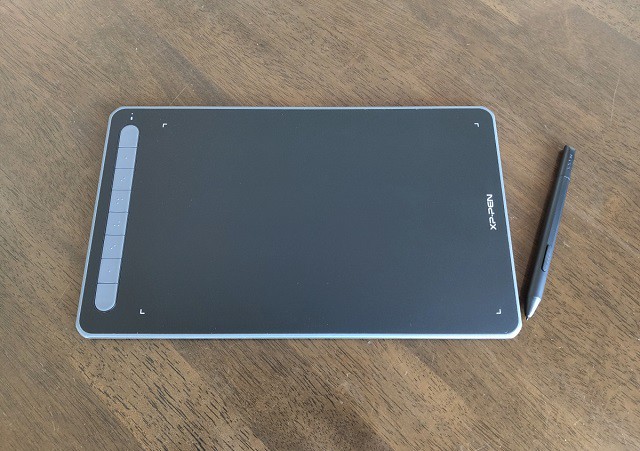
The XPPen Deco LW is a great choice for artists and graphic designers who want the best drawing tablet under $100.‍

It has a 10 x 6-inch working area and a papery texture surface, providing a wonderful experience for your digital artwork creation.

There are eight hard shortcut buttons on the left side of the device that can be customized, as well as two buttons on the stylus.

There are 4 color variants (Black, blue, green, and pink) to choose from, so you can select the one that best suits your style.

The Deco LW comes with a X3 Elite battery-free digital pen, so you won’t have to be bothered if your stylus needs to be charged.

Its 8192 levels of pressure sensitivity, ±60° tilt function, combined with 3g initial activation force, make every stroke more fluent and accurate.

It is compatible with Windows, Mac OS, Linux, Android, and Chrome OS, so you can do your drawing on any device.

It has Bluetooth capability, allowing you not to worry about carrying the USB cable if you don’t feel like it, The fact that you can still use it while it is charging makes it worth it right there.

The XPPen Deco MW tablet has the same technical specifications with Deco LW, but it offers a smaller active area of 8 x 5 inches.

2. XPPen Artist 16 (2nd Generation)

Advanced artists and professionals may elect for an upgraded model like the XPPen Artist 16 (2nd Generation).

The 15.4″ display is a comfortable size for making art work on with enough space to maneuver your arm properly – it also doesn’t take up the whole desk and is even small enough to be portable.

The display is laminated which has no gap between the drawing surface and the LCD beneath. When drawing, the line looks like it’s coming out from beneath the pen tip. there’s no parallax.

The anti-glare screen makes it much easier to draw outdoor or in certain areas, as one of the most annoying things while drawing is having lights reflected on the screen while you draw.

The resolution is the standard 1920 X 1080 FHD, which is more than enough for most artists. True-to-life color with 94% Adobe RGB and 1.07 billion colors means the tint you choose is the tint you’ll see in your final output.

The X3 Elite battery-free pen supports 60 degrees of tilt recognition and 8192 levels of pressure sensitivity. Its initial activation force is just 3g which is to say that the pen register strokes even at extremely light pressures….

Not only is it feature-rich, but it is also compatible with Windows, MacOS, Linux, Chromebook, and Android devices.

The Artist 16 (2nd Generation) tablet comes with a black artist’s glove, a free bundled drawing software (choose from artrage 6 and penCanvas), and ten spare nibs. the four color options of Black, blue, green, and pink also adds appeal to the design.

The XPPen Artist (2nd Generation) series are available in four size variants: 10,1″, 11,9″, 13,3″ and 15,4″. gives pro and amateur artists and photographers new functionality, including android support, Anti-glare coating, and X3 Chip stylus.

3. XPPen Artist 24 Pro

A large drawing tablet is quite an accessory for a professional artist. The XPPen Artist 24 Pro is an illustrator’s dream come true: a large 24″ digital canvas with very little parallax, 2K resolution, wide color gamut and the advanced pen technology.

The 24″ tablet is really big. Make sure you have a deep enough desk to be able to accommodate this beast of a tablet.

The screen with ips panel, 2k resolution (2560 x 1440 pixels) and 90% Adobe RGB color space is very crisp and it feels great to be up close to your artwork. The etched glass protector gives you a nice feel when either drawing or animating.

The PA2 stylus is fantastic. using the pen felt really natural, brush strokes are quick and crisp. It supports 8192 levels of pressure sensitivity and tilt response.

The pen has a rubber grip and comfortable to hold and doesn’t require a battery, so you don’t have to worry about charging it.

This Artist 24 Pro tablet has an adjustable stand that can give you some elevation, from 16 to 90 degrees, allowing it to be used on any flat surface or tilted to the optimal angle for viewing and drawing.

Having 20 programmable keys, as well as 2 Red Dial Wheel can make drawing convenient, which should be more than enough for any artist. The red dial wheel makes certain functionalities like zooming in & resizing the brush easier.

Is Paint Tool SAI available for iPad or Android tablets?

The straightforward answer is no, you can’t, at least not directly. You will need to connect the iPad to a windows machine and use Sai that way similar to a XPPen Artist.

Paint Tool SAI is not compatible with Android, iPad OS and Mac OS devices. SAI is only available for Windows desktop, laptop and tablets that run on Windows operating systems.

The best ipad OS alternative painting program is procreate, which is e is great value for money and costs $9.99 as a one-time purchase.

Paint Tool Sai isn’t available on the android tablet like Samsung Galaxy Tab. There are alternative desktop quality art apps like Clip Studio Paint on the google Play Store. There are other drawing apps that work will like Artflow, Infinite Painter, and Medibang paint.

If you like portable standalone drawing tablet, the Microsoft Surface Pro tablet has windows OS is your best choice for Paint Tool Sai. A compact, and powerful Multifunction drawing tablet for professionals comes with the additional benefit of increased mobility.

A pro version of the Microsoft Surface will come with a pen/stylus. So you have to have a pro version for pen and pressure sensitivity capabilities.

Conclusion

Paint tool SAI’s brush engine is still my favourite out of all the art programs. I just do all the post processing outside of SAI. I always loved brushes with tilt support, but unfortunately Sai doesn’t have that.

I think it’s the only real lightweight option for digital painting. You can work on huge canvases and lots of layers (For me, usually 4k canvas and 60+ layers) and see minimal impact on the CPU.

Big brushes are lightning fast compared to alternative softwares. It still lacks pro level color/level management. But what is offered, works really well.

Deco MW bluetooth tablet from XP-Pen is the one that I use the most because it’s convenient to carry around and I often work in different places. Even though it’s not as fancy as other tablets, it works perfectly fine for what I need in daily work.

I hope this article helps you decide which drawing tablet will suit your needs as a creative person.

(15)
Drawing tablet for vector graphics design in Inkscape

Tuesday, January 3rd, 2023

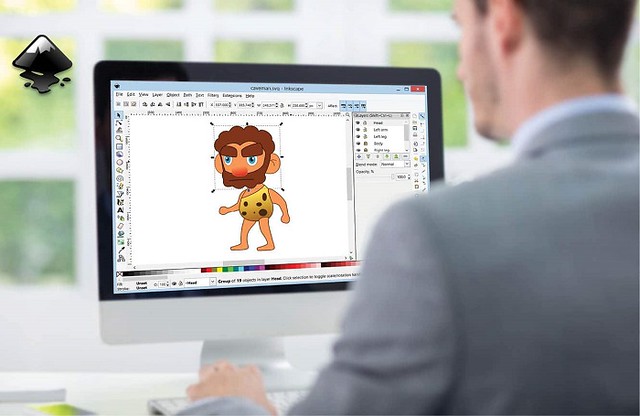
Inkscape is gaining popularity because it’s free and it offers tools that can create vector graphics.

When working with vectors in Inkscape, brushes are often considered to be vectors. This means that they can be scaled, rotated, and moved around the document without affecting the overall image quality.

The Inkscape program has a simple interface and the tools are easy to learn, which makes it a perfect choice for self-taught beginners who are new to graphic design.

It has drawing tools and shape tools that are great for making icons and illustrations. It’s ideal for designers and illustrators who are looking for free vector design programs for digital work.

If you are planning on using Inkscape, I recommend that you invest in a drawing tablet. This will allow you to have more control and precision when creating your designs.

A good tablet can make your work in Inkscape much easier and more effective. Drawing and coloring are the best examples.

Inkscape: Best free vector graphics design software for beginners

Inkscape is a vector graphics design application that’s free to download and use on not only Windows and Mac, but also on GNU/Linux operating systems.

The interface of this software is transparent, stable, and consistent. The users get various tooltips along with useful information from this versatile and flexible software.

Inkscape provides several tools and various shapes, paths, text, markers, clones, transparency effects (alpha), transformations, gradients, patterns and groups.

Inkscape also supports Creative Commons metadata, node editing, layers, complex path operations, bitmap tracing, path-based texts, circumfluent object text, direct XML editing and much more.

The default file format is SVG, but can also compatible with important EPS, PostScript, JPG, PNG, BMP or TIP images and export PNG or other vector-based formats.

Design professionals and hobbyists create a wide variety of graphics like icons, logos, illustrations, maps, diagrams, and web graphics from this open-source vector drawing tool.

With the add-ons feature, the users can customize the functionality of this tool. The graphic designers will find it a hugely adaptable and excellent tool.

Inkscape has a dedicated and passionate user community around the world. This community produces tons of high-quality resources and tutorials that you can freely use to learn vector graphic design.

In addition, there are countless online resources available to you at no cost –guides, tutorials, and free courses– that teach you how to use Inkscape, from beginner to advanced.

It’ll also run on older, less powerful computers; however its main issue is that it has a reputation for being a bit slow and laggy. If you can live with that, however, it’s a good free option.

If you are a PC-based illustrator, a designer who is subscription-averse, or you’re unable to invest in expensive software packages, then Inkscape might be for you.

However, expect a learning curve if you are accustomed to working in mainstream products like CorelDRAW and Adobe Illustrator CC.

Inkscape vs Adobe Illustrator: What’s the difference?

Adobe Illustrator CC is a industry-standard software in vector drawing tools and applications for Windows and Mac OS. It does not run on Linux OS platform.

The biggest difference between Inkscape and Adobe Illustrator is that Inkscape is free and open-source, but Illustrator isn’t.

You can directly download and use Inkscape but if you want to use Adobe Illustrator, you need to choose a subscription plan and it can be expensive for some users.

Another difference is that Inkscape uses nodes editing and Illustrator uses the direct selection tool, which gives more flexibility.

The font and text tool in Inkscape isn’t as convenient as the text tool in Adobe Illustrator mainly because, in Inkscape, you can’t preview the text when you change font or size.

Inkscape doesn’t have the option to choose CMYK as the document color mode. That’s a big down point because there is a huge difference between CMYK and RGB color modes when you send the artwork for print.

Adobe Illustrator supports both RGB and CYMK. You can easily select a color mode when you’re creating a new document or change the color mode at any time. Generally, RGB is used for graphics that will be displayed on a screen, and CMYK is used for design items that will be printed.

Handling images in Adobe Illustrator is easier because you can freely transfer them to Photoshop, work between two programs is a plus.

Inkscape allows you to open EPS, AI, SVG, PDF, SVGZ, VSD, and CDR file formats. However, you can’t get all features for AI files when opened in Inkscape. Like Inkscape, Illustrator supports all these file formats. In addition to this, Illustrator supports CorelDRAW, Photoshop, Pixar, and AutoCAD drawing file formats.

Inkscape and Illustrator function in the very same way because they are both vector software that have the same foundation.

While Illustrator has become the standard in commercial graphic design agencies and studios, Inkscape actually allows you to make creations that are as good as those that are created with commercial software.

What is a graphic tablet?

The graphics tablet is comprised of the tablet (surface) and the stylus. This makes it possible to do very detailed work.

Graphic tablets are pressure sensitive so how hard you press with the stylus determines how dark or thick the strokes are on your screen. You can also get features like tilt sensitivity which accounts for variations in the angle of your stylus in the same way that changing the angle on a pencil results in a different stroke. This allows for a more natural way to shade your drawing, for example.

There are a few different types of graphic tablets that all function differently from one another. There is the classic graphic tablet without screen, the graphic tablet with display, and then the standalone tablet computer like an iPad Pro, Microsoft Surface Pro, or Samsung Galaxy Tab.

The first two types of tablets itself has to be connected to a computer or laptop in order to be fully utilized.

Each of these types of graphic tablets are used in combination with many different kinds of software, including graphics, animation, and sketching software. As long as it is compatible with the graphics tablet, you can use the two together.

Does drawing tablet work with Inkscape?

As they replace your mouse cursor, all graphics tablets will work with Inkscape.

Inkscape allows you to create images by drawing geometrical shapes like rectangles, elipses, lines, and curves with your computers mouse or a graphics tablet. The freehand drawing tools make it possible to draw directly onto the Inkscape canvas using the mouse or a graphics tablet stylus.

You will get the best results if you use a drawing tablet and pen. Inkscape is able to utilize pressure sensitivity and tilt sensitivity of a tablet pen that supports these features. The sensitivity functions are disabled by default because they require configuration.

Inkscape has plenty of drawing tools where the most popular one is the pencil tool which is ideal for free-hand drawing. On top of that, Inkscape features a pen tool ideal for Bezier curves or straight lines. There’s also a calligraphy tool that helps users create great-filled paths.

I have to say that I really like Inkscape’s brush tool (it shows as Draw calligraphic or brush stroke) because they are more practical and pressure-sensitive when drawing with a graphic tablet.

Taking Inkscape to Next Level

Although drawing tablets are typically more useful for applications like GIMP (a free raster photo editing software) and Krita (a free bitmap digital painting software), they do have their place in the Inkscape workspace.

A mouse will work fine for the basic functions. A drawing tablet would be good if you start using Inkscape on a regular basis, and are doing more professional work.

It is extremely difficult to create natural lines and curves with a mouse. Also, fatigue soon sets in when making a digital painting or doing heavy Inkscape work with a mouse!

Drawing tablet is an ergonomic device that combines pressure-sensitive pen delivering precision and control that’s optimized to work with Inkscape to speed workflow.

The Tablet offer intuitive controls over brushes that emulate natural media while increasing precision and speed. It allows you to create freehand digital art the same way you would with a pencil and paper.

Artists can draw clear lines, add colour, change from line to shading, and much more. The stylus (digital pen) allows the artist to use various filters and brushes in quick succession, and editing is easy once the image is finished.

The ability to edit quickly and easily is especially important for graphic artists working with editors and directors who may want change.

The drawing tablet offers customizable buttons that can be assigned to application-specific settings that works with Inkscape, putting your favorite shortcuts at your fingertips.

Choose the best drawing tablet for Inkscape

Whether you’re a visual artist moving into graphic design or you just want to bring your illustrations to life in the digital realm, a drawing tablet is a great purchase.

The price of a drawing tablet can vary dramatically from around $50 for a simple screenless tablet to over $1000 for a professional model. Professional-level tablets measure at least 4,096 degrees of sensitivity and should offer a screen resolution of 1080P or higher.

You’ll usually need to install a driver onto your computer before the tablet can be used. A download link and installation guide is typically packaged with the tablet. Once that’s installed, you’re free to start using your tablet on the image editing software of your choice.

Wacom is the brand of choice for most. I have used Wacom tablets but in recent couple years i changed to a XPPen tablet. Much, much cheaper for the same specs.

1. Nonscreen drawing tablet

Cheaper tablets tend not to have a screen. They’re just a basic plastic surface that tracks the movement of the stylus (pen) and displays it in the computer screen.

Drawing tablets that do not have a screen require a very well-developed hand-eye coordination because they’re hard to use in the beginning.

You would need to train your hand eye coordination for a while by just drawing and tracing lines over and over again until it’s second nature. By that point you should be able to draw with ease.

The entire active area of your tablet represents the entire monitor screen – place the pen in the lower left-hand corner of your tablet and the on-screen pointer will move to the lower left-hand corner of your monitor.

While it is completely possible to use Inkscape on any size of non-screen drawing tablet, even the really tiny ones like the XPPen Deco Mini4, it’s particularly hard to create anything meaningful when the drawing area is too small. If you intend to do free-hand drawing, you’ll need a large tablet.

The XPPen Deco LW Bluetooth drawing tablet I own is a non-screen tablet that connects directly to my laptop. Within a week of owning it, I already feel 10x more confident than I did at first. It’s improved my designs and has refined my ability to sketch and draw more with my hand.

It has Bluetooth capability, allowing you not to worry about carrying the USB cable if you don’t feel like it, and the tablet is well-charged.

It has 8 hot keys, easy to press, which makes it much easier to resize your brush and do similar tasks like zooming.

The X3 Elite Stylus that comes with it is battery-free, so there’s no need to charge it at all.

The Deco LW tablet works with both Linux, Windows & Mac, and it can be used with Android with the right OTG dongle (it comes with a USB-C dongle out of the box).

It has a large working area of 10 x 6 inches, a slim profile and nice specs which supports up to 8,192 levels of pressure, 60 degrees tilt sensitivity and the Initial activation force require only 3 gram.

And I recommend it because of the low Initial Activation Force (IAF). which Requires very little force with the pen to make strokes appear.

IAF is the amount of force necessary to cause the pen to output a line. Ideally, your tablet will have an extremely low IAF where the pen will output a line with the least amount of force possible.

High initial activation force (IAF) means that you have to press slightly harder for the tablet to register your pen strokes. While most people don’t mind it, I’m very dependent on light strokes during my lineart process.

You could say that Deco LW tablet is slightly more expensive than similar tablets, but you get more features & better drawing experience along with it. If you can shell out the additional cost, then I believe you will get your money worth from it.

2. Screen drawing tablet

A tablet with a built-in display is considerably more expensive but gives you better control and visibility.

The graphic display tablet allows the user to write on the tablet’s screen and see the fruit of their work exactly as one would with a pen and paper.

Not having to look between hand and screen and you also don’t have that awkward disconnect between hand and eyes.

I prefer to work with 13,3″ XPPen Artist 13 (2nd Gen) drawing display rather than Deco LW tablet, it’s just that much more intuitive and natural for me with less frustration and multiple undos.

The Full HD IPS display comes with 16.7 million colors. Combine that with the 96% Adobe RGB color accuracy and you’ve got the perfect display for Inkscape.

The screen of the Artist 13 (2nd Gen) has full-laminated technology to minimize parallax, a good anti-glare texture to prevent glare from light reflecting off the screen.

On top of that, the X3 Elite pen has 8192 levels of pressure sensitivity, ±60 degree tilt recognition and minimal initial activation force. Making your arts look as detailed as possible. The pen is also battery-free.

The XPPen Artist 13 (2nd Gen) also did a pretty good job of handling the rest of the features. For example, you’ll be getting 9 re-programmable express keys. It also support Android device connectivity via a full-featured USB Type-C cable.

It’s lightweight, available in four colors (Black, Green, Blue, and Pink) , easy to set-up, and comes with free drawing software (Artrage 6, openCanvas and Cartoon Animator 4). What more can you ask for!

Overall, the XPPen Artist 13 (2nd Gen) is a great display tablet for using Inkscape at an even greater price. If you choose this tablet, you’re bound to love it!

3. Standalone Drawing Tablet

Windows, Android and iOS devices like the Surface Pro, Samsung galaxy tab and iPad Pro take on the other drawing tablets in two ways. You don’t need another computer: just download an art app and start drawing with your fingertip or a stylus.

The good thing about the them is that it’s a standalone pen tablet, you don’t need to connect it to anything. It’s easy to carry around and work on-the-go.

The disadvantage is that since it’s a small computer, it doesn’t have much storage, processing power or even speed in comparison with most desktop computers (which drawing tablets are connected to). Also It’s a big jump in price from all the previous drawing tablets.

Inkscape is not available for Android and iPad OS Tablet but it works on Windows standalone tablet like Microsoft Surface Pro yet. I’d suggest you just try it out if you prefer the portable touchscreen and stylus. but notice that you need to buy the surface pen separately.

After buying a tablet for Inkscape

After buying the XPPen graphic tablet, using Inkscape is a completely new and refreshing feeling. I can now create all my sketches digitally which helps save me time and makes sketching even easier.

I can easily make the changes to my sketch when needed as I just have to return to that layer and go back to sketching.

Inking is a breeze because you can always get those thick perfect lines just the way you want them and if they’re not what you want all you have to do is change the brush, just like picking up a different marker in real life.

Coloring is even easier thanks to masking and sometimes I don’t even bother masking now because of how precise I’m able to get my lines.

Conclusion

Not every designer needs a graphics tablet, it’s certainly an option, not a requirement. If you do typographic design, logo, branding, or vector graphic design in Inkscape software, using a tablet is not a must.

If you’re an illustrator, then definitely yes you should get a tablet because it’ll level up your art. Lines and strokes look much more natural when you draw with a tablet than a mouse.

Using a stylus, you’ll be able to tilt the pen and move your hand and wrist in a much more natural drawing position, giving you much more control over the strokes you’re creating.

If you’re choosing a tablet for assisting daily graphic design work in Inkscape, I would say a nonscreen graphic tablet is more than enough. For digital drawing, I would go for a tablet with a screen or the All-in-one drawing tablet.

Adding a drawing tablet to your design arsenal will not only improve your work but will bring you a refreshing design experience that might even spark your next big piece!

(16)