Archive for the ‘digital art apps review’ Category

12 best Software for 3D Modeling

Tuesday, January 16th, 2024

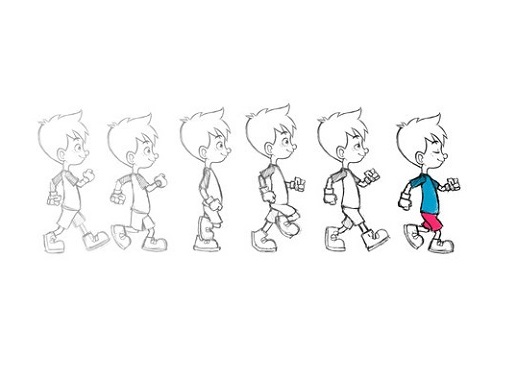
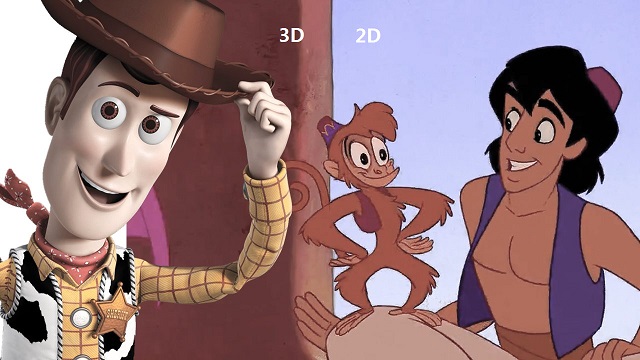
Digital Art has been continuously developing, and thanks to technology, it gets even better and easier.

3D modeling is a technique employed in computer graphics for creating a three-dimensional digital representation of any object or surface.

3D modeling is used for a wide range of purposes, including the design and manufacture of objects, architecture and engineering, education and scientific research, video games, and film and television.

3D modeling software adds value and eases the 3D modeling creation task. As technology advances, they has become an essential tool for various industries and personal projects.

They help to bring design concepts to life and allow for realistic visualization of products, buildings, and even characters for movies and video games.

There are many options available when it comes to 3D modeling software, ranging from free and open-source software to expensive professional software used in the entertainment and architecture industries.

Additionally, All 3D modeling software has its own set of unique features and toolkits, so mastering two or more might be challenging. It takes time to learn the skill and get familiarized with different tools.

Spending a lot of money on the wrong software is a good way to sabotage yourself in the long run. So you need to choose carefully to make sure you find the best 3D modeling software for you.

When choosing a software, it’s important to consider what you want to achieve with your modeling, as well as your skill level and budget.

In this guide, we review the 12 best 3D modeling software. We’ll cover all the important aspects you need to know, from price and usability to what person each program is best suited for.

CAD vs 3D modeling software: which one to choose?

3D Design software divides into two categories: CAD and 3D modeling.

CAD (Computer-Aided Design) and 3D modeling software are similar in that they both allow you to create 3D digital models. However, they differ in the way they are used and the types of models they are designed to create.

3D CAD software is primarily used for technical design, 3D printing and engineering purposes, and focuses on precision and functionality. It’s often used to create detailed technical drawings, schematics, and manufacturing plans for products.

Examples of CAD software include AutoCAD, SolidWorks, Fusion 360, Sketchup, Rhinoceros, Inventor, FreeCAD, OnShape, OpenSCAD, and TinkerCAD.

3D modeling software, on the other hand, is used for a wider range of applications, including animation, film and game design, architecture, and product visualization. It’s more focused on creating realistic and aesthetically pleasing models, and often has a greater range of creative tools and features.

Examples of 3D modeling software include Zbrush, Blender, 3ds Max, Maya, Cinema 4D, Houdini, Modo, Mudbox, and Sculptris.

In summary, CAD software is used for technical design and engineering purposes, while 3D modeling software is used for a wider range of creative applications.

What are the three major types of 3D modeling?

Polygonal modeling, curve modeling, digital sculpting, Parametric modeling, Box modeling, Boolean modeling, procedural modeling and 3D scanning are all methods available to users of 3D modeling software.

However, the most popular three principal methodologies are Polygonal modeling, Spline/curve modeling, and digital sculpting. Each of these techniques offers a unique approach to 3D design, thus catering to different requirements and skill levels.

Polygonal modeling is arguably the most common method used today among the 3D modeling software options. It forms the cornerstone of much of the 3D modeling work carried out.

This technique involves creating objects and characters from an interconnected mesh of tiny geometric shapes known as polygons. The level of detail achievable in the final product is directly proportional to the number of polygons used.

This polygon-modelled object that we produced may be considered a hard surface, which is good for modeling things like buildings and cars.

Digital Sculpting begins with a flat digital shape, which is then manipulated — similar to how an artist might mold clay — to create a new object or design.

Digital Sculpting is typically employed for creating characters, animals, or other living things. This technique often finds preference among artists for its intuitive, hands-on approach to 3D modeling.

NURBS stands for non-uniform rational b-spline. Using control points, we generate incredibly smooth curved surfaces that can be manipulated.

This method is particularly useful when precision is paramount, as it allows for exact representations of complex geometric forms. Although it might present a steeper learning curve compared to polygonal modeling or digital sculpting.

What is 3D mesh?

Meshes are one of the most essential components in 3D modeling.

3D meshes use reference points in X, Y and Z axes to define shapes with height, width and depth.

A 3D mesh is the structural build of a 3D model consisting of polygons. The polygons used are typically quadrangles or triangles.

Usually it can take large numbers of polygons to make a 3D mesh approach photorealism.

12 Best 3D Modeling software

Regardless if you’re a complete beginner or an experienced 3D modeler, you’ll find a suitable option below.

Although, to make our list precise and straight-to-the-point, some programs have been excluded, therefore there shouldn’t be a cause for alarm if several premium ones are not listed here.

1. Zbrush

2. Blender

3. 3Ds Max

4. Maya

5. Cinema 4D

6. Rhino 3D

7. Sketchup

8. Houdini

9. Modo

10. Sculptris

11. Mudbox

12. Fusion 360

Conclusion

3D modeling is a fascinating and rewarding skill that offers endless possibilities for creation and design.

Whether you are interested in creating 3D miniatures or pursuing a career in 3D modeling, mastering the basics of 3D modeling software and techniques is the key to unlocking your full potential.

Choosing the right 3D modeling software is a tough decision, especially when all of them have mostly similar basic features.

With the help of this guide, you’ll be able to choose the right software and start your journey towards becoming a skilled 3D modeler.

If you’re still unsure which one to choose, We do recommend watching some videos on each program before you commit to see it is for you. You may even test two or three applications to determine which one works best for you.

Talk to us if you have questions or concerns with these tools. We will be more than willing to help!

FAQs

What is the best free 3D modeling software for newbies?

If you’re looking for free 3D modeling software, it doesn’t get any better than Blender. It is free but powerful for 3d modeling, texturing, animation and rendering.

Should I learn Blender or Maya first?

It simply depends what your needs are.

Considering the price and the support of the community, Maya is advised for big companies and studios. They can not only afford the 3D software but also need really advanced tools.

Being free makes Blender a great starting point for beginners, and its rich tools allow you to achieve the quality of modeling and sculpting that is not worse than in Maya.

Blender is a great solution for small-scale use in studios, for freelancers, and for hobbyists.

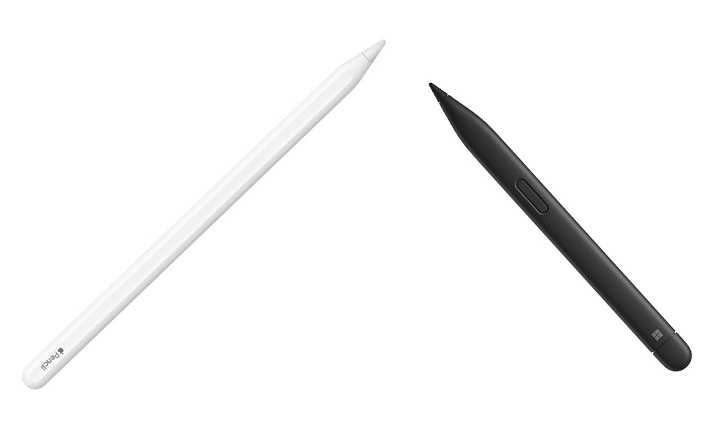
Do I need a graphics tablet for 3D modeling and Sculpting?

You don’t necessarily need a graphics tablet for 3D modeling & Sculpting, but it can certainly be helpful. It depends on your personal preference and workflow.

Many 3D artists use a combination of a mouse and keyboard to create their models. However, a graphics tablet can provide more precision and control, especially when it comes to digital sculpting and painting textures.

One of the main reasons that drawing tablets are so useful for 3D Modeling, Sculpting and painting is the incredible level of pen pressure sensitivity they’re capable of.

With pen sensitivities routinely going as high as being able to recognise as much as 8,192 levels of pressure, you can get truly granular with line thickness and shape.

Related Posts: Best Drawing tablets for ZBrush & Blender

What is the best software for 3D rendering?

There are a lot of software that is used for rendering 3D scenes. But it depends on the type of project that you are working and how you want to render your scene.

For example, if you were to render an animation for film, you would often use path-tracing renderers that render scene.

A few popular options are Arnold Renderer, Maya’s third party rendering software, or Blender’s cycles. All are great for 3D environment render and both are shipped with the 3D software itself.

You could also try a few outside rendering software such as RedShift or VRay as both are strong renderers for realistic rendering.

Another example, if you want to render 3D games with very high quality, then ray-tracing engines from game engines, like UE or Unity for example, are great options.

Source: https://pctechtest.com/best-3d-modeling-software

(0)

Best free and paid software for 2D animation

Thursday, January 11th, 2024

In today’s world, animation is extremely popular. It is a form of art that has captured the imagination of humans for quite a long time.

2D animation is the most understood, traditional, and popular form of animation that creates motion in images in a two-dimensional space.

2D animation software is often required for the creation of complex animations and is used by professionals like game developers, cartoonists, architects, and artists.

Thankfully, Whether you’re a beginner or a professional, a Windows user or a Mac user, there are plenty of different animation software to choose from.

However, the selection process can be tricky due to the multitude of options available.

Are you familiar with animation software? Looking for an animation software app but are not sure whether it will help you achieve your goals and fit right into your lifestyle?

In this article, we will take a look at the top 12 best 2D animation software in 2024, based on their features, tools and prices.

We will also discuss the advantages and disadvantages of each software so that you can make an informed decision when choosing the right animation software for your needs.

What is 2D Animation?

2D animation is the art of creating movement in a two-dimensional space. This includes characters, creatures, FX, and backgrounds. The illusion of movement is created when individual drawings are sequenced together over time.

While this process is sometimes referred to as traditional animation, mainstream 2D production has evolved from hand drawn processes using pencil and paper to the implementation of digital techniques using computer software like Toon Boom Harmony or Adobe Animate CC.

Despite the advances in technology, the core principles of 2D animation remain the same. Each frame is carefully crafted to create movement, and the frames are played back at a speed of 24 frames per second (24fps) to create the illusion of motion.

This illusion of movement has grown to become a top art form that is not only used in the entertainment industry. Various other industries, such as Advertisement, Marketing, Gaming, Retail, Architecture, and Engineering, use 2D animation in multiple ways.

What is 2D Animation software?

2D Animation software is an important tool used by modern animators to create stunning visuals and effects. It brings in life to the graphics creating an illusion of movement by arranging the graphics in a sequence.

Using 2D animation software, even an amateur artist will be able to create interesting animations, stop-motion, motion graphics, etc.

What is the difference between 2D and 3D animation?

2D animation involves creating objects in a two-dimensional space, showing width and height. As an example, classic Disney movies are in 2D.

3D animation involves a two-dimensional object depicted in three dimensions. 3D objects can be rotated, flipped, and moved like real objects.

For animators, is that 2D animation is more artistic and 3D is more mechanical/technical.

2D requires a large amount of illustration, as every frame needs to be drawn, either on a graphic tablet or hand drawn on paper.

For 3D animations, all frames must be rendered after modeling is complete. It is tasked with creating movement via ‘rigs’, where a 3D model is essentially given a skeleton that can be manipulated in a virtual 3D space. you also need a 3D animation software.

The type of animation you pursue will mostly come down to your artistic preference and budget (2D animation is more cheaper).

12 Best 2D Animation Software in 2024

With the right software, it is fun creating 2D animation. You only have to get your script and storyboard ready.

Here’s our compiled a list of the best paid and free 2D animation software out there to help you make the right decision for your animation needs!

1. Toon Boom Harmony

2. Adobe Animate

3. Moho Pro

4. Synfig Studio

5. Opentoonz

6. Pencil2D

7. Cartoon Animator 5

8. TVPaint Animation

9. DigiCel Flipbook

10. Blender

11. Krita

12. After Effects

Conclusion

As you can see, there are many animation software on the market today, each with its own unique set of features and pricing structure.

Whether you’re looking to create 2D gaming environments, social media graphics, or cartoons, there’s a top-quality animation software option on this list for you.

While some of these may be suited for professionals, most are generally user friendly to beginners as well.

Think about which features are most important to you, your budget, and how you’re most likely to use animation software. Then select the one that best suits your requirement.

We hope it will help you hone your foundation skills, practice animation styles, and help you get professional results.

Have you used any of the software mentioned above before? Which one works for you and do you have any other recommendation? Share with us.

FAQs

Do people still use 2D animation?

While 3D animation is the most prominent type of animation in modern cinema, 2D animation remains a popular and essential medium for creating engaging and compelling content.

2D animation is often used in television shows, movies, commercials, and other forms of visual media.

It has a long history and is still a popular and widely used technique today, often praised for its ability to convey emotion and character in a simple, stylized way.

Do I need a graphics tablet for 2D animation?

drawing tablet for animation is more or less essential for 2D animators, digital sculptors, story board artists, and concept artists. It works well with the drawing, sketching and animation software.

Compared to a mouse, A graphics tablet with pen allows for more precise and natural drawing, which can lead to smoother and more detailed animations.

All the pen tablets have great pressure sensitivity, which allows you to vary the line thickness and opacity by adjusting the pressure applied.

Graphics tablets with display are even more convenient as you draw on the screen directly. This creates a more natural and intuitive drawing experience.

Can I creat 2D animation if I can’t draw?

There are actually several options for creating 2D animations without having to draw everything by hand.

One option is to use software that allows you to manipulate pre-made assets, such as characters, backgrounds, and props.

Another option is to use motion graphics software that allows you to animate text and shapes.

Source: https://pctechtest.com/best-3d-animation-software

(0)

Best apps for Taking Notes on iPad, Android, PC and Mac

Monday, January 8th, 2024

Note-taking is one of the best habits anyone can instill. The mere act of writing whatever you learn in lectures, seminars, and even life in general, can have a profound impact on your life.

A note-taking app is a lightweight tool that allows you to digitally record information on your device instead of writing it on paper.

You can type, draw, add images, checklists and even attach files to your notes. There are lots of modern abilities which you can check out and you will like it.

The best note taking apps make it simple and easy to organize essential information and store it for quick access.

What’s more, some note taking apps is cross-platform and works on Mac, Windows, Chrome OS, iPadOS and Android – a huge advantage since people normally use all kinds of devices. Everything is also synced across the devices.

Note-taking apps have all but taken the place of paper notes, and, with all of their extensive functions, can help you build an easily-accessible second brain.

There are now hundreds of note-taking tools available to users, But which one is the best for you? Sometimes too many options can be overwhelming.

Choosing the right note-taking app can be a daunting task, but don’t worry – We have narrowed down the top 20 picks for note-taking apps to help you.

The 20 Best Note-Taking Apps in 2024

Here are 20 popular note taking apps that are widely used right now. Some are all-around great choices for every note-taking task, while others are more suited to individual or collaborative use.

1. OneNote

OneNote is a comprehensive note-taking app developed by Microsoft. It allows users to create notes in various formats, including text, images, and audio, and organize them in notebooks and sections.

2. Notion

Notion is a versatile productivity app that combines note-taking, project management, and database functionalities. It allows users to create notes and organize them in a hierarchical structure, as well as collaborate with others and track tasks.

3. Evernote

Evernote has been a popular choice for note-taking for many years. It has a wide range of features, including the ability to create notebooks, organize notes with tags, and sync across devices.

4. Obsidian

Obsidian is a great app for taking notes and organizing your thoughts. It’s simple to use and has a lot of features that other note-taking apps don’t have. The only downside to Obsidian is that it’s not free, but it’s worth the price.

5. Joplin

Joplin is an open-source note-taking and to-do app that allows for the creation of plain-text notes and supports synchronization with various cloud services. It runs on iOS, macOS, Android, Windows, and Linux.

6. Google Keep

Google Keep is a simple and easy-to-use note-taking app that integrates with other Google services, such as Google Docs and Google Drive. It allows users to create notes, lists, and reminders.

7. SimpleNote

Simplenote is a minimalistic note-taking app that allows users to create, edit, and sync notes across devices. It also supports tagging and search functionalities.

8. Standard Notes

Standard Notes is a secure and private note-taking app that offers plain-text editing, encryption, and cross-platform synchronization.

9. Zoho Notebook

Zoho Notebook is a beautiful and intuitive app that lets you create notes, lists, sketches, audio recordings and web clippings.

10. Bear

Bear is a stylish and intuitive note-taking app known for its markdown support, making it ideal for students who need to format their notes efficiently.

11. Notability

Notability is a powerful and versatile note-taking app that allows students to take handwritten notes, annotate PDFs, record lectures, and organize their notes effectively. It also supports syncing with cloud storage services like Google Drive and Dropbox.

12. GoodNotes

GoodNotes is another popular app for handwritten note-taking. It offers a wide range of pen and highlighter options, shape recognition, and advanced search capabilities to find notes quickly.

13. Roam Research

Roam Research is a powerful PKM tool designed for pro note-takers to make notes, capture ideas and most importantly connect them up using backlinks & a graph.

14. Squid

Squid is a powerful, intuitive, and delightful Android note-taking app. You can take handwritten notes just like you would on paper, but with many advantages of digital vector ink! Easily markup PDFs to fill out forms, edit/grade papers, take lecture notes, or sign documents.

15. Logseq

Logseq is a personal knowledge management tool that is not well-known, but it’s one of the best note-taking apps out there.

Logseq’s “interstitial journaling” approach allows for seamless integration of daily tasks and thoughts, making it a useful tool for productivity and organization.

16. Workflowy

Workflowy is a clean and distraction-free app that helps you quickly capture notes, plan your to-do’s, and get organized. Simple to use, but incredibly powerful, Workflowy can help you manage all the information in your life.

17. Dynalist

Being an outliner software, Dynalist is a collaborative note-taking tool that can also help you take notes hierarchically. The software organizes information in a way that helps you with recall, much like a second brain.

18. Ulysses

Ulysses is a powerful tool perfect for Mac users who want to take their note-taking to the next level. It is a feature-rich app with a clean and simple interface, making it easy to use.

However, this tool is not freely available, hindering some people from being able to utilize it.

19. Apple Notes

The pre-installed Apple Notes app is a simple and user-friendly option for basic note-taking. It supports text, handwriting, images, and checklists and syncs across all Apple devices.

20. Dropbox Paper

Dropbox Paper is a document editor and note taking app that can be greatly beneficial in a wide range of scenarios.

Users will find Dropbox Paper’s simple and distraction-free layout makes it perfect for everyday writing.

How to choose the best note taking apps?

The app you use for note-taking can have a huge impact on the quality of your notes. You need to consider some important factors before choosing.

We have assessed note taking apps for ease of use, features, organization tools, team collaboration, cloud storage, cross-platform compatibility, handwriting support, and a number of other factors.

Add all types of content

Most note taking apps allow you to add a wide variety of content to your notes. for example, with Audio recording function support, you can record sound bites from your lectures, or even an entire lecture, as a backup to your note-taking.

Using apps like OneNote you can record audio or video into a page, embed online videos and other content, clip from your screen or the web, print documents directly into your notebook and add photographs or scan documents using your devices camera and Microsoft Lens.

Organization Tools

One of the main aspects of note-taking apps is how they organize your notes. There are broadly two organizational systems that note-taking apps use: folders and tags.

Folders are what you’ll likely be familiar with from Windows’ File Explorer or Finder on Mac.

Tags use a different approach. You first give each note page a unique label (or tag). Then, you can find notes under a specific tag by selecting the tag name in your workspace.

Evernote utilizes a good tagging system. However, it’s not the best choice for using folders, as it only offers two layers of depth: Notebooks and Notebook Stacks.

If you want a deeper hierarchy, Notion is a top choice that uses infinitely-nested folders, so you can create a fully fleshed-out structure for your notes.

Team Collaboration

If you’re working with a group of colleagues, consider creating a shared online notebook so you can collectively collate notes and resources and add comments without having to physically meet up.

This means you can’t lose shared material. Notes can be shared with the click of a button, and as long as they are saved or backed up it’s pretty difficult to lose them.

Search Functionality

An obvious reason for you to take notes is so that you can go back and review them later. But sometimes flipping through pages of notes to find one piece of information can be frustrating.

Many note-taking apps offer search functionality where you can search for keywords and phrases to quickly find information. Some note-taking apps even allow you to search your handwriting.

Cloud Storage

If you use OneNote, your notes will be stored in your Office 365 account by default. This will make them available on any device as long as you log into the apps using your University account details.

Most other note taking apps include cloud storage too. Keeping your notes in the cloud means they’re available for you to read or add to wherever you are, on any device, and there is less chance of losing them.

Write by hand

Writing by hand can be quicker for some and may feel more natural than typing.

If you have a pen tablet for note taking, you can write directly into app with a stylus, with the option of converting this to text later on.

You can also use a pen to annotate PDF or Word documents when researching or reading documents.

Most note taking apps don’t offer the option to write and sketch by hand, which can feel limiting to a lot of people.

Several note-taking apps that support hand-written are OneNote, Evernote, Notability, Goodnotes, Apple Notes, and Squid.

Related Posts: Drawing Pads for Annotating PDF DocumentsBest iPads for DrawingBest Android Pen Tablets.

Price

Our picks include a mix of free and paid options to meet the needs of different users; when possible, we note when free apps also include in-app purchases and what features those extra fees unlock.

When deciding which of the note-taking apps to use, consider what your needs are.

Free and simple apps will deliver a simple experience, but for more complex feature needs you should probably look to an app with a paid for subscription.

Conclusion

Taking notes is a powerful habit to build; one that can dramatically increase your productivity and your creativity.

Note-taking apps keep your information organized and help you focus on what’s most important.

We highly recommend these 20 well-known note-taking apps, each with its own strengths and features.

Whether you’re looking for a simple, all-in-one solution, or something more powerful and versatile, there’s an app for that.

Taking notes has never been more exciting or easier! It is a good idea to try out a few different apps and see which one works best for you.

Source: https://pctechtest.com/20-best-note-taking-apps

(2)

10 Best Photo Editing Software

Wednesday, December 6th, 2023

Photo editing programs are an easy, fun and creative way to make your images pop!

In this article, I want to share with you some really cool photo editors that will enhance your images and position your brand more strongly on your social feeds.

Some photo editing apps are better than others, some are free others are paid. Just keep in mind the free ones can be limiting and not offer what you need.

10 best Photo editing software

Several photo editing options are available, catering to various skill levels. Here are some popular choices:

1. Photoshop CC

Adobe Photoshop CC is known for its ability to create a wide range of images from scratch. It is used by many professional photographers and graphic designers.

It allows users to do things like crop images, adjust lighting, add effects like gradients or shadow boxes, change background colors and more.

It can also be used to create animations like time-lapse videos or stop motion animations using layers.

The software also allows users to create their own custom brushes and filters which they can use on any image they wish including photos taken with their smartphone!

Photoshop comes with many other features such as layers which allow you to stack up different saved images on top of each other without losing any quality or detail when overlaying them onto another image.

2. Lightroom CC

Adobe Lightroom CC is a powerful tool mainly used by photographers but it’s relatively easy to pick up and play. It has a variety of features that help to curate, process, and showcase photos.

Lightroom lets you work with the raw files from your camera as well as support other file types.

It also lets you adjust the photos with a wide range of tools like editing and retouching tools, noise reduction tools, different filters and presets that can be applied to your photo or video, photo layout options for print or web publishing, and many more features.

3. Snapseed

Snapseed is an easy-to-use photo editor that is available on both iOS and Android devices. It has a variety of editing tools that can be used to give photos a professional look.

It has a wide range of filters, textures, tools, frames and more. It also has an in-app camera for taking new photos from different angles or perspectives.

A user can edit the same photo with Snapseed for several hours without getting bored of it.

4. Affinity Photo

Affinity Photo is a powerful image editing program with capabilities that can easily rival Photoshop.

From its vast array of tools like RGB color sliders, exposure, tone curve and sharpening controls, to its modern editing features like Live Blend Modes and Clipping Masks, Affinity Photo is one of the most comprehensive image editing suites available.

While Photoshop might have a larger library of features, Affinity Photo comes close if not surpassing it in many areas.

It is well accepted by professionals and common users due to its high performance and low price.

5. Canva

While primarily a graphic design tool, Canva also offers basic photo editing features. It’s easy to use and great for social media graphics.

The interface is simple with all the necessary functions to create advertisements, posters, invitations, presentations, websites or social media posts.

There are also function buttons that allow you to change the layout, size and color of your design. There are various templates available for different types of projects as well available in different languages.

6. Pixlr

Pixlr is a cloud-based set of image tools and utilities, including a number of photo editors, a screen grabber browser extension, and a photo sharing service.

The suite was intended for non-professionals, however the apps range from simple to advanced photo editing. It has a free version and a more advanced paid version.

7. Fotor

This online photo editing tool offers a range of features, including filters, retouching, and graphic design elements. It has a user-friendly interface and offers pre-made templates as well.

Everyone has the ability to design any form of graphics and covers, limited only by their imaginations.

8. PhotoScape X

PhotoScape X is mainly dedicated to photo editing and cropping, with which you will be able to retouch all the images you want in a very simple and fast way.

Especially now when it is very important to have good photos to share through social networks.

There’s a free version available. However, it should be noted that PhotoScape is not yet as popular as other editing programs.

9. GIMP

GIMP is a great tool and generally has almost the same features as the photoshop has.

It includes many advanced editing capabilities, including layers, plug-ins, painting, text, filters, selection, and masking.

Counting that its free and supported on linux, it can be great for students and anyone who’s not ready to pay for Adobe subscription.

10. Darktable

Darktable is a free and open-source photography workflow application that works well for managing and editing raw images.

Rather than being a raster graphics editor like Adobe Photoshop or GIMP, it comprises a subset of image editing operations specifically aimed at non-destructive raw photo post-production.

It’s a bit clunky and lacks some of the latest features of Lightroom / Lightroom Classic.

Conclusion

Many people will recommend Adobe Photoshop and Adobe Lightroom. Both are really great programs and the industry standards. But they are not for beginners and they are expensive.

For beginners I suggest starting with something free or very inexpensive just to get the basics of photo editing. Then go a little more advanced.

Remember to explore these options based on your specific editing needs and skill level.

FAQs

Do I need a drawing tablet for Photo editing?

Yes, it’s far superior than a mouse for editing and retouch work in Photoshop. more details here: Pen tablets for Photoshopdigital tablets for GimpGraphics Pads for photo editing.

You can get a low priced pen tablet that will do very nicely for this. You will find that you just have so much more fine control this way. It’s good to have it as an option.

It also will help speed up your workflow significantly better than a tablet in Lightroom. In LR you want to minimize how much you use the mouse. So editing controller and hotkeys are the way to go.

In addition, You can use it with note taking appsgraphic design program and digital drawing software. I can’t imagine going back to just using a mouse, especially sacrificing pressure sensitivity.

How to choose the best photo editing software?

There is no one-size-fits-all answer to the question of what’s the best photo software for your needs. It depends on your skill level, your needs, your preferences, and your goals.

The best way to choose the best photo software for your budget is to try them out for yourself. Most photo software offer free trials or demos that allow you to test their features and functions before you buy them.

You can also read reviews and watch tutorials online to get a better idea of how they work and what they can do.

Ultimately, the best photo software for your budget is the one that suits your style and helps you achieve your vision.

(0)

IPad Pro vs Surface Pro 9 Comparison

Thursday, November 30th, 2023

For artists, photographers, designers, students, and other creative professionals, a tablet can be a handy second device for getting work done.

In the portable and handy tablet market, Surface Pro 9 and Apple iPad Pro (6th Generation) are two dominant players, Because they comprise powerful hardware, sleek design, and diverse features.

Both are impressive. But, what’s the differences between them? which one is better and best suited to meet your preferences/needs?

In this article, we shall be opting for an exploration of their strengths along with their weaknesses. It will further help you reach a fair decision.

IPad Pro vs Surface Pro 9 Comparison: Which One is Better?

We will take a look at the hardware, OS, pen input support, performance and many more features of these 2 devices: iPad Pro vs Surface Pro 9 Comparison.

Design

The 12.9-inch iPad Pro measures 11.04 x 8.46 x 0.25 inches and weighs 682 g. The Surface Pro 9 comes in at 11.3 x 8.2 x 0.37 inches and weighs 879g.

Both iPad Pro and surface pro 9 tablets are super slim, feature an anodized aluminum body, and pack a large, immersive display.

But the bezels on the iPad Pro are much slimmer and consistent all the way around. The bezels on the Surface Pro 9 are similarly narrow on the sides, but the top and bottom borders are thicker.

Both tablets are very close when comes to portability, They are still very compact and easy to bring around compared to the smaller 9 to 11-inch model, but when it comes to one-handed usage, the experience with the smaller model is significantly better.

The Surface Pro 9 comes in four colors: Platinum, Forest, Graphite, and the Sapphire option. The iPad Pro, on the other hand, is offered only in two colors: Silver and Space Gray.

Screen Panel

Both Surface Pro 9 and iPad Pro sport high-quality displays powered by proprietary technologies. Microsoft’s Surface Pro 9 uses PixelSense Flow while Apple’s iPad Pro relies on Liquid Retina XDR.

The difference is backlighting. Apple’s iPad Pro features mini LED backlighting that gives better contrast and HDR quality than the Surface Pro’s conventional IPS LCD panel.

iPad Pro’s display has a contrast ratio of ​​1,000,000:1, which is impressively capable of producing deep blacks while maintaining a high brightness of up to 1600 nits, while the Surface Pro 9 maxes out at 450 nits and has a 1,200:1 contrast ratio.

This means that the iPad Pro is more colorful, brighter and better suited for outdoor use.

Screen Size and Resolution

Surface Pro 9’s screen comes at 13-inch with a 2,880 by 1,920-pixel resolution, giving it a pixel density of 267 PPI.

The iPad Pro is available in two sizes, the 11-inch and the 12.9-inch. The 12.9in model offering a 2,732 by 2,048 resolution, delivering 264 PPI.

That 3-pixel difference aren’t worth fussing over. At this pixel density, the display will look perfectly sharp.

The Surface Pro 9 has a 3:2 aspect ratio, while the 12.9-inch iPad Pro has a 4:3 aspect ratio. Both are fine and suited for viewing videos and working in documents, but the 3:2 aspect ratio is a bit longer in portrait mode.

Color Accuracy

The Surface Pro 9 has a color accuracy of 75.1% DCI-P3, while the iPad Pro has a wider color gamut of 100% DCI-P3.

This means that the iPad Pro is more accurate, vivid and vibrant when displaying colors.

Refresh Rate

Both displays have a 120Hz refresh rate, which makes content in motion on the screen smoother, crisper, and more responsive for scrolling, drawing, gaming, watching movies, and more.

Moreover, It dynamically adjusts the screen refresh rate up to 120Hz and down as low as 24Hz on an iPad Pro and 60Hz on the Surface Pro 9.

Performance

Microsoft’s Surface Pro 9 relies on the 12th gen Intel processor found in laptops (i5 or i7), while Apple’s iPad Pro is powered by its own proprietary M2 processor.

The cellular variant of the Surface Pro 9 uses a Microsoft-exclusive ARM CPU developed by Qualcomm. It will have a slower performance than Intel, but a superior battery life.

12th gen Intel processor can provide a speedy performance and should be ideal for productivity tasks like note taking and some light creative work (Photoshop or, say, Lightroom).

However, Since the Surface Pro 9 relies on Intel Iris Xe graphics instead of a discrete graphics card, you’re going to have a rough time for advanced gaming, 3d modeling and animation.

Apple M2 SoC is renowned for both power and efficiency. It is faster than the Surface Pro 9, able to run more intensive tasks such as video editing and gaming with ease.

Memory and Storage

The iPad Pro start with 128GB of storage, with options for 256GB, 512GB, 1TB, and 2TB. The non-terabyte capacity models have 8GB of memory, while the terabyte ones have 16GB.

Microsoft’s Intel models are available in configurations with 8GB, 16GB, and 32GB of LPDDR5 RAM, while the SQ 3 version has 8GB and 16GB LPDDR4x variants.

Microsoft also includes 128GB, 256GB, 512GB and 1TB storage options across all model.

iPad OS vs Windows 11 

The Surface Pro 9 runs a full version of the Windows 11 operating system. This gives it more customizable features, access to an open file system, and access to powerful software, including the desktop versions of Office and Photoshop.

But Windows 11 is not as smooth as iPad OS, and the tablet mode is bad. The UI is very hard to use and nothing is optimised for touch as the iPad.

On the other hand, the iPad Pro uses the tablet-exclusive iPadOS, which have apps that are designed for a touch-based computer. So it is very limited for normal desktop OS functions eg multi-tasking, file manager.

There are really great apps on the iPad, and some are pretty much iPad exclusive, like, for example, Procreate, which is one of the best drawing apps out there.

However, most of the time, the mobile version of the app like photoshop, is not as feature-rich as Windwos desktop version.

The OS & software you use comes down to what you need. If you need a full operating system, then the surface is the obvious choice. As for consuming content, scrolling through the web, and such the iPad is great.

We don’t recommend Surface Pro 9 SQ3 version, because some areas of Windows 11 and 64-bit apps aren’t optimized for ARM-based chipsets. It should still be great for web browsing and other day-to-day activities while other apps like Photoshop might not work quite as well.

Apple Pencil 2 vs Surface Slim Pen 2

Neither The Surface Pro or iPad Pro comes with a pen but they are both pen compatible. It’s an additional $100 and $ 120 respectively.

Surface Slim Pen 2 has 4,096 levels of pressure sensitivity and precision tilt detection, which allows for a natural writing and drawing experience.

Slim Pen 2 is really comfortable to hold on and it is also the only one of the two styluses to sport an eraser on its back. You could erase stuff by just flipping the pen around.

Still, when it comes to the overall drawing experience, Apple Pencil (2nd Generation) is the best active stylus on the market.

with a 9ms response rate that makes it feel responsive in use, It has a handy Hover feature, decent tilt sensing and pressure detection too.

Use it to take quick notes, use it for drawing, use it for general browsing even, it all feels great.

Apple Magic Keyboard vs Microsoft Signature Type Cover

The Surface has a built-in kickstand, which is pretty useful. The iPad doesn’t have a built-in stand, but of course, you can get a keyboard case that can double as a stand for it.

Microsoft’s Signature Type Cover Keyboard has three levels of white backlighting and enough up-and-down key travel for satisfying tactile feedback. It also has an easy-to-use glass touchpad and room to put away the Surface Slim Pen 2 and recharge it.

Apple’s Magic Keyboard Attaches magnetically to iPad, It folds smaller than most other keyboard cases, wrapping tightly around the iPad. With scissor-switch keys, Typing on it is comfortable and convenient.

The keyboard is a necessity if you want both tablets to replace your laptop. Apple charges $329 for its Magic Keyboard, while Microsoft’s Signature Type Cover Keyboard costs $130.

Cameras

The Microsoft Surface Pro 9 doesn’t pay much attention to its camera. You get a 5-megapixel camera on the front for video calling and Windows Hello authentication, with a 10MP autofocus camera on the back.

The iPad Pro, in contrast, is the significantly winner. You get two cameras at the rear (12MP and 10MP wide angle) along with a LiDAR sensor for depth mapping.

Combined with features like auto image stabilization and TrueTone flash, the iPad Pro’s cameras are great for casual photography and 4K recording at 60fps.

The front camera sports a 12MP resolution with cinematic video stabilization. The Ultra Wide lens along with TrueDepth technology renders even the front camera footage high quality.

Luckily, the front cameras of Both tablets are able to do panning and zooming to make sure you’re in the frame. Apple called “Center Stage”, while microsoft called “Automatic Framing feature”.

Audio

Surface Pro 9 comes with dual far-field microphones that pick up your voice clearly and a set of stereo 2W speakers. It is a superb device for video calls, then, but less so for entertainment.

It’s hard for two speakers to beat four speakers on a tablet. The iPad Pro’s quad-speaker setup produces loud and surprisingly balanced audio, whether you’re streaming Pandora or immersing yourself in a flick.

Furthermore, The collection of five “studio-quality” microphones dotted around the iPad Pro’s enclosure is paired with the speakers.

Connectivity

For local wireless networking, both Apple and Microsoft include support for Wi-Fi 6E, which will be handy when on appropriate networking infrastructure.

Apple does use Bluetooth 5.3 in the iPad Pro, while Microsoft use Bluetooth 5.1 in the Surface Pro 9.

Apple includes 5G cellular support in its iPad Pro as a paid extra, which supports both sub-6GHz and mmWave connections.

Microsoft limits its 5G connectivity to models sporting the SQ3 chip- ARM-equipped Surface Pro 9, You cannot get cellular on the Intel models.

On to physical connectivity, and this is where Microsoft pulls ahead.

Surface Pro 9 have two USB-C/Thunderbolt 4 ports, a Surface Connect port, and a Surface Type Cover port.

Apple includes a single USB-C/Thunderbolt 4 port, though it also has a Smart Connector for connecting with accessories.

This makes it easier to connect a hub and attach multiple peripheral devices to the Surface Pro 9.

Battery Life

If battery life is a huge priority, the iPad Pro might be the way to go.

The iPad Pro’s battery lasted around 10 hours of continuous browsing or 8 hours of drawing on Procreate with the 2nd gen Apple pencil.

On the other hand, Surface Pro 9’s battery offered 8 hours of web surfing or 6 hours of drawing on Sketchable with the Surface Slim pen 2.

The main reason behind the iPad Pro’s better battery life is its less power-hungry M2 chipset. Surface Pro 9’s 12th Gen Intel CPU is less efficient in battery consumption.

Price

Microsoft Surface Pro 9 starting at $1,099.99, This model comes equipped with an Intel Core i5 processor, 8GB of RAM, and a 256GB SSD for storage.

Retail prices for the 11-inch iPad Pro start at $779.97, while the 12.9-inch iPad Pro starts at $1,049.00. This model is equipped with M2 processor, 8GB of RAM, and 128GB storage.

Similar Posts: Samsung Galaxy Tab S9 Ultra vs iPad Pro Comparison ,Wacom Cintiq vs iPad Pro Comparison , XP-Pen Artist 22R Pro vs Wacom Cintiq 22 Comparison.

Conclusion

Surface Pro 9 is a great 2-in-1 device for productivity and compatibility in terms of Windows software.

iPad Pro excels in terms of touch-based interfaces, creative abilities, battery life, integration with the Apple ecosystem, and more.

With their many features and capabilities, the Microsoft Surface and iPad Pro are both excellent options for anyone looking for a powerful device.

Both are great for watching videos, browsing the web or video conferencing. They also each have solid touch screens you can draw or write on.

Ultimately, Whether you choose the iPad Pro or the Surface Pro 9 depends on your preferences and specific needs.

Source: https://pctechtest.com/ipad-pro-vs-surface-pro

(0)

Adobe Photoshop vs Illustrator Comparison

Tuesday, November 28th, 2023

Photoshop nd Illustrator are two of Adobe’s massively popular graphics programs.

If you’re working on a new project, you might have a hard time figuring out which of the two programs will work best for you, since on the surface they seem so similar.

We’ve compiled some of the main differences between Photoshop and Illustrator to help you get started.

Photoshop

Photoshop is one of the most popular Photo Editing Programs for modifying already created images or graphics, like photos, and is Adobe’s most popular program.

Photoshop is raster-based and uses pixels to create images. so if you’re scaling something up or down, it can lose its quality very quickly.

Photoshop is a popular choice for web graphics, photo editing and designs since those projects will stay at a fixed size.

Editing photos is awesome in Photoshop, because it includes a lot of unique filters, special effects and tools.

Another great benefit of Photoshop is that you can have complete control of your projects, since you can edit your graphic pixel-by-pixel.

Illustrator

Adobe Illustrator is an advanced vector-based Digital Drawing Software. So, unlike Photoshop’s pixel-based format, it uses mathematical constructs to create vector graphics.

In Illustrator, a line is composed of two dots connected by a computer algorithm, instead of just a line of pixels. Because of this, Illustrator is used often to create logos or anything that may need to be printed or displayed at different sizes.

A vector graphic will never lose its quality if it’s scaled up or down. Illustrator will also give you a better print output since it’s not resolution dependent.

A drawback of Illustrator is that it can’t be used easily to modify images that are already created, since there are limited filters and image editing tools available to you.

Do You Need a Drawing Tablet for Photoshop and illustrator?

Using a stylus on a drawing tablet makes editing and drawing much more natural than using a mouse, and allows you to work faster and more accurately too.

Pen Tablets for Photo Editing help a lot to people who suffer from carpal tunnel, no matter how long you work with a stylus, you’ll never feel tired or get a soar wrist.

While using a mouse you only have your wrist movements whereas while working with a pen you get a full range of motion with your arms and wrists.

Graphics Pads are absolute positioning devices while mice are of the relative positioning variety. Your clicks and selections will be accurate with a tablet as your pen cursor position will be mapped precisely to your screen.

Drawing Pads have pressure sensitivity, something a mouse simply does not have. so you can draw like a pen or pencil, applying thicker or thinner strokes as you go. This makes it better suited for photoshop and illustrator especially when you are doing detailed work.

You can also control the shape of the strokes by simply tilting the pen, a feature that is better for high-end professionals.

The shortcut keys on tablets reduce the need to switch between tools, allowing you to concentrate on the work at hand. This enables you to work faster and eliminates the tedium and strain that come with performing seemingly repetitive tasks.

Investing in a graphics pads for photoshop and drawing pads for illustrator can help you take your digital art and design skill to the next level.

Conclusion

You’ll come to find that some people just prefer to use one software over another, but sometimes it’s best to use Photoshop and Illustrator together.

For example, you may need to add some text to an image you need to edit. Maybe you need to add a watermark to a photo for your blog or over an image for your portfolio.

It’s best not to add any text to an image in Photoshop since it can distort, so transferring the edited photo to Illustrator and then adding the text there will give you the best result.

One is definitely not better than the other, they’re just different. Understanding the basic differences between Photoshop and Illustrator will help you make the decision about which software is best for your next project.

Photoshop’s primary use is for the correction, manipulation and compositing of photographic images while Illustrator’s primary use is for creating, manipulating and compositing vector illustrations.

Both are extremely useful and serve their own purposes well.

Which you need depends on the type of work you intend on doing. Here’s a very short list that might help you.

Illustrator can import photos but it is primarily an illustration tool mainly for drawing and creating raster images for art, advertising and website illustration.

(3)