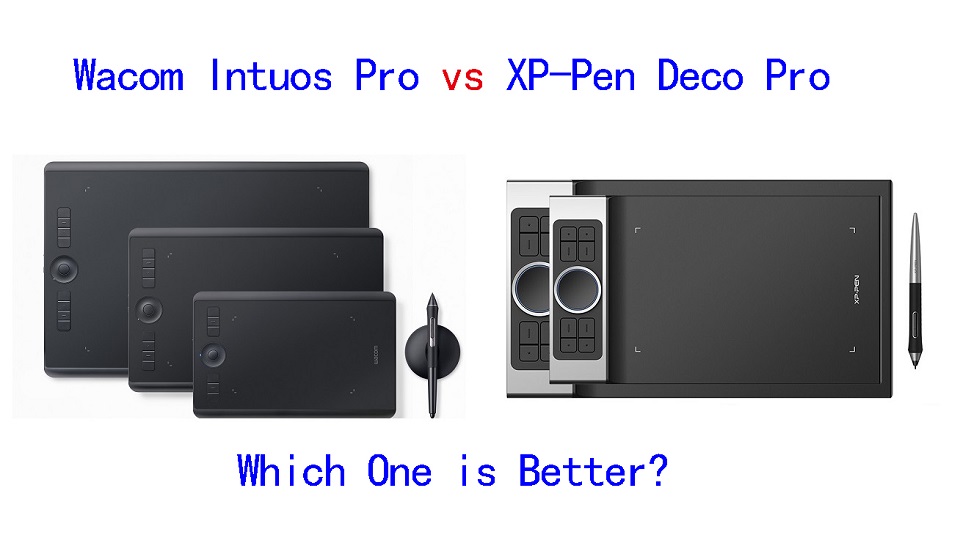
Wacom Intuos Pro vs XPPen Deco Pro Comparison

November 10th, 2023

Whether you are doing photo editing, digital painting or 3D sculpting, having a professional tool is fundamental to fuel your creativity and productivity.

For the longest time, the Wacom Intuos Pro series was considered the pinnacle of screenless graphics tablets.

These offered the highest pressure sensitivity settings along with extra features such as wireless connectivity and touch support.

However, these tablets also tended to cost an arm and a leg. The justification for the pricing is that these products are targeted for professionals.

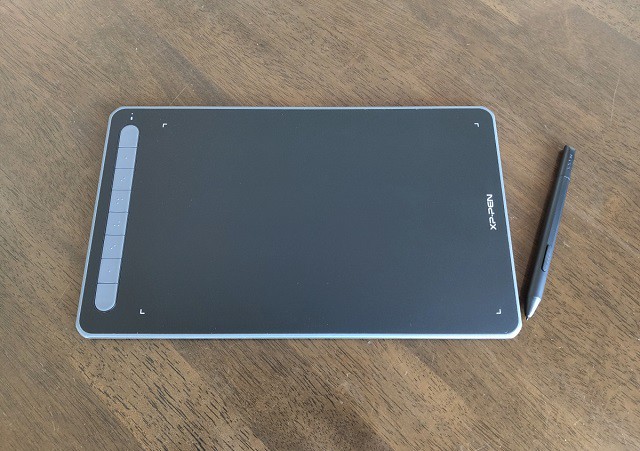
The Deco Pro is XP-Pen’s high-end addition to their Deco series of screen-less tablets, which features a very sleek and unique design with Rich features.

It is made to compete with Wacom’s Intuos Pro line while costing only as much as the low-end Intuos tablets.

Which one is better or more suitable for your needs? This article will help you understand the key distinctions between the two tablets and make the best decision possible.

Brand Comparison: Wacom vs XP-Pen

Wacom is more well-known and widely used because of its sturdy construction and widespread availability, plus it’s an older brand which was established in Japan in 1983.

In the last couple of years Wacom has seen its grip on the entry level graphics tablet market loosening considerably.

Competitors like XP-Pen have artists who want to make their mark in the digital art world more choices in the tools that they can use.

XP-Pen tablets are generally cheaper than Wacom tablets and have more features.

If beginner artists wanted tools that were appropriate for their skill level, they could always get the XP-Pen tablets. This brand is also a budget tool for professionals.

Keep in mind that both of these corporations are successful and sell products that satisfy almost all their customers.

Features Comparison: Wacom Intuos Pro vs XP-Pen Deco Pro

So let’s dive into the debate, Wacom Intuos Pro vs XP-Pen Deco Pro Comparison, Read on to find out…

Build Quality and Design

Wacom’s build quality has always been stellar and this Intuos Pro is no exception.

The device is a sleek black, feels reassuringly strong even though it is only 8mm thick.. It has a sturdy anodized aluminum back panel, with a fiberglass composite resin shell on the front.

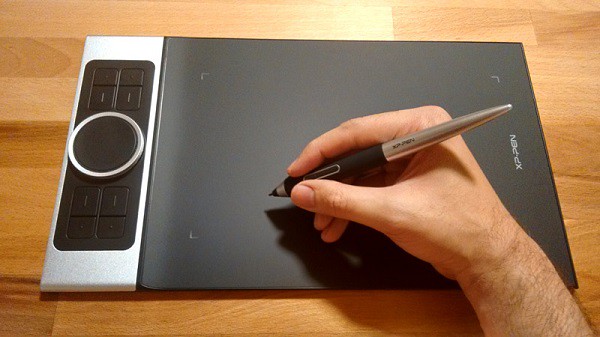
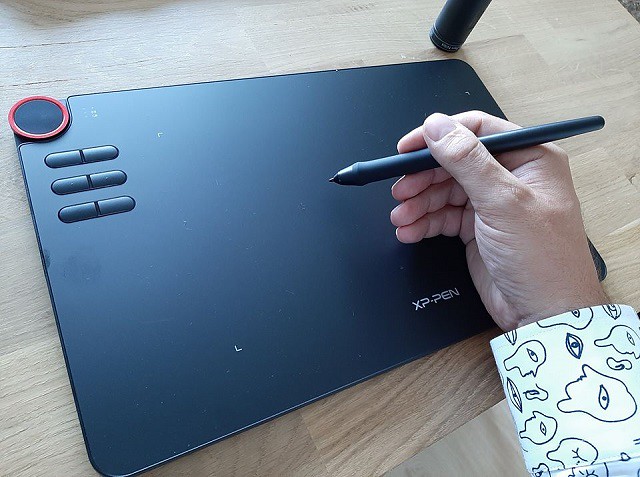
The XP-Pen Deco Pro has a rather unique design with its black plastic front and cool sliver aluminum base & dial. It is a nice looking tablet with solid build quality.

The device is extremely slim, with just 7 milimeters height on most areas, except on the side where the buttons are, where it reaches a 16.5 mm height.

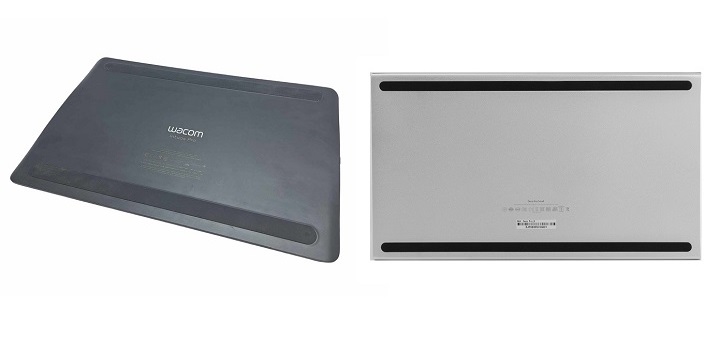
The back of both tablets has two long rubber feet spanning the whole tablet for maximum stability, and the usual information sticker.

Compared to Wacom intuos pro tablet, the Deco Pro is much sleeker, thinner and more modern. It has won a few design awards, like the 2019 Reddot Design Award and the 2018 Good Design Award.

Wacom intuos pro tablet felt more heavy, which gave you a feeling of higher quality.

In additin, The edge of the Deco Pro tablet is a fairly sharp corner design, while the edge of intuos pro was slightly more rounded.

Active Area Size

The Wacom Intuos Pro comes in three different sizes: small version with 6.3 x 3.9 inches active area, medium version has 8.7 x 5.8 inhes while the large version offers 12.1 x 8.4 inches.

The Deco Pro is available in two sizes, small (9×5 inches working area) or medium (11 x 6 inches), but these should not be confused with Wacom’s small and medium sizes as XP-Pen’s small and medium sizes are much larger!

If you tend to work on a small monitor below 19 inches or a laptop, you should be just fine with the small version of wacom intuos pro. It should be enough.

If you really need a tablet with a larger drawing surface, the savings you would make on the XP-Pen Deco tablets far outweigh any advantage you would get by opting for the doubly priced medium sized Wacom Intuos Pro tablet.

Surface Texture

The surface of intuos pro is rough, meaning you get a good degree of friction as you sketch. This gives it that paper feel, plus it helps to control your stylus.

In actual use, the Wacom Intuos Pro works very well. But the friction/resistance on the surface eats down the nibs very fast.

The surface of Deco pro also has a slight grain to it, but it’s smoother than the wacom, and after weeks nibs didnt wear down much.

It’s worth noting that if you don’t like the default surface, Wacom sells different overlays with smoother or rougher surfaces you can apply to the tablet. The packaging includes a sampler sheet of the surface options.

Shortcut Buttons

Both tablets had lots of macro buttons and a scroll wheel. You can program them to do all sorts of stuff, it’s cool.

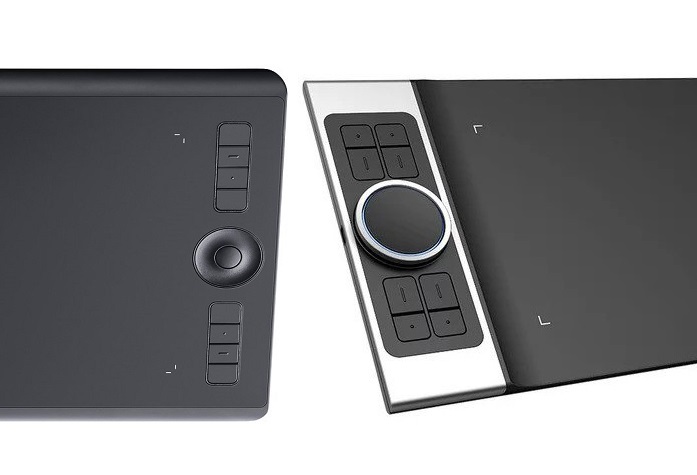
On the xp-pen you have eight shortcut keys and the innovative double wheel.

“double wheel” means that you can turn the outside rim of the dial (the mechanical wheel) and assign that to one function such as zoom in & out, or increase & decrease the brush size, etc.

And additionally you can use the inner or “virtual wheel”, which is the circumference of the touch sensitive trackpad, assigned to something completely different, such as rotating the workspace, scrolling, etc.

On the wacom you have 6 to 8 shortcut buttons and a touch ring, which can help you resize the brushes quickly, it can also be used to zoom in & out, or to rotate your canvas.

The button in the middle of wheel is only for switching the function of the wheel and nothing else.

Stylus Pen

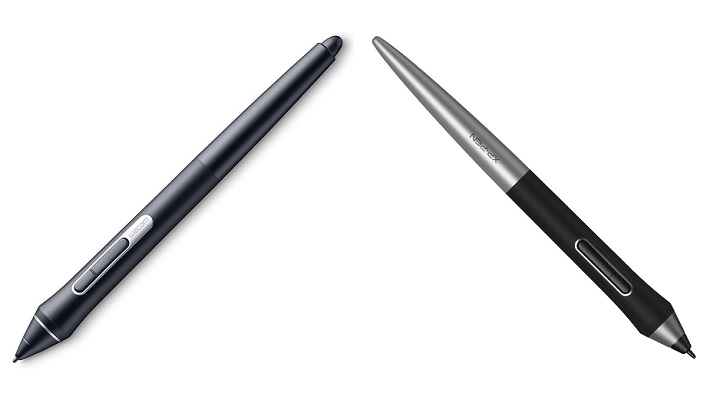
Wacom Intuos Pro tablet comes with the most precise stylus – Pro pen 2, which is battery-free, supports 8192 pressure levels and tilt sensitivity.

It has a semi-hard/semi-soft rubber grip with two side buttons and a pen eraser on the end. Holding this pen is very comfortable.

The XP-Pen Deco Pro tablet has a PA1 battery-free stylus with 8192 pressure levels and Tilt recognition.

It features 2 buttons, a semi-hard/semi-soft rubber grip with silver plastic for much of the rest of the pen. It is quite light but doesn’t feel unbalanced.

The advantage of going with a greater number of 8192 pressure levels is that it enables you to make finer distinctions in the thickness of the lines, which is essential when working on high-resolution drawings.

Tilt sensitivity means that the tablet can detect the inclination angle of the stylus and change the brush stroke to achieve a more natural and realistic feeling. This is great for shading but has many more applications.

The wacom has the slight edge with pen handling over the xp-pen, it’s pressure sensitivity is more natural and needs less force to draw.

In addition, Wacom’s pen tilt is fast, precise, and doesn’t change directions when you press the pens macro keys. It’s completely smooth.

XP-Pen’s tilt was slower by comparison to the wacom, and it jittered around a bit and changed directions when you pressed the macro keys on the pen. It’s not precise enough.

Multi-Touch Support

The XP-Pen Deco Pro does not support and touch gestures, and will not recognize your fingers – it will only recognize the stylus.

The Intuos Pro has multi-touch and gesture support, which is incredibly useful. so you can use phone gestures on your tablet with your fingers.

You can customize some of these, so tapping four fingers might open a menu, while tapping three might open a new window, and pinching zooms in and out on an image.

If you don’t like it, you can easily disable this feature from the side of the tablet.

Compatibility

The Wacom Intuos Pro offers excellent Windows and Mac compatibility.

The Deco Pro isn’t just built to work on both Windows and Mac computers, it can also be connected to an Android device so you can paint and sketch on your phone or tablet.

Connectivity

Wacom includes a USB-C to USB Type-A cable, with the USB-C end plugging into the tablet for charging.

XP-Pen contains the USB-C to USB-A cable to connect the tablet to your laptop. it also has 2 adapters: USB-A to USB-C and USB-A to Micro-USB.

The Deco Pro tablet will support a USB-C to USB-C connector cable but it doesn’t come with the cable.

Bluetooth Wireless is standard on the Intuos Pro and is optional on the XP-Pen Deco Pro.

Although you can get a cheaper version of the Deco Pro without Bluetooth, this is not recommended as the hassle from having extra wires is just not worth the small cost saving.

Drivers

To setup the tablet with a PC or Mac, all you need to do is connect it to your computer and then download and install the drivers.

The XP-Pen driver have a nice interface, letting you change active area size, pressure sensitivity, customize shortcut keys, etc. The actual driver software itself is quite simple and gets the job done.

Comparing it to the Wacom driver, it’s very similar, maybe the Wacom app would win in the comparison as it has more features.

In addition, Wacom’s driver software is notably simpler, convenient to update and install than that of the XP-Pen.

Accessories

Despite being cheaper than the Intuos Pro, the XP-Pen Deco Pro comes with more accessories, such as extra black artist drawing glove, 2 adpaters, etc.

XP-Pen Deco pro comes with 8 nibs in total, all of which are of the same hard plastic design.

Wacom Intuos Pro has ten nibs, including four felt nibs which are similar to using paint brushes or pastels.

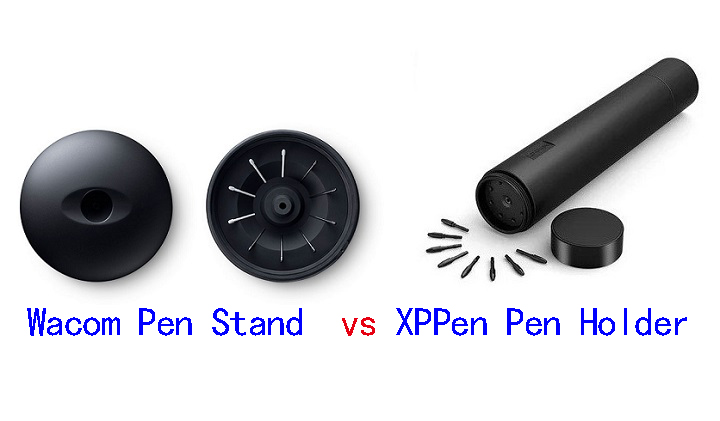
Additionally, the Deco Pro comes with a pen holder, while the Intuos Pro has a pen stand.

The weighted pen stand of wacom has a screw-in bottom and when you unscrew the piece, you will find a variety of 10 different pen tips.

To remove the included pen tip, there’s a small hole on the bottom of the pen stand which you can use to easily remove the pen tip.

The pen case of xp-pen is a tube which holds the pen safely inside during transportation.

Both ends can be unscrewed, with the lid on one end acting as a pen stand, and the other end holding the pen nib replacements and the pen nib remover.

Bonus Software

When you purchase Deco Pro, and register it on the XP-Pen website, you get a choice of two software options for free. These are ArtRage 6 and openCanvas, and are for windows and Mac.

You can get a free 3-moth trial of Shapr3D and MASV, which comes with Wacom Intuos Pro purchase.

Luckily, there are many free drawing, photo editing, animation and whiteboard programs available, so you can use a pen tablet for online teaching, a graphic tablet for annotating pdf and etc.

Price

XP-Pen Deco pro is priced affordably and within reasonable, It is priced at $99.99 (Deco Pro Small), $129.99 (Deco Pro Medium), $129.99 (Deco Pro SW Bluetooth), $159.99 ( Deco Pro MW Bluetooth). Wacoms prices are more expensive, respectively $249.95 (Intuos Pro Small), $379.95 (Intuos Pro Medium), $499.95 (Intuos Pro Large).

Conclusion

Looking at the balance between specs and cost, we believe Either tablet will be a perfectly good buy. Which one you get really depends on your art style and preferences.

XP-Pen deco Pro series is known for its best value for money. Wacom Intuos Pro series is quite costly but they have a great experience and smooth user interface.

If you’re a professional who is looking to invest in a tablet for multimedia manipulation, I will highly recommend Wacom’s line of Intuos Pro tablets.

Wacom Intuos Pro tablet is known to be free from pen lag and extremely accurate. It’s worth it’s weight on gold for the time savings and increased accuracy.

If you’re simply a consumer who is looking to utilize a tablet for recreational use, you’ll likely be better off saving some money and choosing to one of the XP-Pen Deco Pro tablets.

The affordable price point of this means you could start on this as a beginner and really grow into it over time as you improve.

Source: https://pctechtest.com/wacom-intuos-pro-vs-xppen-deco-pro

(1)

Wacom Cintiq 22 vs Huion Kamvas 22 Plus Comparison

November 3rd, 2023

If you’re not new to the digital art world, you’re probably already aware that graphic tablet with display is a good tool for an artist.

These display tablets are unbelievably cool, allowing you to use a stylus and work directly on your artwork. Even traditional artists are surprised by how easy, nature, accurate and intuitive the process is for them.

Compared to sizes of 15.6-inch or smaller, the 22-inch gives you a physically larger drawing area that allows you to create more lengthy pen strokes and more comfortable arm movements as you draw.

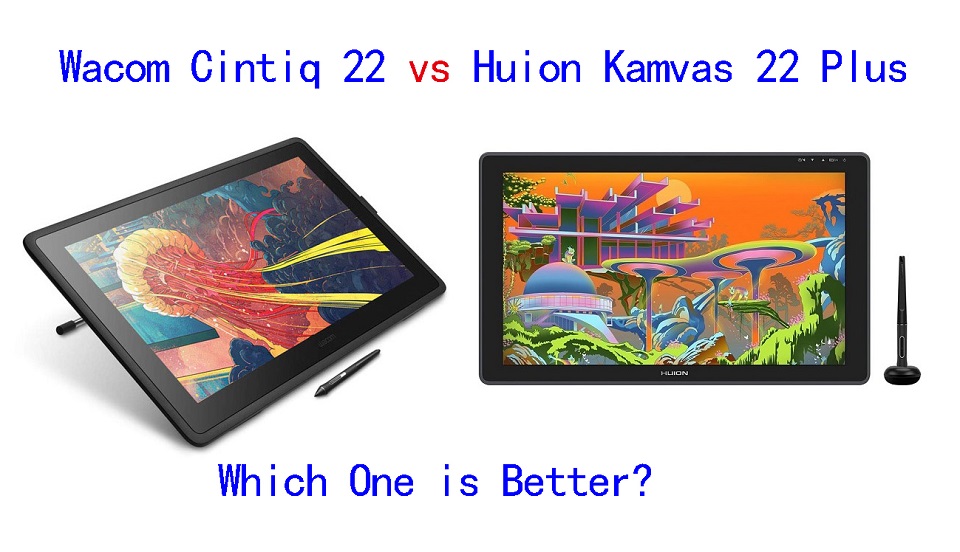
If you are looking for a quality 22-inch pen display that has all the necessary drawing features you need while still being very economical, the Wacom Cintiq 22 and the Huion Kamvas 22 Plus are the two best and most popular choices.

One may be wondering which one of the two to get. For the most part, both devices are similar, like screen size, resolution and pressure sensitivity, but there are some differences here and there.

Keen on one or the other? We compared Wacom Cintiq 22 vs Huion Kamvas 22 Plus, divided all pros and cons of each model, describe all features to help you find the best device.

Brand Comparison: Wacom VS Huion

Wacom is the industry leader and standard. They have been producing high-quality drawing tablets for artists since its foundation in 1983.

If you weren’t worried about price, you’d want a wacom and you wouldn’t get remorse anyway because you’d own the best possible tablet.

On the other hand, Huion is a newcomer, founded on 2011. It is something of a market leader in terms of budget tablets, so there’s plenty to cover.

Huion tablets are certainly becoming more and more popular. They are typically much cheaper than an “equivalent” Wacom and – on paper, at least – do the same things.

Features Comparison: Wacom Cintiq 16 vs Huion Kamvas Pro 16

For detailed information about Cintiq 22 vs Kamvas Plus 22comparison, you can find below:

Build Quality and Design

Huion and Wacom both take quite a minimalist approach with the design of their tablets.

If we compare the Huion Kamvas 22 Plus and the Wacom Cintiq 22, we’ll see that both are mostly screen, without function buttons.

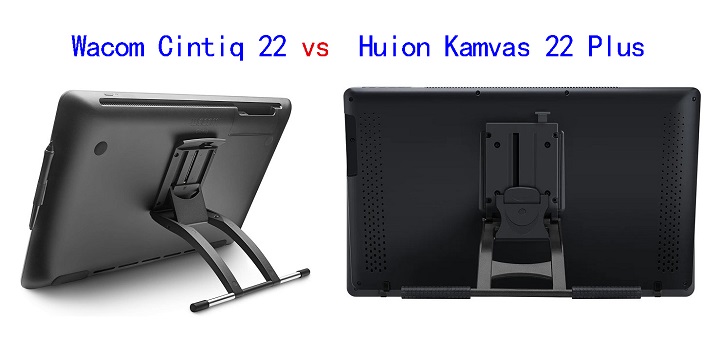
As for appearance, Both Tablets comes with a black plastic body, Build quality is solid and feels well made.

Both tablets also come with an adjustable stand that allows you to set it to your preferred height.

The Wacom stand offers angle adjustment from 16° to 82°, while the Huion stand provides angle adjustment of 20° to 80°.

In addition, With both devices, you can remove the stand to reveal a VESA mount, which gives you the option to mount an arm.

Both drawing tablets are big and bulky devices that are difficult to carry around.

But there is some significant difference in weight– the Huion Kamvas 22 Plus weighs 3.9kg including stand, while the Wacom Cintiq 22 weighs a considerably more hefty 5.9kg with its stand!

Screen Quality

Both devices offer the same screen size of 21.5-inch, as well as the same 1920 X 1080-pixel resolution.

We must say that these specifications perhaps have room for upgrades such as 2.5K or 4K resolution for a higher pixel density and clarity.

In terms of color gamut there is some significant difference – the Cintiq 22 features a color accuracy of 96% sRGB, while the Kamvas 22 Plus offers a hugely impressive 140% sRGB color gamut.

A wider color gamut will provide more accurate and vibrant colors, which is especially important for artists and designers who need to work with a wide range of colors.

This is down to Huion’s new Quantum Dots Technology of QLED Panel, which also allows the tablet to boast a hugely impressive 1200:1 contrast ratio, while Cintiq 22 has an IPS panel with 1000:1 contrast ratio.

Since Wacom Cintiq display is calibrated out of the box, so the colors looks accurate. As for Huion Kamvas, it has a relatively inaccurate color calibration out of the box.

However, you can always manually tweak the colors by going through the OSD options of Huion. And If you’re willing to do a bit of color calibration on setup, it’s absolutely class-leading.

Screen Technology

Cintiq 22’s screen is not laminated, which is cheaper to manufacture. Because there is a gap between the active screen and its top layer, this creates a parallax issue.

Kamvas 22 Plus has full lamination screen, which reduces the air gap, the parallax is minimal, resulting in a lag-free drawing experience.

Drawing Surface

The Kamvas 22 Plus uses etched glass on the screen, which is more scratch-resistant than the matte film that the Cintiq 22 uses.

Both type of textured screen is super nice and its really almost glare free and feels a bit rougher, somehwere in between glass and paper.

This texture helps give resistance against the pen while drawing to make it easier to control your strokes.

Stylus Pen

For the most part, the pens of the two devices are quite similar that is thickest on the area most proximal to the tip and tapers towards the other end.

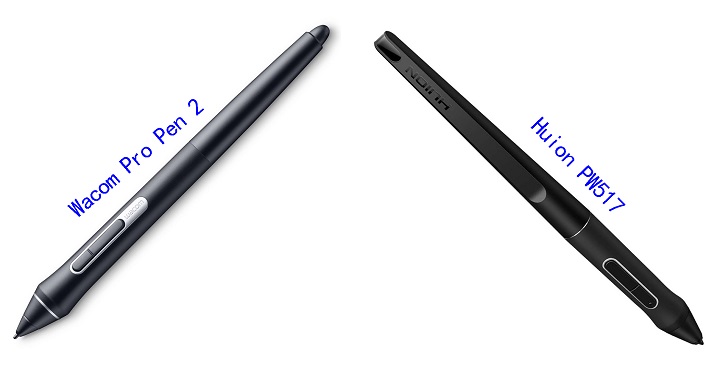
They both have 2 customizable buttons, and a rubber grip for better and comfortable use. They are both battery-free, and requires no charging at all.

However, the wacom Pro Pen 2 that comes with Cintiq 22 has an extra eraser on the top end, which allows you to switch to the eraser tool the same way you could do with regular pencils.

On paper the two pens are very similar. Both Wacom and Huion PW517 stylus boast 8,192 levels of pressure sensitivity and ±60° tilt detection. This assures excellent accuracy in making manual inputs.

However, and with the caveat that this is subjective, the Wacom stylus still just feels better in use, with a smoother action in the hand.

Wacom Pro Pen 2 has a lower initial activation force where it better detects the lighter pressure! Much better than Huion stylus, The tracking is impeccable, no jitter at all.

Programmable Buttons

As mentioned above, neither the Cintiq 22 nor the Kamvas 22 plus comes with programmable shortcut buttons.

If you are someone who uses a keyboard for in-application shortcuts, this is not really a big deal .

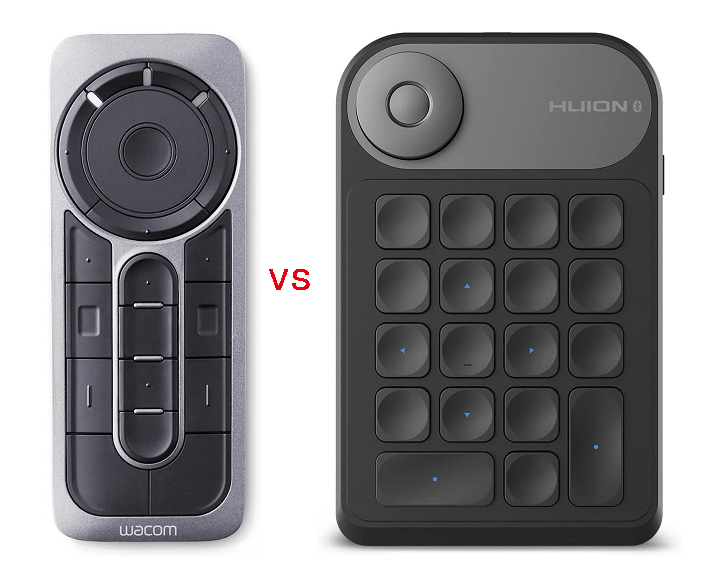
If you want button control, you can pick up a Wacom Expresskey Remote for the Cintiq 22, which gives you 17 programmable buttons and a touch ring.

It connects wirelessly via 2.4Ghz to the computer and can work for around 160 hours on 2 hours of full charge.

The Kamvas 22 Plus also have a comparable accessory, the Keydial Mini K20, which includes 18 programmable buttons and a mechanical dial.

It feature with the Bluetooth 5.0 wireless function, And Its 1200mAh battery ensures continuous working for about 100 hours.

Note that both Expresskey Remotes are not included in the box and needs to be purchased separately.

Connectivity

Both tablets are not a standalone drawing tablet, so they needs to be connected to a computer.

Cintiq 22 connects to a computer via 3 separate cables for power, USB, and HDMI connections.

The Kamvas 22 Plus comes with a somewhat interesting power cable which Huion calls the 3-in-1 cable.

The cable comes with a USB-A, HDMI, and a port for the power supply which all converge into a single USB-C input plug for your computer.

Another difference to the Cintiq 22 is the addition of a USB-C to USB-C cable so you can attach your compatible android phone or laptop.

Compatibility

The two devices in this comparison can work seamlessly with devices running on Windows, or macOS, and supports various mainstream drawing and designing software.

However, Wacom Cintiq 22 lacks the Android connectivity that Huion offers on its Kamvas 22 Plus tablet, so if you use Android devices, this is worth bearing in mind.

Drivers and Software

Before drawing on the screen, you need to download the drivers from their official website, install them and then you are good to go.

The tablet driver software interface will detect the pen display and open the available options for you.

Wacom drivers are more stable and a bit more “plug-and-play” in terms of setup, with more options to speed up and simplify your creative experience, including customizable pen gestures and on-screen pen and touch controls.

Huion drivers may encounter more issues, and not as well as wacom in quality. But it still allows you to adjust your personal preferences on pressure sensitivity, tilt, and button mapping, all of which required only a few minutes of effort.

Accessories

Despite being cheaper than the Cintiq 22, the Huion Kamvas 22 Plus comes with more accessories, such as extra black artist drawing glove, pen nibs, etc.

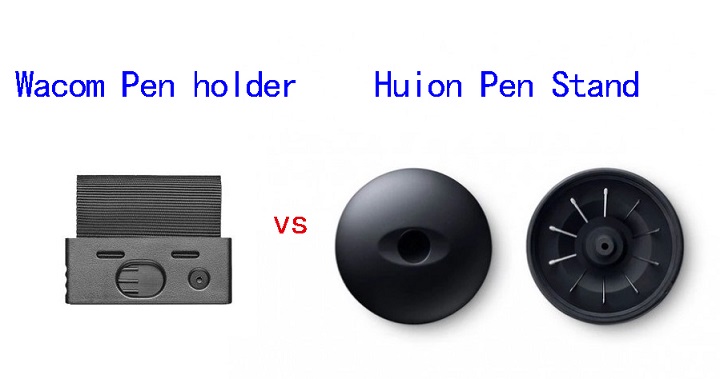
The Kamvas 22 Plus comes with a circular pen holder. It can hold your pen in an upright or flat position.

The pen holder also doubles up as nib storage, which houses 10 spare pen nibs. This can last you quite a while.

The Cintiq 22 comes with a simple fabric loop to hold the pen. The loop is attached to the side of the tablet. It also houses the 3 extra pen nibs.

Price

Price is one of the main reasons why so many artists are excited about the Huion Kamvas 22 Plus. It will cost you $549.00.

Compared to Kamvas 22 Plus, the Cintiq 22 is 1.2 times more expensive at $1299.95. But it still has the lowest price Wacom has ever offered for a drawing display of this size.

Additionally, If you can tolerate a non-laminated display, narrower 120% sRGB color gamut, a matte screen film instead of etched glass, then you can save extra $100 on Huion Kamvas 22 (basic, non plus version).

Conclusion

Both the Cintiq 22 and Kamvas 22 Plus are good drawing device for those who want a large screen at a budget-friendly price.

Wacom Cintiq 22 is more expensive, but still has the best pen and drawing experience. For most artists, Wacom’s main feature is longevity and dependability.

But if your budget is tight, get a Huion Kamvas 22 Plus, It’s more budget-friendly and offers great value for the price.

You won’t go wrong with any of them, as they offer all you need to create good artworks. All depends on your levels of skill, preference, needs and budget.

Source: https://pctechtest.com/wacom-cintiq-22-vs-huion-kamvas-22-plus

(0)

Wacom Cintiq 16 vs Huion Kamvas Pro 16 Comparison

October 31st, 2023

In today’s digital age, finding the right tool that can meet multiple needs is crucial.

The graphic tablet with screen is objectively better in every concievable way over the non-screen versions, which feels more natural to traditional drawing.

15.6 inch is a popular size that gives you plenty of working space but without being too huge. It’s still small enough to carry it around easily.

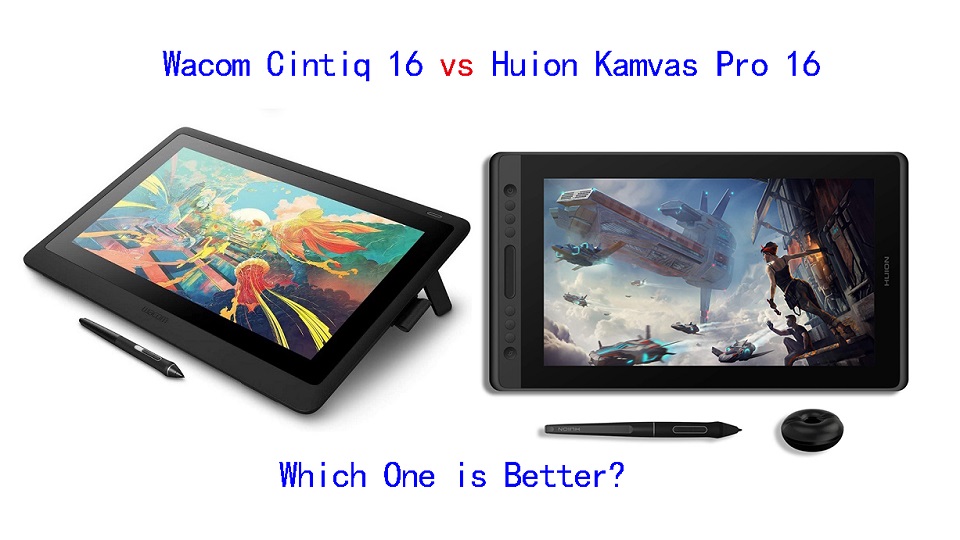
You might have seen the Wacom Cintiq 16 vs Huion Kamvas Pro 16. They are both budget-friendly mid-range display tablets that get fantastic reviews.

But which tablet is better? If you’re a beginner, it is evident that choosing the right tablet between them will absolutely put you in turmoil.

This is where you’ll require some advices that can guide you correctly. In this guide we place the two tablets side by side to compare and contrast their features, helping you decide which one is right for you.

Brand Comparison: Wacom vs Huion

Through the years, Wacom had been the main player in the field producing high-quality drawing tablets.

Huion came in later and started off with cheap drawing tablet options for beginner artists.

As years went by, Wacom also came up with beginner-centered drawing tablets that were cheaper and rookie friendly.

Huion on the other hand also grew to make high-quality professional devices that matched up to the high-quality standard set by Wacom.

Features Comparison: Wacom Cintiq16 vs Huion Kamvas Pro 16

Should you pay the extra money for Wacom Cintiq 16, or is the Huion Kamvas Pro 16 good enough? We have compared the two display tablets– including the display quality, parallax, stylus, drawing experience, and more.

Build Quality and Design

Huion Kamvas Pro 16 is a sleek looking device with an all black front with a shiny silver rim.

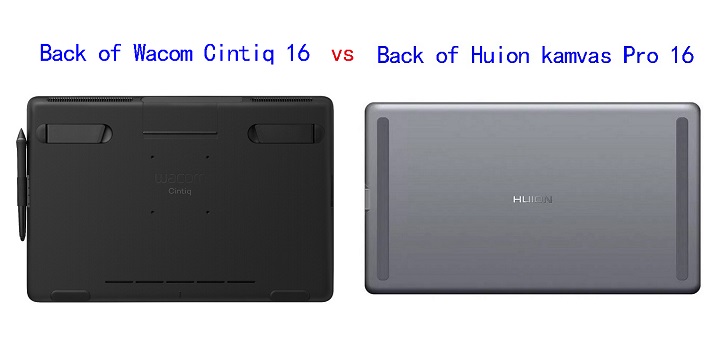
This tablet is made quite durably with premium feel. The back of the tablet is made of a silver aluminum alloy material which feels hard and cool to the touch.

Wacom Cintiq 16 is made of plastic, the overall build quality and polish impresses, it is very solid and the design is professional and clean.

Screen Quality

For drawing and photo editing, clarity and precision are key. Higher clarity allows you to see every detail on screen.

Also, you are going to want a color accurate display to ensure the colors you use are going to be colors you expect in the final product.

The tablet Wacom Cintiq 16 and Huion Kamvas 16 Pro comes with same screen size of 15.6-inch and reolution of 1920 x 1080-pixel. So they have same pixel density and clarity.

The screen of Huion Kamvas Pro 16 covers a wider colour gamut of 120%, While the Wacom Cintiq 16 only has 96% sRGB color support.

However, Wacom Cintiq 16 displays come pre-calibrated out of the box and show accurate colors right of the bat.

Kamvas Pro 16 is not precalibrated, the default calibration is somewhat off, a bit strong on the blues, but once you calibrate the display using a colorimeter, the colors displayed become very accurate and better as expected.

Screen Technology

Huion Kamvas Pro 16 comes with fully laminated screen, which have reduced the space between the glass and the screen, reducing parallax to almost zero and making drawing much more accurate in the process.

Wacom Cintiq 16 does not have a laminated display so you have some parallax, But It’s worth noting that the parallax is minimal and less noticeable.

Drawing Surface

Wacom cintiq 16 have an anti-glare film applied to the glass surface, preventing any distracting reflections. The matte finish is also more pleasant and natural to draw on than the smooth glass.

It’s glued more firmly onto the glass than a normal screen protector so it’s tricky to remove it, you could also damage your screen if you use too much force.

Huion Kamvas Pro 16 comes with an etched glass surface with light texture. This gives it enough resistance to not feel like you’re sliding around uncontrollably.

It doubles as an anti-glare texture to prevent too much glare from light reflecting off the screen.

This texture has been applied directly to the screen and is not a screen protector so you cannot take it off. Glass will last practically forever, whereas a plastic film wears down from use.

Stylus Pen

Both tablets come with a battery-free pen, so you don’t need to worry about replacing the batteries often.

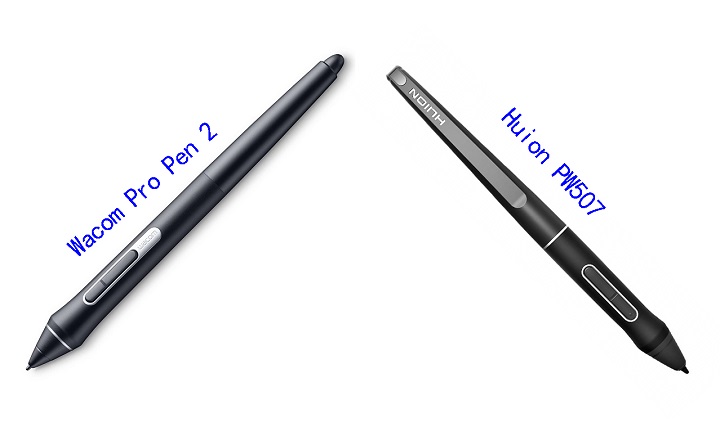
The wacom pro pen 2 and Huion PW507 stylus looks similar. They both have two side buttons, a soft rubber grip and same shape.

But wacom stylus has an eraser on the end that can be used just like a normal pencil eraser for a more intuitive, natural erasing motion.

️ Both pens have over 8,000 pressure levels, ensuring smooth transitions between thick and thin lines, as well as transparent and opaque paint.

Both pens also supports tilt functionality, measured at ±60°. This is great for those who like to use the stylus at an angle to get different effects in their artwork.

The difference here is that Wacom stylus comes with lower initial activation force, and better tracking + tilt accuracy, etc.

This means it better detects the lighter pressure, eradicates unnecessary lags, and the pointer will not shifts off-center.

Hotkeys

There are 6 programmable buttons and 1 touch bar along the side of the Huion Kamvas 16 Pro tablet. It allow for instant one-touch access to time-saving shortcuts in all your favorite creative applications.

The two bigger buttons at the top and bottom are unprogrammable with one of them being the power button, and the other being the function switch button (which doubles as the OSD settings button).

There are no express keys on this Cintiq 16 model and Wacom doesn’t include the Express Key remote, but it is compatible.

The Wacom Expresskey Remote will give you 17 programmable buttons and a touch ring.

Accessories

Wacom Cintiq 16 comes with a detachable fabric loop, which is attached to a piece of plastic that slides and snaps into the side of the Cintiq 16. It also houses 3 standard replacement nibs and a nib removal tool.

With Huion Kamvas Pro 16, you get a pen stand, which allows you to keep your stylus in a horizontal or vertical position when not in use. Inside it, you’ll find 10 replaceable nibs and a nib remover.

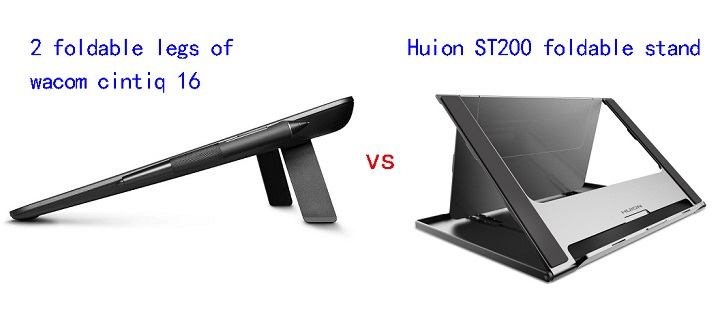
Wacom Cintiq 16 features VESA Support and 2 integrated foldable legs so you can go from almost flat to a 19° incline in seconds.

Kamvas Pro 16 comes with a Huion ST200 metal foldable stand, which offers six angle adjustments of 14.5, 19.5, 22.5, 37, 41.5 and 45 degrees to let you get the most comfortable angle possible for your hand. you will also get a drawing glove.

Connectivity

You can easily connect the Wacom Cintiq 16 and Huion Kamvas Pro 16 tablet with its Included 3-in-1 cable (USB-C to HDMI, USB-A and power) to your desktop.

In addition, Huion Kamvas Pro 16 also support a single USB-C to USB-C connection. This helps to avoid desk clutter and easily connect the tablet to your devices with USB-C port, but you need to buy the cable separately.

Compatibility

Huion Kamvas Pro 16 is compatible with Mac, Windows, and Android.

Wacom Cintiq 16 is only compatible with Windows and Mac devices.

So the Huion Kamvas beats the Cintiq for Android compatibility.

Drivers & Software

A tablet driver is a software program that allows a computer to communicate with a drawing tablet.

If you use your tablet without its drivers, the operating system will often see it as a mouse, rendering most of its features useless.

With the drivers installed, there will be a bridge between the two, letting the OS know how it should react when the tablet is used in a certain way.

The drivers also come with a handy user interface trough which you can change your tablet’s settings.

Wacom is well known for providing stable drivers for all operating systems. Huion’s software quality, the driver and configuration app can be lacking.

Price

If you were to go to Amazon right now and buy both tablets, the Wacom Cintiq 16 would cost you $599.95 whereas the Huion Kamvas 16 Pro tablet would cost you $399.99.

The Kamvas 16 Pro is priced substantially lower than the Cintiq 16. If you get the newer Huion Kamvas 16 Pro version with higher 2.5k Resolution, then they will hover around the same price.

Conclusion

Looking to upgrade from pen-paper to creating projects directly on the screen? These are the best upgrade for professional artists/designers.

Both the Wacom Cintiq 16 and the Huion Kamvas 16 pro are excellent screen tablets for artists. Both products are reliable, high-quality, and have a great reputation.

Wacom Cintiq 16 is still the best in terms of the drawing experience.

Comparing strictly in terms of functionality and price—the value for money—Huion Kamvas Pro 16 appears to be a more advantageous choice than Wacom Cintiq 16. A great drawing tablet for animation, drawing, photo editing and more.

Which tablet you go for will depend on your individual preference, budget and need.

Source: https://pctechtest.com/wacom-cintiq-16-vs-huion-kamvas-pro-16

(0)

Best Pen tablets for CorelDraw and Painter

October 30th, 2023

Corel Painter is a well-known digital painting software, while CorelDraw is a market-leading graphic design softwre. But in order to run smoothly, it needs the right device.

The graphics tablet is comprised of the drawing surface and the stylus. They have become an essential tool for artists, animators, photographer, graphic designers, and digital illustrators.

For them, This is a great way to produce many drafts and to be able to make changes, while being able to also directly digitise the image and edit it in various programs.

With a digital pen and powerful features, these devices allow unparalleled precision and flexibility in artwork creation.

Are you looking for the best drawing tablets for Corel Painter and CorelDraw? Whether that be for drawing, illustration or art, pctechtest have got you covered!

Corel Painter vs CorelDRAW: What is the Difference?


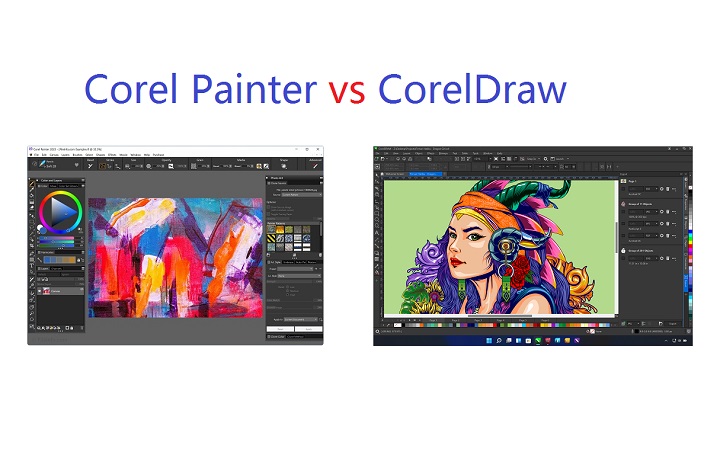
Corel Painter is built for digital painting, with all the features and tools needed for creating realistic digital artwork.

It has a robust painting engine, multi-layered brushes, cloning and photo-painting tools, and a drawing tablet compatibility that makes it very intuitive for painting.

It allow susers to make and edit raster based images or bitmaps like your JPGs, PNGs and BMPs among others… stuff made out of pixels. If you need a professional-level digital painting program, then Corel Painter is definitely the way to go.

CorelDRAW, on the other hand, is a vector-based graphic design software. It is a powerful and versatile application that provides a wide range of tools and features for creating, editing, and manipulating various types of visual content.

CorelDRAW is primarily used for graphic design and illustration purposes. It allows users to create and edit vector graphics, which are images defined by mathematical equations and can be scaled without losing quality.

This makes CorelDRAW suitable for designing logos, illustrations, posters, brochures, banners, and other printed or digital materials.

Advantages of using a Graphic Tablet for Corel Painter and CorelDraw

The graphic tablet allows you to draw with a pen or stylus, which feels more natural, easier and comfortable than using a mouse. This can be especially helpful for people who are used to drawing on paper.

graphic tablet allow more accurate control than a mouse, which makes it possible to do very detailed work.

A graphic tablet can be more ergonomic than using a mouse, as it allows you to keep your arm and wrist in a more natural position. This can help to reduce fatigue and pain.

When you use a pressure-sensitive stylus or pen tablet with Core Painter and CorelDRAW, the amount of pressure that you apply controls the width of your strokes.

Each person uses a different strength or pressure level in a stroke, and you can set the application to match your stroke strength by specifying pen settings.

Best of all, The brushes of Corel Painter and CorelDraw are built to take advantage of pressure and many also allow for tilt, rotation and bearing control so that you can create your ultimate art.

In addition, You’ll also like that the Hotkeys on the side of the tablet can be customised to suit Corel Painter and Corel Draw so that you can work even more easily without having to use your keyboard.

Combine a drawing tablet with Corel Painter and CorelDraw’s wide selection of brushes and features, like the bezier tool, It will fit all your digital art needs and take your digital art to the next level.

You’re in for a treat when you get used to it; and when you start using the tablet for drawing in Corel Painter and CorelDraw software, you’re going to start to wonder how you ever lived without it…

What Drawing Tablet Types is Best for Corel Painter and CorelDraw?

There are 3 types of drawing tablets available and which type you intend to get will drastically alter your required budget.

1. Graphics Tablets

The first type is called a graphics tablet. Usually, the tablet is interacted with a pressure sensitive pen with the surface of the tablet mapped to the display of the computer.

Notably, drawing pads for beginners are relatively inexpensive at less than $100 USD, and perfect for beginners. But there is a learning curve of feeling your position on the tablet with what you are seeing on your monitor.

The most popular such device at the moment for instance would be the wacom intuos, XP-Pen Deco, and Huion Inspiroy.

2. Display Tablets

The pen display tablet has an in-built screen so that you can just draw straight on the display. The learning curve is much less than the hand-eye disconnect experienced with a non-screen graphics tablet.

The obvious disadvantage of a display tablet is the increased cost which can exceed $200 USD. So you will need to decide how much you are willing to spend.

Display tablets come in a variety of sizes and display resolutions. But they still require a computer in order to function. You can think of it like an extra monitor that handles drawing on the screen.

The most popular such device at the moment for instance would be the Wacom Cintiq, XP-Pen Artist, and Huion Kamvas.

3. Standalone Tablets

Some mobile tablets come with pen input support and when they do you can usually buy an optional pressure sensitive stylus. Of course, they are usually the most expensive.

The most popular standalone portable graphic tablets at the moment for instance would be the iPad Pro + apple pencil, surface pro + slim pen 2, and samsung galaxy tab + s pen.

Compared to regular drawing tablets, they allows you to more easily draw digitally on the go, when you’re out and about since these are highly portable devices.

These devices can come with different operating systems, most of them will ship with either iOS or Android and only very few will ship with Windows (Surface Pro though).

This also means that your drawing software choices will be limited by your OS, for instance you are not going to get full fledged corel painter and corelDraw going on iOS or Android.

In addition, These Mobile Android & iPad Painting Applications will never match up to their fully featured desktop counterparts.

10 Best Graphic Tablets for Corel Painter and CorelDraw in 2023


The drawing tablets for Corel Painter and CorelDraw do not differ based on the app- they typically work just as well in each software.

We’ve compiled this list of the best tablets for Corel Painter and CorelDraw based on various criteria. We’ve included such factors as screen size, resolution, color accuracy, pressure & tilt sensitivity, and price.

1. Wacom Intuos Pro

2. XP-Pen Deco Pro

3. Huion Inspiroy Dial 2

4. Wacom One 13

5. Huion Kamvas Pro 16

6. XP-Pen Artist 16 (2nd Gen)

7. Wacom Cintiq 16

8. Huion Kmavas 22 Plus

9. XP-Pen Artist 24 Pro

10. Microsoft Surface Pro 9

How to Use Pressure Sensitive Digital Pen in CorelDRAW?

The following tools in CorelDRAW let you use the pressure of your pressure-sensitive pen, stylus, or other device: Artistic Media (Expression mode), Eraser, Smear, Twirl, Attract, Repel, Roughen, and Smudge.

In addition, you can vary brushstrokes by using pen tilt and pen bearing with the Artistic Media (Expression mode) tool, Eraser , Roughen and Smudge tools. Note that pen tilt and pen bearing can be used only if your pen or stylus supports these features.

Conclusion

If you are drawing in Corel Painter and CorelDraw, we recommend that you take advantage of using a graphic tablet since with it, you will gain speed, precision, and comfort.

Almost any drawing tablet will be a massive improvement on trying to use something like Painter and CorelDraw with a mouse.

You should find the right tablet for you from this list! Whether you’re looking for a graphics tablet, pen display, or a standalone tablet.

There are plenty of options out there for artists, It all boils down to what your preference, workflow, ecosystem, skill levels and budget are.

If you’ve got a small budget to start with, pick something cheaper from our list and start with that.

As you grow, you can upgrade to something a little more loaded with features. Happy drawing!

Source: https://pctechtest.com/best-drawing-tablets-for-corel-painter-and-coreldraw

(2)

Drawing Tablet for Digital Painting in Paint Tool SAI

January 10th, 2023

If you’re searching for good digital painting software, you’ve probably come across PaintTool SAI. This is a rather old digital painting and drawing program developed in 2004 for Windows.

It is widely used by anime and manga artists, but you can use PaintTool SAI for almost any kind of project. many digital artists combine the PaintTool SAI with popular programs like Adobe Photoshop or Adobe Illustrator to optimize their creativity.

PaintTool SAI is a popular digital artist software due to its simplicity and variety of tools. Its intuitive user interface is simple and easy to learn yet powerful. The popularity can also be attributed to how the lightweight painting software has been optimized to run with minimal resources and rarely crashes.

Drawing tablets are essential for artists painting in Paint Tool SAI. The possibilities they offer are simply immense! With a drawing tablet, an artist will no longer have any limitations.

What is Paint Tool SAI used for?

PaintTool SAI is a graphics design software that helps artists create and edit different types of illustrations like cartoons and anime.

It is an editor and painting tool with anti-aliasing capabilities with which you can smooth out jagged edges and minimize distortions in low-res drawings and images.

It achieves this by averaging the colors of the pixels at the boundaries of different shades. This has a greater impact when there is a high contrast border between pixels.

PaintTool SAI allows you to view entire brightness ranges of different colors on one platform. You can then combine portions of different drawings or images and transfer them or erase what you need.

It has multiple robust tools for specific tasks needed to achieve this. There are raster drawing tools like a marker, airbrush, watercolor and pen. It also has selection-based tools like a magic wand and lasso, which can be configured to enable anti-aliasing, and works well with its zoom and rotate functions.

There are layering tools, Lineart tools, transformation tools, linework layers, brushes and erasers for removing hard edges.

PaintTool SAI enables you to draw smooth curves and diagonal lines without jagged distortions, remove unsightly jagged edges and smooth the edges of your digital images or graphics.

It also softens the color transition between edge pixels and background pixels in Adobe Photoshop to make it appear smoother.

It is compatible with MultiMedia eXtension (MMX) technology, an Intel processor architectural extension that enhances the performance of multimedia algorithms, enabling the processor to handle data faster and more efficiently.

It also has 16bit ARGB color channels in line with photography and Photoshop advancements. This enhances image manipulation because there is more flexibility in handling colors. Editing is easier even in photoshop projects with glaring differences.

The tool provides full digitizer support so you can process all kinds of images and convert analog to digital. You can export your images in their native SAI format or through BMP or PSD.

You don’t have to keep jumping from one application to another. PaintTool SAI also has a data protection function that protects the integrity of your multimedia images and backs them up just in case there is abnormal termination.

The lightweight painting software only requires 1024MB of your system memory and 512MB of storage. This memory footprint and CPU utilization are low compared to the tasks it accomplishes. It is currently priced at approximately $52 per software license, which is a steal for a wholesome digital painting tool like this.

Advantages of drawing tablet for digital painting in Paint Tool SAI

A stylus provides more control and interactivity than a mouse because it gives you the most responsive digital painting experience by allowing your hand and brush to work fluidly as one.

While a mouse is a great pointing device, it is not particularly convenient for painting. A mouse can only move on a flat, two-dimensional surface.

This tool has also been cited as the cause of the aptly named mouse arm syndrome, specifically repetitive strain injury (RSI) and carpal tunnel syndrome (CTS).

A tablet stylus, on the other hand, has the ability to sense the motions of your wrist, hand, and arm. This gives you an authentic feel, accuracy, and control.

Drawing tablets work with commonly used digital art programs such as Paint Tool SAI and Photoshop, turning your computer into a digital canvas. You can draw as naturally and comfortably as you would with pen and paper.

Want to undo? Tab, copy, paste, command, shift, spacebar, and more. You can do this by assigning custom keystrokes or actions to the express keys on your pen or drawing tablet. This enables you to work faster and eliminates the tedium and strain that come with performing seemingly repetitive tasks.

Pressure sensitivity is the key to creating dynamic digital art. With pressure sensitivity, you can vary the width of your strokes and control how dark you would like your lines.

Many Paint Tool SAI brushes respond to stylus pressure. Depending on the variant settings, greater stylus pressure can increase the width of a brushstroke, the penetration of color, or the degree of other effects.

The most significant aspect of a drawing tablet is how sensitive it is to pressure. When you use a pressure-sensitive stylus or pen tablet, the amount of pressure that you apply controls the opacity and width of your strokes.

In theory, a mouse has no pressure information because a mouse button is either “on” (button down) or “off” (button up).

How to Turn on Pressure Sensitivity in PaintTool SAI

In PaintTool SAI, you can easily turn on and adjust your pressure sensitivity through the brush settings and minimum pressure.

Method 1: Use the Brush Settings

In PaintTool SAI the Min Size slider in the brush settings menu “changes the brush size when pressure is 0.” This affects the size of your brush depending on how much pressure you apply while drawing.

Find Min Size under Brush Size in the brush settings menu. Adjust the slider to your preferences. Default PaintTool SAI brushes have Min Size values ranging from 0-50%.

As a general rule, the higher value % your minimum size is, the less pressure sensitivity your brush will have. Therefore, if you want to have a more reactive brush, it is better to choose values 50% and below.

The benefit of using this method to turn on and adjust your pressure sensitivity is the ability to customize the brush to your comfort and preferences.

Method 2: Change Minimum Pressure Settings

Another way to turn on and adjust the pressure sensitivity in PaintTool SAI is by changing the minimum pressure settings in the Pen Tablet section of PaintTool SAI’s options.

In Pen Tablet section find the Minimum Pressure for Brush Stroke. Use the slider to adjust the minimum pressure you desire. keep your values low if you prefer a more reactive brush. The default settings for minimum pressure are usually 0.

3 Good cheap drawing tablets for Paint Tool SAI

A drawing tablet is something you can make great use of whether you’re are an experienced artist or just starting.

Non-screen drawing tablets are some of the most beginner-friendly drawing tablets out there as they are very inexpensive. You use them by drawing on the tablet while looking at the monitor screen.

The Pen Display Monitors come with a built-in screen and support for pen input. Draw directly on the screen is very engaging and enjoyable. They are considerably more expensive than normal pen tables and mostly used by intermediate and professional artists.

With so many drawing tablets out there, it’s hard to know which one to choose if you’ve never used one before.

The pressure sensitivity of a drawing tablet is among the top characteristics to consider before making a purchase. The greater the sensitivity, the more control you have over your strokes.

Drawing tablets come in varying sizes. Generally speaking, you’ll want the graphic tablet size to be close to the size of your monitor.

It’s not as comfortable to draw on a small tablet, so if you have a comfortable working space, it’s a good idea to get a bigger tablet.

The number of hotkeys differs by tablet, but the ones that include more hotkeys allow for greater customization options, which is particularly convenient for pros!

Wacom has been at the very top of the drawing tablet game for a long time. If you’re looking for the best overall and budget-friendly graphics tablet, then the XPPen brand is a must-buy for you. It feels like a premium build device with the wonderful price.

1. XPPen Deco LW

The XPPen Deco LW is a great choice for artists and graphic designers who want the best drawing tablet under $100.‍

It has a 10 x 6-inch working area and a papery texture surface, providing a wonderful experience for your digital artwork creation.

There are eight hard shortcut buttons on the left side of the device that can be customized, as well as two buttons on the stylus.

There are 4 color variants (Black, blue, green, and pink) to choose from, so you can select the one that best suits your style.

The Deco LW comes with a X3 Elite battery-free digital pen, so you won’t have to be bothered if your stylus needs to be charged.

Its 8192 levels of pressure sensitivity, ±60° tilt function, combined with 3g initial activation force, make every stroke more fluent and accurate.

It is compatible with Windows, Mac OS, Linux, Android, and Chrome OS, so you can do your drawing on any device.

It has Bluetooth capability, allowing you not to worry about carrying the USB cable if you don’t feel like it, The fact that you can still use it while it is charging makes it worth it right there.

The XPPen Deco MW tablet has the same technical specifications with Deco LW, but it offers a smaller active area of 8 x 5 inches.

2. XPPen Artist 16 (2nd Generation)

Advanced artists and professionals may elect for an upgraded model like the XPPen Artist 16 (2nd Generation).

The 15.4″ display is a comfortable size for making art work on with enough space to maneuver your arm properly – it also doesn’t take up the whole desk and is even small enough to be portable.

The display is laminated which has no gap between the drawing surface and the LCD beneath. When drawing, the line looks like it’s coming out from beneath the pen tip. there’s no parallax.

The anti-glare screen makes it much easier to draw outdoor or in certain areas, as one of the most annoying things while drawing is having lights reflected on the screen while you draw.

The resolution is the standard 1920 X 1080 FHD, which is more than enough for most artists. True-to-life color with 94% Adobe RGB and 1.07 billion colors means the tint you choose is the tint you’ll see in your final output.

The X3 Elite battery-free pen supports 60 degrees of tilt recognition and 8192 levels of pressure sensitivity. Its initial activation force is just 3g which is to say that the pen register strokes even at extremely light pressures….

Not only is it feature-rich, but it is also compatible with Windows, MacOS, Linux, Chromebook, and Android devices.

The Artist 16 (2nd Generation) tablet comes with a black artist’s glove, a free bundled drawing software (choose from artrage 6 and penCanvas), and ten spare nibs. the four color options of Black, blue, green, and pink also adds appeal to the design.

The XPPen Artist (2nd Generation) series are available in four size variants: 10,1″, 11,9″, 13,3″ and 15,4″. gives pro and amateur artists and photographers new functionality, including android support, Anti-glare coating, and X3 Chip stylus.

3. XPPen Artist 24 Pro

A large drawing tablet is quite an accessory for a professional artist. The XPPen Artist 24 Pro is an illustrator’s dream come true: a large 24″ digital canvas with very little parallax, 2K resolution, wide color gamut and the advanced pen technology.

The 24″ tablet is really big. Make sure you have a deep enough desk to be able to accommodate this beast of a tablet.

The screen with ips panel, 2k resolution (2560 x 1440 pixels) and 90% Adobe RGB color space is very crisp and it feels great to be up close to your artwork. The etched glass protector gives you a nice feel when either drawing or animating.

The PA2 stylus is fantastic. using the pen felt really natural, brush strokes are quick and crisp. It supports 8192 levels of pressure sensitivity and tilt response.

The pen has a rubber grip and comfortable to hold and doesn’t require a battery, so you don’t have to worry about charging it.

This Artist 24 Pro tablet has an adjustable stand that can give you some elevation, from 16 to 90 degrees, allowing it to be used on any flat surface or tilted to the optimal angle for viewing and drawing.

Having 20 programmable keys, as well as 2 Red Dial Wheel can make drawing convenient, which should be more than enough for any artist. The red dial wheel makes certain functionalities like zooming in & resizing the brush easier.

Is Paint Tool SAI available for iPad or Android tablets?

The straightforward answer is no, you can’t, at least not directly. You will need to connect the iPad to a windows machine and use Sai that way similar to a XPPen Artist.

Paint Tool SAI is not compatible with Android, iPad OS and Mac OS devices. SAI is only available for Windows desktop, laptop and tablets that run on Windows operating systems.

The best ipad OS alternative painting program is procreate, which is e is great value for money and costs $9.99 as a one-time purchase.

Paint Tool Sai isn’t available on the android tablet like Samsung Galaxy Tab. There are alternative desktop quality art apps like Clip Studio Paint on the google Play Store. There are other drawing apps that work will like Artflow, Infinite Painter, and Medibang paint.

If you like portable standalone drawing tablet, the Microsoft Surface Pro tablet has windows OS is your best choice for Paint Tool Sai. A compact, and powerful Multifunction drawing tablet for professionals comes with the additional benefit of increased mobility.

A pro version of the Microsoft Surface will come with a pen/stylus. So you have to have a pro version for pen and pressure sensitivity capabilities.

Conclusion

Paint tool SAI’s brush engine is still my favourite out of all the art programs. I just do all the post processing outside of SAI. I always loved brushes with tilt support, but unfortunately Sai doesn’t have that.

I think it’s the only real lightweight option for digital painting. You can work on huge canvases and lots of layers (For me, usually 4k canvas and 60+ layers) and see minimal impact on the CPU.

Big brushes are lightning fast compared to alternative softwares. It still lacks pro level color/level management. But what is offered, works really well.

Deco MW bluetooth tablet from XP-Pen is the one that I use the most because it’s convenient to carry around and I often work in different places. Even though it’s not as fancy as other tablets, it works perfectly fine for what I need in daily work.

I hope this article helps you decide which drawing tablet will suit your needs as a creative person.

(15)

Drawing tablet for vector graphics design in Inkscape

January 3rd, 2023

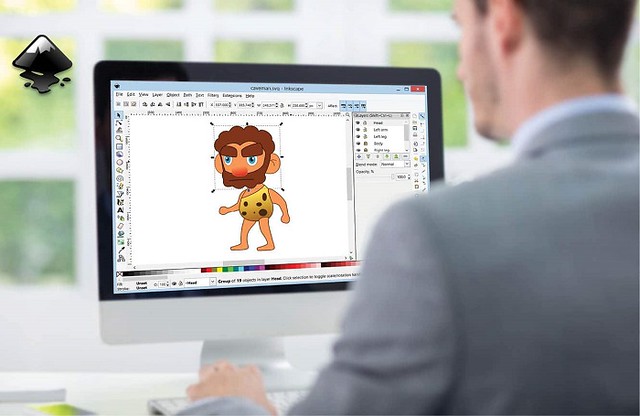
Inkscape is gaining popularity because it’s free and it offers tools that can create vector graphics.

When working with vectors in Inkscape, brushes are often considered to be vectors. This means that they can be scaled, rotated, and moved around the document without affecting the overall image quality.

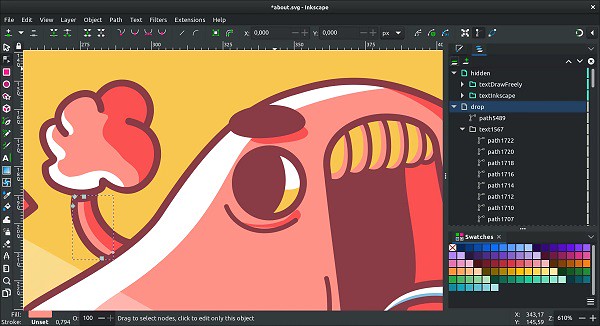
The Inkscape program has a simple interface and the tools are easy to learn, which makes it a perfect choice for self-taught beginners who are new to graphic design.

It has drawing tools and shape tools that are great for making icons and illustrations. It’s ideal for designers and illustrators who are looking for free vector design programs for digital work.

If you are planning on using Inkscape, I recommend that you invest in a drawing tablet. This will allow you to have more control and precision when creating your designs.

A good tablet can make your work in Inkscape much easier and more effective. Drawing and coloring are the best examples.

Inkscape: Best free vector graphics design software for beginners

Inkscape is a vector graphics design application that’s free to download and use on not only Windows and Mac, but also on GNU/Linux operating systems.

The interface of this software is transparent, stable, and consistent. The users get various tooltips along with useful information from this versatile and flexible software.

Inkscape provides several tools and various shapes, paths, text, markers, clones, transparency effects (alpha), transformations, gradients, patterns and groups.

Inkscape also supports Creative Commons metadata, node editing, layers, complex path operations, bitmap tracing, path-based texts, circumfluent object text, direct XML editing and much more.

The default file format is SVG, but can also compatible with important EPS, PostScript, JPG, PNG, BMP or TIP images and export PNG or other vector-based formats.

Design professionals and hobbyists create a wide variety of graphics like icons, logos, illustrations, maps, diagrams, and web graphics from this open-source vector drawing tool.

With the add-ons feature, the users can customize the functionality of this tool. The graphic designers will find it a hugely adaptable and excellent tool.

Inkscape has a dedicated and passionate user community around the world. This community produces tons of high-quality resources and tutorials that you can freely use to learn vector graphic design.

In addition, there are countless online resources available to you at no cost –guides, tutorials, and free courses– that teach you how to use Inkscape, from beginner to advanced.

It’ll also run on older, less powerful computers; however its main issue is that it has a reputation for being a bit slow and laggy. If you can live with that, however, it’s a good free option.

If you are a PC-based illustrator, a designer who is subscription-averse, or you’re unable to invest in expensive software packages, then Inkscape might be for you.

However, expect a learning curve if you are accustomed to working in mainstream products like CorelDRAW and Adobe Illustrator CC.

Inkscape vs Adobe Illustrator: What’s the difference?

Adobe Illustrator CC is a industry-standard software in vector drawing tools and applications for Windows and Mac OS. It does not run on Linux OS platform.

The biggest difference between Inkscape and Adobe Illustrator is that Inkscape is free and open-source, but Illustrator isn’t.

You can directly download and use Inkscape but if you want to use Adobe Illustrator, you need to choose a subscription plan and it can be expensive for some users.

Another difference is that Inkscape uses nodes editing and Illustrator uses the direct selection tool, which gives more flexibility.

The font and text tool in Inkscape isn’t as convenient as the text tool in Adobe Illustrator mainly because, in Inkscape, you can’t preview the text when you change font or size.

Inkscape doesn’t have the option to choose CMYK as the document color mode. That’s a big down point because there is a huge difference between CMYK and RGB color modes when you send the artwork for print.

Adobe Illustrator supports both RGB and CYMK. You can easily select a color mode when you’re creating a new document or change the color mode at any time. Generally, RGB is used for graphics that will be displayed on a screen, and CMYK is used for design items that will be printed.

Handling images in Adobe Illustrator is easier because you can freely transfer them to Photoshop, work between two programs is a plus.

Inkscape allows you to open EPS, AI, SVG, PDF, SVGZ, VSD, and CDR file formats. However, you can’t get all features for AI files when opened in Inkscape. Like Inkscape, Illustrator supports all these file formats. In addition to this, Illustrator supports CorelDRAW, Photoshop, Pixar, and AutoCAD drawing file formats.

Inkscape and Illustrator function in the very same way because they are both vector software that have the same foundation.

While Illustrator has become the standard in commercial graphic design agencies and studios, Inkscape actually allows you to make creations that are as good as those that are created with commercial software.

What is a graphic tablet?

The graphics tablet is comprised of the tablet (surface) and the stylus. This makes it possible to do very detailed work.

Graphic tablets are pressure sensitive so how hard you press with the stylus determines how dark or thick the strokes are on your screen. You can also get features like tilt sensitivity which accounts for variations in the angle of your stylus in the same way that changing the angle on a pencil results in a different stroke. This allows for a more natural way to shade your drawing, for example.

There are a few different types of graphic tablets that all function differently from one another. There is the classic graphic tablet without screen, the graphic tablet with display, and then the standalone tablet computer like an iPad Pro, Microsoft Surface Pro, or Samsung Galaxy Tab.

The first two types of tablets itself has to be connected to a computer or laptop in order to be fully utilized.

Each of these types of graphic tablets are used in combination with many different kinds of software, including graphics, animation, and sketching software. As long as it is compatible with the graphics tablet, you can use the two together.

Does drawing tablet work with Inkscape?

As they replace your mouse cursor, all graphics tablets will work with Inkscape.

Inkscape allows you to create images by drawing geometrical shapes like rectangles, elipses, lines, and curves with your computers mouse or a graphics tablet. The freehand drawing tools make it possible to draw directly onto the Inkscape canvas using the mouse or a graphics tablet stylus.

You will get the best results if you use a drawing tablet and pen. Inkscape is able to utilize pressure sensitivity and tilt sensitivity of a tablet pen that supports these features. The sensitivity functions are disabled by default because they require configuration.

Inkscape has plenty of drawing tools where the most popular one is the pencil tool which is ideal for free-hand drawing. On top of that, Inkscape features a pen tool ideal for Bezier curves or straight lines. There’s also a calligraphy tool that helps users create great-filled paths.

I have to say that I really like Inkscape’s brush tool (it shows as Draw calligraphic or brush stroke) because they are more practical and pressure-sensitive when drawing with a graphic tablet.

Taking Inkscape to Next Level

Although drawing tablets are typically more useful for applications like GIMP (a free raster photo editing software) and Krita (a free bitmap digital painting software), they do have their place in the Inkscape workspace.

A mouse will work fine for the basic functions. A drawing tablet would be good if you start using Inkscape on a regular basis, and are doing more professional work.

It is extremely difficult to create natural lines and curves with a mouse. Also, fatigue soon sets in when making a digital painting or doing heavy Inkscape work with a mouse!

Drawing tablet is an ergonomic device that combines pressure-sensitive pen delivering precision and control that’s optimized to work with Inkscape to speed workflow.

The Tablet offer intuitive controls over brushes that emulate natural media while increasing precision and speed. It allows you to create freehand digital art the same way you would with a pencil and paper.

Artists can draw clear lines, add colour, change from line to shading, and much more. The stylus (digital pen) allows the artist to use various filters and brushes in quick succession, and editing is easy once the image is finished.

The ability to edit quickly and easily is especially important for graphic artists working with editors and directors who may want change.

The drawing tablet offers customizable buttons that can be assigned to application-specific settings that works with Inkscape, putting your favorite shortcuts at your fingertips.

Choose the best drawing tablet for Inkscape

Whether you’re a visual artist moving into graphic design or you just want to bring your illustrations to life in the digital realm, a drawing tablet is a great purchase.

The price of a drawing tablet can vary dramatically from around $50 for a simple screenless tablet to over $1000 for a professional model. Professional-level tablets measure at least 4,096 degrees of sensitivity and should offer a screen resolution of 1080P or higher.

You’ll usually need to install a driver onto your computer before the tablet can be used. A download link and installation guide is typically packaged with the tablet. Once that’s installed, you’re free to start using your tablet on the image editing software of your choice.

Wacom is the brand of choice for most. I have used Wacom tablets but in recent couple years i changed to a XPPen tablet. Much, much cheaper for the same specs.

1. Nonscreen drawing tablet

Cheaper tablets tend not to have a screen. They’re just a basic plastic surface that tracks the movement of the stylus (pen) and displays it in the computer screen.

Drawing tablets that do not have a screen require a very well-developed hand-eye coordination because they’re hard to use in the beginning.

You would need to train your hand eye coordination for a while by just drawing and tracing lines over and over again until it’s second nature. By that point you should be able to draw with ease.

The entire active area of your tablet represents the entire monitor screen – place the pen in the lower left-hand corner of your tablet and the on-screen pointer will move to the lower left-hand corner of your monitor.

While it is completely possible to use Inkscape on any size of non-screen drawing tablet, even the really tiny ones like the XPPen Deco Mini4, it’s particularly hard to create anything meaningful when the drawing area is too small. If you intend to do free-hand drawing, you’ll need a large tablet.

The XPPen Deco LW Bluetooth drawing tablet I own is a non-screen tablet that connects directly to my laptop. Within a week of owning it, I already feel 10x more confident than I did at first. It’s improved my designs and has refined my ability to sketch and draw more with my hand.

It has Bluetooth capability, allowing you not to worry about carrying the USB cable if you don’t feel like it, and the tablet is well-charged.

It has 8 hot keys, easy to press, which makes it much easier to resize your brush and do similar tasks like zooming.

The X3 Elite Stylus that comes with it is battery-free, so there’s no need to charge it at all.

The Deco LW tablet works with both Linux, Windows & Mac, and it can be used with Android with the right OTG dongle (it comes with a USB-C dongle out of the box).

It has a large working area of 10 x 6 inches, a slim profile and nice specs which supports up to 8,192 levels of pressure, 60 degrees tilt sensitivity and the Initial activation force require only 3 gram.

And I recommend it because of the low Initial Activation Force (IAF). which Requires very little force with the pen to make strokes appear.

IAF is the amount of force necessary to cause the pen to output a line. Ideally, your tablet will have an extremely low IAF where the pen will output a line with the least amount of force possible.

High initial activation force (IAF) means that you have to press slightly harder for the tablet to register your pen strokes. While most people don’t mind it, I’m very dependent on light strokes during my lineart process.

You could say that Deco LW tablet is slightly more expensive than similar tablets, but you get more features & better drawing experience along with it. If you can shell out the additional cost, then I believe you will get your money worth from it.

2. Screen drawing tablet

A tablet with a built-in display is considerably more expensive but gives you better control and visibility.

The graphic display tablet allows the user to write on the tablet’s screen and see the fruit of their work exactly as one would with a pen and paper.

Not having to look between hand and screen and you also don’t have that awkward disconnect between hand and eyes.

I prefer to work with 13,3″ XPPen Artist 13 (2nd Gen) drawing display rather than Deco LW tablet, it’s just that much more intuitive and natural for me with less frustration and multiple undos.

The Full HD IPS display comes with 16.7 million colors. Combine that with the 96% Adobe RGB color accuracy and you’ve got the perfect display for Inkscape.

The screen of the Artist 13 (2nd Gen) has full-laminated technology to minimize parallax, a good anti-glare texture to prevent glare from light reflecting off the screen.

On top of that, the X3 Elite pen has 8192 levels of pressure sensitivity, ±60 degree tilt recognition and minimal initial activation force. Making your arts look as detailed as possible. The pen is also battery-free.

The XPPen Artist 13 (2nd Gen) also did a pretty good job of handling the rest of the features. For example, you’ll be getting 9 re-programmable express keys. It also support Android device connectivity via a full-featured USB Type-C cable.

It’s lightweight, available in four colors (Black, Green, Blue, and Pink) , easy to set-up, and comes with free drawing software (Artrage 6, openCanvas and Cartoon Animator 4). What more can you ask for!

Overall, the XPPen Artist 13 (2nd Gen) is a great display tablet for using Inkscape at an even greater price. If you choose this tablet, you’re bound to love it!

3. Standalone Drawing Tablet

Windows, Android and iOS devices like the Surface Pro, Samsung galaxy tab and iPad Pro take on the other drawing tablets in two ways. You don’t need another computer: just download an art app and start drawing with your fingertip or a stylus.

The good thing about the them is that it’s a standalone pen tablet, you don’t need to connect it to anything. It’s easy to carry around and work on-the-go.

The disadvantage is that since it’s a small computer, it doesn’t have much storage, processing power or even speed in comparison with most desktop computers (which drawing tablets are connected to). Also It’s a big jump in price from all the previous drawing tablets.

Inkscape is not available for Android and iPad OS Tablet but it works on Windows standalone tablet like Microsoft Surface Pro yet. I’d suggest you just try it out if you prefer the portable touchscreen and stylus. but notice that you need to buy the surface pen separately.

After buying a tablet for Inkscape

After buying the XPPen graphic tablet, using Inkscape is a completely new and refreshing feeling. I can now create all my sketches digitally which helps save me time and makes sketching even easier.

I can easily make the changes to my sketch when needed as I just have to return to that layer and go back to sketching.

Inking is a breeze because you can always get those thick perfect lines just the way you want them and if they’re not what you want all you have to do is change the brush, just like picking up a different marker in real life.

Coloring is even easier thanks to masking and sometimes I don’t even bother masking now because of how precise I’m able to get my lines.

Conclusion

Not every designer needs a graphics tablet, it’s certainly an option, not a requirement. If you do typographic design, logo, branding, or vector graphic design in Inkscape software, using a tablet is not a must.

If you’re an illustrator, then definitely yes you should get a tablet because it’ll level up your art. Lines and strokes look much more natural when you draw with a tablet than a mouse.

Using a stylus, you’ll be able to tilt the pen and move your hand and wrist in a much more natural drawing position, giving you much more control over the strokes you’re creating.

If you’re choosing a tablet for assisting daily graphic design work in Inkscape, I would say a nonscreen graphic tablet is more than enough. For digital drawing, I would go for a tablet with a screen or the All-in-one drawing tablet.

Adding a drawing tablet to your design arsenal will not only improve your work but will bring you a refreshing design experience that might even spark your next big piece!

(16)

6 Best Drawing Tablets for 3D Modeling & Sculpting in Blender and Zbrush

November 7th, 2022

If you love 3D sculpting or modeling in Blender, Zbrush, Sculptris, SketchUP, Maya….. you need a drawing tablet.

Drawing tablets and pens have always been the popular choice by animators and visual effects artists.

Working with tablets makes your work easier and allow you to create perfect models through various tools.

What is a drawing tablet?

drawing tablet is basically a computer input device which is used used for digital drawing. It is also called pen tablet, graphic tablet, or digital art pad.

You require a Stylus (Pen) to use it, it utilizes pressure sensitivity, and the tablet itself usually comes with a lot more function buttons (hotkeys).

The pen also acts like a computer mouse, giving you the ability to left and right click by using a button on the side of the pen.

It can be a drawing tablet with screen or without screen. The screen drawing tablets still needs to be connected to a computer to function, whether its a PC or Mac.

Blender vs Zbrush

Both ZBrush and Blender are amazing 3D modeling software. They are similar in the aspect of sculpting and modeling but are quite different at the core.

ZBrush is a sculpting program from Pixologic famous for its perfect digital sculpting technique. On the other hand, Blender is an open-source 3D modeling program famous for its modeling, sculpting, animating, rigging, concept arts, and storyboarding.

Blender is free to use, while ZBrush costs money. This can be a major consideration for some people, as free software is always appealing.

ZBrush is a much more robust and feature-rich program than Blender, so it may be worth the investment for serious 3D modelers.

ZBrush is better suited for modeling intricate details, while Blender is better for more general modeling.

If you’re looking to create models with a lot of small details, ZBrush is the better option. However, if you need to create simpler models or don’t need as much detail, Blender will probably serve you better.

Blender has an integrated game engine, which can be used for creating games or prototypes. ZBrush does not have this capability, so it’s not as good of an option for game development.

Both programs have a learning curve and take some time to master. But they have active communities of users who are willing to help beginners get started.

If you need to sketch a quick concept, with simple but efficient tools: choose Sculptris! which is a very feature limited version of Zbrush, but it’s free.

Are drawing tablets and pens good for 3D modeling?

In the past, most modeling work was done with a simple mouse, a keyboard. As technology evolves, 3D modeling has taken a different shape and modelers are asked to be more resourceful than their counterparts were back in the day.

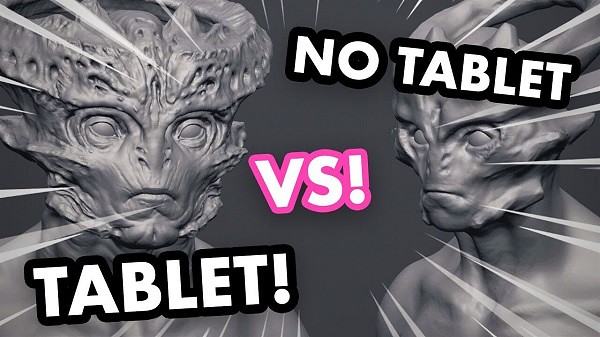
You’ll be very hard-pressed to find mice useful in 3D sculpting. Sculpting essentially requires a stylus, for best (most natural) results. 3D modeling is close to drawing so you are basically using a pen to sculpt.

If you are a 3D designer or digital artist working with a tablet is more efficient and comfortable than a mouse, especially when you use it for longer period of time. You can use it for making 3D sculpted models in softwares like zbrush, Sculptris, SketchUP, Maya, and blender…

The digital pens have a natural feel that can give you better control in drawing objects or characters. The tablet lets you work as if you are drawing on paper which allows the modeler to freely move their hand in a more natural way.

The pressure sensitivity of digital pen can be mapped to such functions as the strength or size of your stroke (The harder you push the bigger the effect). This allows you to more organically dictate how much of an effect you will have on your model as you perform such tasks as sculpting or texturing.

And you can even customize the buttons on the tablet with your favorite shortcuts conformed to individual software. Hence, with the drawing tablet, you can unleash your creativity in a whole new level. And that too, with such an extent of convenience and efficiency you never knew could be possible!

Tasks such as sculpting and texturing are probably the most suited to tasks for a Drawing Tablet and you can really benefit from using one. The pressure sensitivity helps adjust brush strength whereas the precision helps get each stroke to look exactly how you want it to.

If the tasks you are performing in 3D program only rely on clicking buttons or dragging items it really isn’t necessary. Such tasks include animation, composition and rendering.

Screen tablet vs Screenless tablet

The screenless pen tablet get connected to a computer through a USB cable or through wireless (2.4GHz wifi or bluetooth). Looking at the screen while drawing takes getting used to. but it takes up less workspace, cheaper, better for ergonomics.

Usually the disconnect between drawing on a non-screen tablet and seeing the results on your computer monitor goes away with very little practice. Some people even prefer it as neither your hand or your pen will ever cover what you are drawing.

A display tablet is a tablet that allows users to draw directly on the screen of that tablet. It’s More costly, takes more workspace, ergonomics require some setup (keyboard placement, screen placement, practicing good posture), the hand in the way thing.

But the advantages are 1:1 Interaction with the digital clay when sculpting, larger work area (though you mostly use the middle part), generally pen displays come with better colors than computer.

Even though there are many great tablets for 3D modeling that aren’t display tablets, display tablets have an advantage as it’s easier to do 3D modeling when you can draw directly on a tablet’s screen. It makes work more intuitive and you feel more connected as you are not working on a surface separate from what you look at.

I am not saying you cannot do 3D animation with a drawing tablet, many do, but if you get a chance compare working on both types. Not everyone prefers a heavier, larger, more fragile tablet however.

What should I look for in a drawing tablet for 3D modeling?

Before you go and purchase a drawing tablet for 3D modeling and sculpting, you need to know that there are certain features that a tablet for 3D modeling should have. These features can differentiate what tablet is good for 3D modeling and what tablet isn’t.

Here are a list of features you should consider when picking which tablet to buy:

Size options

Drawing tablet works in absolute mode, each point on the tablet maps to a point on the screen. for optimal experience and precision, buy a tablet that matches (roughly) your monitor dimensions.

Generally, with drawing tablets, the bigger the device, the larger the drawing area. However, as the surface area increases so does the price of the tablet.

The working area you should opt for is dependent on your convenience, preference, mobility, desk space, and the magnitude of artworks or sculptures you need to create.

You’d require larger models for producing bigger artwork as it’ll require wider hand movements and vice versa. But smaller ones can be ideal for portable use or when you are short on space.

Stylus Pen

The Pen is one of the biggest factors to consider when purchasing a tablet. It has to be comfortable to hold for extended periods of time. It needs to feel natural and fit in with your workflow.

The pens come in 2 types. Battery-Free Electromagnetic Resonance pens which as the name suggest do not require to be charged and pens with batteries requiring charging.

Opting for battery-free ones would be a smarter move as it would eliminate the hassle of recharging. It relies on the electromagnetic signal being sent from the pen to the tablet.

Other features you need to consider are the pen’s pressure sensitivity, resolution (Lines Per Inch), Responsiveness (Report Rate Speed), tilt function support, etc.

Pressure Senstivity

High levels of pressure indicate a more sensitive stylus which can detect even the faintest difference between the pressures exerted.

It can provide the most detailed outputs as you’d be able to produce lines of a more versatile range of thicknesses and opacities.

When purchasing a drawing tablet it is pretty standard to have 8192 levels of pressure sensitivity this is basically a measure of how responsive a brush is to pressure. Some cheaper ones with will have half of that with 4096 levels.

8192 levels is preferred for 3D Program however 4096 is adequate. This ensures if you need to make any adjustments to the pressure curve (how hard you need to press to get the desired result) you still have a reasonable amount of levels to do so.

Responsiveness

Report Rate Speed measures how many times per second the tablet sends information about the stylus position & pressure back to the computer. Usually, above 200+ RPS is ideal for drawing.

The tablet for 3D modeling should also be highly responsive to your pen strokes or other inputs. This is crucial for receiving the most realistic sculpting/drawing feel as a laggy device will not only be annoying and time-consuming, but will also result in inaccurate outputs.

Lines Per Inch

Lines per inch (LPI) refers to the resolution of a drawing tablet. The LPI determine how well a tablet can pick accurate strokes and tiny details.

For 3D modeling, you need a tablet with at least 2540 LPI. This LPI is sufficient to provide enough detail for your sculptures and illustrations. Depending on what you want, you can go for tablets with higher LPI, even reaching 5080 LPI.

Tilt Function

You will also note that a lot of the pens have tilt senstivity support. This is irrelevant in 3D Program as it is not supported so don’t be concerned over this function.

Tilt support on a drawing tablet just means that when the pen is tilted, it will result in a different size of the brush. It’s definitely not necessary, but can sometimes make drawing with a tablet feel more “organic” or similar to traditional art tools.

Hotkeys

Hotkey and shortcut keys is where having a tablet for 3D modeling can really come in useful. The need for keys to navigate, masking, smoothing and even undoing soon add up. the more the better.

Wireless Connectivity

this is one of the things that can make a noticeable difference in terms of comfort while using the graphics tablet. A wireless drawing tablet is always a good thing as it reduces the amount of cables over your desk and allows you to work more comfortably.

The wireless tablet can connect to your computer wirelessly via 2.4GHz Wifi technology or Bluetooth technology, with a wireless range of up to 10 meters.

Your non-screen pen tablet can operate wirelessly or in USB cable mode, but not both at the same time.

Pen display monitors generally use 3 cables to connect: a HDMI cable for video, a USB cable for data, and a separate power supply cable.

Some screen tablets however include a convenient 3-in-1 cable that incorporates the 3 functions in one cable, reducing the amount of cables over your desk and helping you keep a much tidier workspace.

Some newest pen display models support usb-c connection, which hailed as one connection to rule them all, it was developed to handle power, data and video, and it was drop-dead simple to use. you just need one cable to connect to your laptop.

Compatibility

The drawing tablets on the market are compatible with almost all operating systems, including the Windows, Linux and Mac OS.

Some new models even support Android and chrome OS devices. Therefore, no need to fret over that since you can connect to practically any device and resume your work.

Basically, any tablet that is compliant with a stylus is good enough for using 3D modeling programs.

Other features to Consider When Buying pen display monitor

A good tablet (≤22-inch) has a screen resolution of at least 1920 x 1080 or more, so that the colors are sharp and crisp.

If two screens both with a 1080p Full HD resolution. the smaller monitor will have a more densely packed pixel density, resulting in smoother lines and sharper images.

The color gamut describes a range of colors within the spectrum of colors, or a color space, that can be reproduced on an output device. The most commonly known color gamut might be “NTSC” ,“sRGB” and “Adobe RGB”.

In-Plane Switching (IPS) panels are the ideal panel technology for monitors for graphic design because they feature a brighter display and higher color accuracy, giving you a clear and real-life color image.

Compared to non-laminated screen, full-laminated screen can effectively reduces parallax and brings the pen tip closer to the cursor, allowing for more accurate positioning.

A matte display comes with an anti-glare coating that helps minimize reflections on your screen. but the image quality in displays with matte finish is not as sharp or bright as a glossy screen.

6 Best Drawing Tablets for 3D Sculpting & Modeling

Choose between Pen tablets without a screen, or a screen graphic tablet for ZBrush and Blender, whichever you choose, there is definitely something for you.

If money is not the problem and you need the best drawing tablet, get a Wacom. Wacom is the industry standard and they make fine products.

If you are a beginner then XPPen is the best option. XPPen is a nice option for the drawing purpose with reasonable price. which might give you a bit more for the same price.

As a leading graphic tablet manufacturer, XPPen tablets allows you to draw, paint, and create amazing artworks. you really can’t go wrong with either one.

1. XPPen Deco 03

The XPPen Deco 03 is one of the best tablets for 3D sculpting. This tablet comes with a bunch of features that make it excellent for professional 3D modeling work. Best of all, it is quite affordable.

It features a 10 x 5.62 inches active area with papery texture surface, so you have plenty of space to create and get work done.

The Deco 03 tablet can be used wirelessly or wired. For wired use, you simply need to connect the USB cable a PC. For wireless use, the tablet has an ISM 2.4G USB receiver.

The battery of the Deco 03 tablet charges quite fast. With 2 hours of charging, the tablet will be good for use for up to 16 hours.

The tablet features 6 programmable shortcut keys and a red roller wheel. This will make your sculpting work easier.

This stylus P05 does not need to be charged since it is battery-free. and it has a high 8192 levels of pressure sensitivity. Therefore, your strokes will feel natural and the drawings or 3D models come out life-like.

2. XPPen Deco Pro

The XPPen Deco Pro tablet features a very sleek and unique design with silver aluminum alloy casing, which gives this tablet a much more beautiful and durable feel.

It has 8 programmable keys for functionality, however what is really cool is the double wheel deign. You could map one to brush size the other to zooming for instance.

The Deco Pro is available in two sizes, small (9″ x 5″ drawing surface) or medium (11″ x 6″ drawing surface), but these should not be confused with Wacom’s small and medium sizes as XPPen’s small and medium sizes are much larger!

The Deco Pro MW & Deco Pro SW version features Bluetooth connection option. So you can work wirelessly by pairing your tablet to a computer by Bluetooth.

It comes with PA1 battery-free stylus which has 8,192 levels of pressure sensitivity, has virtually no lag, and has a natural tilt response, making each stroke more organic.

Compatible with Windows, Mac, Linux, Chrome OS. It is even compatible with Android OS, so you can connect it to your Phone or tablet.

3. XPPen Artist 13 (2nd Gen)

The XPPen Artist 13 (2nd Generation) is a well-positioned entry into the budget drawing tablet market that costs only $300.

The 13.3-inch display size with 1920 X 1080 pixels of resolution is ideal to carry around.

The tablet’s color gamut is incredibly high with 96% Adobe RGB. The screen shows 16.7 million colors. Therefore, you can be as creative as you want when it comes to coloring your models.

The fully laminated technology and anti-glare screen coating reduces parallax to create a pen-to-paper feel.

It comes with 9 fully customizable express keys on the left side. It allows for different key setup for different programs.

It can connects with a single USB-C cable or 3-in-1 Cable to your computer. but the single USB-C cable is sold separately.

The Artist 13 (2nd Gen) tablet offers precision control when sketching, sculpting, or drawing when bundled with the stylus X3 Elite.

The stylus is powered by the X3 smart chip, without the spring mechanism, have a reduced initial activation force to just 3g. offers better stabilization, sensitive and accurate.

The device offers three other display size variants – 10.1-inch, 11.9-inch and 15.4-inch. which has almost same technical specifications.

4. XPPen Artist 15.6 Pro

The XPPen Artist 15.6 Pro is a 15.6-Inch creative graphic display with 1920×1080 FHD resolution.

The color gamut is also incredibly high with 120% sRGB. Showing you 16.7 million colors on the screen, this is loved by professionals who work in 3D animation and have to deal with multiple colors and shades.

On the Artist 15.6 Pro tablet, the glass and LCD panel are laminated into one piece, which reduces or eliminates parallax. the parallax will not bother you.

The pre-applied, and replaceable film cover’s anti-glare properties reduce reflections considerably.

The tablet has 8 fully customizable shortcut keys, alongside the unique red dial, which can be programmed to zoom in and out, alter brush sizes, and so on.

The stylus is battery-free and boasts 8192 levels of pressure sensitivity, as well as 60 degrees of tilt functionality. It is easy to maneuver, and you can change the angle at which you work.

The Artist 15.6 Pro is unquestionably an excellent product and value for money for all the 3D artists and designers out there.

It also offers two other display size variants – 11.6-inch and 13.3-inch. which has almost same tech specs.

5. XPPen Artist 22R Pro

With a 21.5-inch IPS screen, you get a lot of space to let your creative juices flow.

The resolution of XPPen Artist 22R Pro tablet is 1920 x 1080 pixels. and will display sharp images and provide a good drawing experience.

The tablet performs great in terms of vibrancy and color accuracy. Its display is capable of producing rich colors that cover 88% NTSC – 120% sRGB color space.

This tablet includes an adjustable stand that allows you to adjust your work level. It is compatible with popular 3D software packages.

It includes 20 customizable hotkeys and 2 red-ringed rotary wheels that can be customized in the tablet’s driver settings.

The pen is battery free and has all the features of more expensive tablets like 8192 points of pressure senstivity, 60-degree tilt functionality, 200RPS report rate.

The buttons on the side of the pen can be assigned to things like mouse clicks etc. It comes with an artist glove included for less resistance while working.

This model is ideal for those who want a big screen to work on. The larger the work area, the more control you have over your final outcome.

If you don’t need the hotkeys, you can get the XPPen Artist 22 (2nd generation) in the same size at a much lower price than the Artist 22R Pro.

6. XPPen Artist 24 Pro

This is a huge, heavy, well-built monitor. Boasting a 23.8-inch workspace with the attached adjustable stand. the monitor can adjust from 16 degrees up to 90.

The tablet’s screen resolution is 2560 x 1440. This high resolution allows you to create models with superior color quality. Your modes will be both vibrant and detailed.

The XPPen Artist 24 Pro has a 90% Adobe RGB color coverage, looks very vibrant, and is capable of displaying subtle differences between the color tone which are not distinguishable on generic computer monitors.

It comes with a textured film overlay bringing the feel of drawing on paper. This helps to give it a real pen on paper feel, which always works to bring out the most natural finishes.

It has 20 customizable keys on the two side of the tablet as well as 2 red dial wheels for changing brush size, etc.

The PA2 battery-free stylus provides 8,192 levels of pressure sensitivity as well as tilt response, ensuring superior definition of even the finest lines.

XPPen provide a non shortcut key version and you can save $100.

Conclusion

The possibilities of drawing tablet are endless! you can draw, you can retouch or restore pictures, you can make digital paintings with greater accuracy than a mouse, you can make past of your design work flow be faster, you can use it as a mouse and click on things, scroll things.

Pen Tablets are great for 3d art they aren’t only used for 2d. If you are a professional, beginner, or hobbyist I can almost assure you will see the benefit in having one provided you are performing the kinds of tasks that will best utilize its features.

They are a really fun tool to use and one I personally couldnt function without one. I have a XPPen Artist 15.6 Pro tablet and use it daily for Blender work. It is most useful for sculpting, texture painting, and grease pencil.

At the end, it will really come down to preference and what you’re able to get used to and be comfortable with. Kindly take note that these are just tools and won’t be an instant thing that will make you a good sculptor. Good luck with your decision and happy sculpting!

(9)

6 Best Drawing Pads for Tattoo Artists to Create Design

September 23rd, 2022

Tattoos are a great way to express yourself and your personality. those with tattoos are usually very proud of them.

Tattoos have become less taboo and more of a trend in recent years.

Tattooing is a permanent choice, so it is important that the design is well thought out and executed flawlessly. one thing that remains the same about getting inked is the ability to design your own meaningful tattoo.

When it comes to sketching out a tattoo design, artists have a few different options for tools. The most common and classic tool is the pen and paper method.

Using a pen and paper gives the artist a lot of control when it comes to the line work and details of the tattoo.

Another popular method is using a computer program to design the tattoo. This can be anything from a basic drawing program to a more complex tattoo specific program.

This method is becoming more and more popular as it gives the artist a lot of freedom to experiment with the design and make changes quickly and easily.

Tattoo artists print the design on a special transfer paper, then transfer it to the client’s skin. This makes any tattoo designed in art programs like Photoshop easy to get permanently drawn onto your skin.

I loves the fact that it saves on paper and sketching time and it’s so easy to add layers and remove lines. Being digital it’s backed up in the cloud, so I’m not hunting through masses of paper trying to find that sketch, for the client who’s in the waiting room !

Tattoos are art just like anything else, they just have different styles and rules that make them special. Once you get the hang of drawing and coloring and shading in general, you can apply what you’ve learned to tattoo styles.

7 Best Tattoo Design Software & Apps

Whether you’re a tattoo artist or someone looking to get a tattoo, there are plenty of design apps to aid your decision.

While using an app from the Apple App Store or Google Play is the most common, many revert to using software like Adobe Illustrator or Photoshop. That being said, you should use the option that best fits your budget and skills in technology.

Procreate
Procreate is great for “painterly” work and pencil sketching because of the minimalist interface, Available only on iPad, and packed with features artists and creative professionals love.

One of the biggest advantages of this app is that the default brush sets are beautiful and they are fully customisable.

Moreover, you can create your own brush/ brush set to meet your own drawing needs.

Moreover, the powerful “Adjustment” function located at the top left corner in Procreate (icon looks like a magic wand),

allows you to apply various effect to the selected layer, including Blurs, Sharpen, Noise, Hue, Saturation, Brightness, etc.

In almost no time at all, Procreate has become the essential tool for digital illustration on the iPad due to its intuitive interface and the variety of resources and artistic styles for which it can be used.

Designing digitally makes it easy to create perfect lines for stencils, present work to clients, and quickly resize designs during an appointment.

Adobe Fresco
Adobe Fresco replaced the two previous mobile drawing apps from Adobe, Photoshop Sketch, and Illustrator Draw. both were discontinued for iOS and Android and are no longer available for download.

Adobe Fresco is a powerful new iPad app that combines your favorite Photoshop brushes with vector brushes and Live brushes.

This new functionality allows you to “paint with watercolors and oils that blossom, blend, smear, and smudge just like the real thing.” Since vector brushes are also an option, you can create crisp, clean lines that are infinitely scalable so you can print your masterpieces at an size.

Adobe Fresco has the power of the Photoshop painting engine. It’s USP, the “real-time brushes” that duplicate the communication of ink or paint with paper. Its element of the specialist system jobt hat Adobe brands like Sensei.

Adobe Fresco is free for the basic version, but like all things Adobe, there’s a monthly fee for more advanced features and Photoshop Creative Cloud integration. If you have an iPad and an Apple Pencil, it’s worth downloading the trial just to check it out.

Some tattoo flash I did on Adobe Fresco. It’s got a super neat watercolor live brush. Works like a charm!

Clip Studio Paint
Clip Studio Paint Pro is the perfect program for artists on a budget since it doesn’t cost very much but still provides plenty of vector and brush tools for you to create professional-looking comics.

For more detailed work for both lineart and painting, I prefer CSP due to it’s more advanced features. I don’t use CSP for manga/comics or animation, but I use it kind of like a better Photoshop geared towards illustration and general digital art.

It is definitely more complex and takes a lot of time to learn, but it has a lot of features that Procreate just doesn’t even try to have.

For example, the vector options alone would probably be worth the price for you. You can draw a line and then pull/adjust it into place. The inking brushes are extremely smooth and crisp. Anything that involves inkwork is going to be better on CSP than Procreate.

The most impressive feature of this is how easy it is to draw. The brushes “feel” natural and drawing is smooth. Changing sizes and shapes are intuitive and line weights react excellent from graphic tablets.

Available on Windows, macOS, iPad, iPhone, Android & Chromebook. You don’t need a new device to make pro art!

Adobe Photoshop CC
Photoshop is one of the most popular and powerful photo editing software programs used by tattoo artists. It allows them to create custom designs and make changes to existing designs.

In addition to providing a complete photo editing experience, Photoshop is a great drawing program for improving drawings. Many digital artists use this system to make beautiful images.

You can use it to draw up all kinds of tattoo designs and ideas. The program features layers, freely zoom for finer details, and a variety of other drawing tools. The Pen tool and Freeform tool can be used for drawing on a blank canvas.

There are several painting tools available in the Photoshop application. The Brush and Pencil tools are used as traditional drawing features to apply color with strokes. You can use the Eraser, Blur, and Smudge tools to modify the image further.

Making tattoo art in Photoshop is a lot more straightforward than you probably think it is.

Adobe illustrator CC

Adobe Illustrator is a magical software. Rich in features and functionalities, it provides infinite opportunities for designers to create any sort of design. The interface is intuitive, the toolset is impressive, and the number of tutorials you can refer to whenever you are stuck with your design makes it a top-choice for every designer.

you can create a tattoo vector illustration in Adobe Illustrator. it has powerful shape tools. you can make curves faster, shade with mask and blob brush, and color quickly.

Adobe Illustrator CC is an industry-standard tool in vector drawing and editing for professional design and artwork.

Rich in features and functionalities, it provides infinite opportunities for designers to create any sort of design. The interface is intuitive, the toolset is impressive, and the number of tutorials you can refer to whenever you are stuck with your design makes it a top-choice for every designer.

you can create a tattoo vector illustration in Adobe Illustrator. it has powerful shape tools. you can make curves faster, shade with mask and blob brush, and color quickly.

I have used Adobe Photoshop for sketching, Then I transfared the sketch into Adeobe Illustrator. Inking process is important for defining outer lines of your artwork. Try to crate all lines as clean as possible when inking process. This will huge impact your final result of artwork.

Medibang Paint Pro
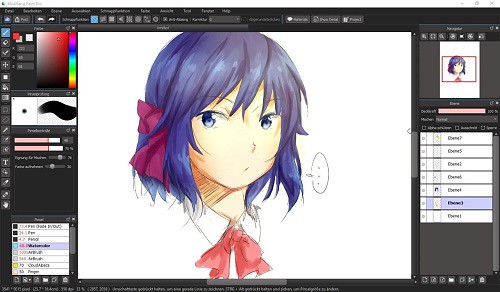
If you’re looking for a free app to draw and design your tattoos, then MediBang Paint is the one for you. Initially created as a comic creation app, MediBang is a great graphic app that you can use to design a tattoo for yourself or your clients.

It offers multiplatform support and is available for Android, iOS devices (iPhone and iPad), Windows, and macOS. You can use the app to draw and paint gorgeous tattoos. Start a design on your PC, then take it over to your iPad or Android tablet with ease.

You can use it to import photos to help create or design a photo tattoo. MediBang also has a network of users that you can share your work with when you create an account. That’s a great way to get your work out there, besides the traditional social media route.

While the app does have ads, they don’t disrupt the creative process. It may not replace the likes of Photoshop or the beloved Procreate. However, MediBang is a simple, yet powerful drawing app that any tattoo lover or artist would enjoy.

Autodesk Sketchbook Pro

Autodesk Sketchbook is one of the easiest to grasp designing/ sketching apps out there. Used by concept artists, designers, architects, and even Tattoo Artists. it is one of the go-to options for deigning.

It lets you create basic sketches and convert them into intricate designs with minimal efforts. It is opted by professionals looking for clarity and speed when working on their stylistic projects.

Users can also capture ideas on the go since the software lets users use device cameras as scanners.

It helps digital artists and illustrators design with professional-grade perspective tools and intuitive user interface.

Works with graphics tablets. Changing the size of the brush is very intuitive – this operation can be performed using a keyboard shortcut or a special toolbox.

It is a popular app suitable for all systems – iOS, Mac OS, Windows and Android. You can sketch, draw, and paint on any platform it’s badass !

what drawing tablets do tattoo artists use?

If you’re a graphic designer, illustrator, or digital tattoo artist you’ll know that a drawing tablet can boost your creativity and streamline your workflow.

You can use a graphic tablet such as Wacom or XPPen to create and use calligraphic brushes in digital painting software.

Almost all graphics tablets for tattoo design have a number of sensitivity levels (some as few as 2000, others can go over 8,000.

A pen with high pressure sensitivity picks up even light pen strokes, making it easy to create different shades and shapes without digital augmentation.

In the same vein, many pro-grade tablet pens feature “60-degree tilt,” which allows you to press down on the pen tip from many angles, offering much a wider range of marks, and less frustration.

Before we jump in, it’s important to make sure you understand the difference between the different types of graphics tablets.

There are 3 types of drawing Tablets for Tattoo Sketches:

Classic drawing pad

Don’t have screens are more common and affordable. They’re basically large, pressure-sensitive trackpads that you control with a special stylus.

Using a classic Pen tablet for beginners like xppen deco 01 v2 can still work really well, but it takes some time to get used the hand-to-eye coordination.

Screenless is a great affordable option for a beginner don’t concern yourself with what the pros are using get what works for you and fits your needs now. Your equipment will grow with your skills as and when required.

Pen display monitor

Built-in external monitors that hook up to your computer. Drawing directly on the screen is really nice to have, similar to the pen-to-paper drawing, however, these tablets also come at a much higher price tag.

They offer a natural experience and help take your creative ideas and illustrations to the next level. Apart from looking stunning, you can draw or paint directly on the screen using your favourite 2D Software or 3D Software which makes it more intuitive and responsive for the digital tattoo artist to use.

I recommend that tattoo artists use drawing tablets with display, the possibilities presented by having a digital surface with countless colors and hues means that anyone with enough skill and creativity can find a way to apply digital capabilities to physical objects.

XPPen is a great brand, and I recommend their Artist line there’s a variety of sizes there, so just browse the specs and see what best suits you. Their products are quality and their customer service (should you ever need them) is good too. XPPen Artist have to be plugged to your computer and to the wall to work, but give you the freedom to use all your desktop apps.

Standalone Pen Computer

The main want/need for this type of tablet is to be portable, and have a decent battery life. This is because the tattoo artist wants to continue drawing the hours away from the comfort of being outside, or in different areas of their house without needing to be plugged in.

Standalone drawing tablets, such as the iPad Pro, Surface pro, and samsung galaxy tab, function without being connected to a laptop. extremely portable, good battery life, and works great, so you can draw on the go.

This types of tablets also comes with a pressure-sensitive stylus offering features designed to replicate the experience of drawing, writing and sketching on paper, with a real pen or pencil.

The ability to take a picture (fitted with a camera) and instantly edit it, or use it as a template for an illustration or concept drawing, is priceless for many creative users, such as tattoo artists, muralists, and sculptors.

One of the main disadvantages of buying a standalone drawing tablet like iPad for drawing is the cost. Even the cheapest iPads are much more expensive than other drawing tablets, which is why it’s best to think about how you want to use your tablet before you set a budget.

6 Best drawing tablets for Tattoo Artists: Reviews & Recommendations

Now that you know the basics, it’s time to go out and pick the best drawing tablet for you.

1. iPad Pro
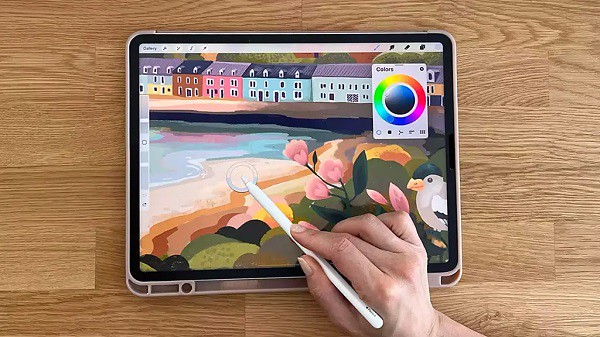
iPad Pro with apple pencil is a great tool for tattoo work and can make creation of any tattoo design a lot easier and less time consuming.

The 12.9 inch large screen will feel as big as a laptop, plus apple pencil will blow your mind with on intuitive and reactive it is. Procreate drawing app is great for doodling, sketching, and doing linework .

As far as screen quality goes ipad pro is great, it’s a glass screen, offering a resolution of 2048×2732 pixels at a pixel density of 264 pixels per inch (ppi). plus the super retina hd display tech of apple is supposed to be really good.

The display can refresh at up to 120Hz and supports dynamic refresh rate switching. It also has lower reflections, DCI-P3 color space, True Tone, and HDR video.

Apple Pencil is considered one of the most advanced styluses in the market and known for its consistent, smooth, and reliable performance.

Drawing has a better feel thanks to the speedier processor. The higher refresh rate also ensures that latency when using the Apple Pencil is reduced further to 20 ms.

As for the cameras themselves, the rear-mounted 12MP wide and 10-MP ultra-wide sensors take great photos.

2. Samsung Galaxy tab S8 Ultra

Incredibly slim, sleek design, a brilliant, punchy screen that’s expansive – perfect for watching, photo editing, or sketching on, and plenty of power help Samsung’s Galaxy tab S8 Ultra stand out.

With Samsung’s AMOLED screen technology, which is incredibly deep, vibrant, and rich, which is one of the finest and most color-accurate displays out there with support for HDR10+.

The 14.6-inch display supports a resolution of 2960 x1848, plus the high 120 Hz refresh rate makes every touch and pen input interaction feel very smooth.

The display looks beautiful. Bezels are thin. Colours are vibrant and display is bright. All visuals look sharp.

The included S Pen is well built, has a matte textured surface, nice to hold, has one side button and a firm rubberised tip.

The S Pen is almost cylindrical, and it feels more natural on first use given the softer, more pen-like tip. supports up to 4,096 levels of pressure sensitivity with tilt recognition – and it works great.

This is the best Android tablet for creating digital art and tattoo design.

3. Surface Pro 8
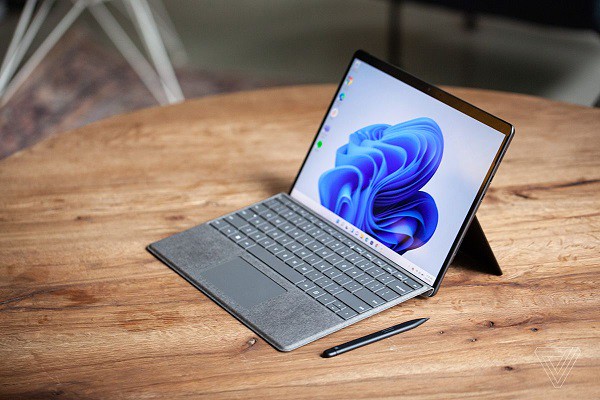
The Surface Pro 8 is an excellent tablet that comes with Windows 11. Digital creatives will love the power on offer here in a tablet form factor, but you’ll need to spend extra for a stylus.

It comes with a 13-inch PixelSense display with a resolution of 2,880 x 1,920, and at this screen size, that leads to a fantastic looking display with pin-sharp details.

On some models you can now up the refresh rate from 60Hz to 120Hz. it makes using a stylus for doodling even more responsive.

The most advanced versions featured an Intel Core i7-1185G7 processor with integrated Iris graphics, 16GB of RAM, and 256GB of storage. You can opt for an i5 model with half the RAM and storage, but performance will take a hit.

The image is very sharp, because there with a good 10MP rear-facing webcam and a 5-megapixel front-facing camera, which can capture video/image in 1080p.

Surface Pro 8 battery lasts only 6~8 hours on average use but advertised to last 16hr! Good tablet, good pen, not so good battery life.

If you want a capable tablet but don’t want to switch to iOS or Android, the Surface Pro 8 is a great choice.

Unlike iPads or Android tablets which run mobile operating systems, the Surface Pro 8 isn’t limited to mobile apps. So, you can run full Windows apps such as Adobe Photoshop, while still benefitting from the slim and light tablet form.

4. XPPen Artist (2nd generation) series

The XPPen Artist (2nd generation) is a pen display. Basically a second monitor that plugs into you Windows or Mac computer allowing you to draw in it with the included pen.

The resolution of these displays are FHD, that’s 1920 x 1080 pixels. On the 10.1” / 11.9” / 13.3” / 15.4” display of the XPPen Artist 10 (2nd gen) / Artist 12 (2nd gen) / Artist 13 (2nd gen) / Artist 16 (2nd gen) that looks really nice and crisp.

The IPS panel can reproduce 1.67 billion colors and features ≥ 90% Adobe RGB color gamut the colors and accuracy are amazing.

XPPen Artist (2nd generation) series is equipped with an anti-glare glass, which makes the screen can virtually eliminate reflections and reduce eye strain.

The display is laminated so there’s no gap between the line and the pen tip. it’s meant to remove parallax, ensures the cursor will always follow the pen nib closely.

The X3-Smart-Chip battery-free digital pen is a very popular stylus amongst artists and is known for its accurate tracking and well-balanced pressure sensitivity.

Initial activation force of the pen is low to 3g and thin lines can be drawn easily even with a thick brush selected.

The tablet also comes in four colors: Black, Blue, Pink, and Green. which is quite rare to find.

This tablet is compatible with windows, macOS, ChromeOS, Linux, as well as Android phones / tablets both via USB-C or HDMI wired connectivity.

It also comes loaded with ≥ 6 customizable express keys that you can set for general usage and your most-used tools/key commands to keep keyboard use to a minimum while working.

The reverse side of the tablet features four rubber feet to help keep it secure on most desks/tabletops to avoid any slips and shakes while editing.

On paper the XPPen Artist (2nd generation) looks very good indeed. It’s commonly agreed that XPPen do a good line in affordable and good quality screen drawing tablets.

5. XPPen Artist Pro series

It is very important for a drawing tablet to have a color-accurate screen. The XPPen Artist 12 Pro / Artist 13.3 Pro / Artist 15.6 Pro comes with a 11.6″ / 13.3″ / 15.6″ screen which covers 100% sRGB / 120% sRGB / 120% sRGB color space. it is decent enough.

The screen’s quite sharp thanks to the FHD resolution of 1920×1080 pixels, the colors are pretty punchy for an IPS panel, and it gets sufficiently bright.

The fully laminated display technology reduced the parallax to the lowest level, which means a thinner profile, improved display quality, better outdoor visibility, wider viewer angle, more accuracy. Drawing experience are really good.

XPPen provide a high-quality matte screen protector for the Artist 12 Pro / Artist 13.3 Pro / Artist 15.6 Pro drawing monitors, it support anti-glare and radiation protection. Plus you get extra scratch and drop resistance and an oleophobic coating to see off greasy fingerprints, too.

The Artist 12 Pro / Artist 13.3 Pro / Artist 15.6 Pro comes with some of the very unique features – like the red roller wheel, combine with other 8 programmable shortcut buttons on the tablet. you can get things done faster with the quick access to shortcuts.

Features a non-slip rubber grip design, the Battery-free digital pen PA2 will bring you a comfortable & stable grip that helps to relax your mind and enable you to come up with more creative ideas.

The 200PPS data transfer rates, 5080LPI in resolution, ±60° tilt function and 8192 levels of pen pressure sensitivity allow getting a professional level of drawing (make the thinner line with one simple movement).

XPPen’s Artist Pro tablet is one of the most compelling entry-level graphics displays on the market. It’s lightweight, well-built, highly customizable, color-accurate, and all for a reasonable price.

6. XPPen Deco MW / Deco LW

Loved for its thin and light design, the XPPen Deco MW / Deco LW comes in 4 gorgeous colors: Black, blue, green, and pink.

The XPPen Deco MW / Deco LW has a active drawing area of 8″ x 5″ / 10″ x 6″. It’s light, thin, and easy to maneuver around on the desk, but has rubber feet to help keep it from sliding.

The tablet’s enhanced effective surface also gives more friction to the tips, which gives a feel that is similar to writing on paper with a pencil.

There are a row of eight express (shortcut) keys along the side. The tablet can be turned so the keys are on the left or right side depending on if you are right or left-handed.
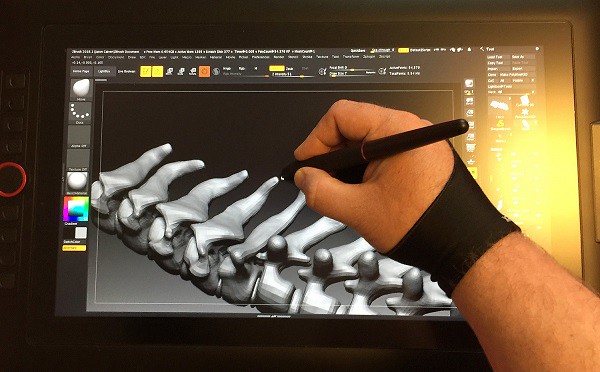
This tablet has a resolution of 5,080 lines per inch, and the pen has 8,192 pressure levels and can be used tilted down up to 60 degrees on either side.

The battery-free Stylus used the X3 Smart Chip has a more stable pen tip, less latency and better durability, as well as improved precision.

The XPPen Deco MW / Deco LW packs a 1,000 mAh battery which can last up to 10 hours of continuous use. This operates the Bluetooth 5.0 connectivity that uses significantly minimal power while maintaining very low latency.

This tablet is compatible with windows, macOS, ChromeOS, Linux, as well as Android phones or tablets both via Bluetooth or wired connectivity.

The two XPPen Deco MW & Deco LW tablets are thin, lightweight and stylish. But yet feels solid due to a high-quality plastic build.

It works flawlessly and provides a professional experience at lower cost.

Final Verdict

I make this guide for anyone wanting to learn or improve designing tattoos.

Some drawing tablets are ideal for beginners while others boast advanced features and technology that are suitable for professionals.

I’m a professional artist and for me, a PC and dedicated drawing tablet like wacom cintiq or XPPen Artist is an absolute must, while the iPad is nice to have but not necessary.

Personally, it feels more natural drawing on a screen tablet than an iPad because of that- a matte screen protector could help with that (I have one on my iPad).

There are professionals who can use iPads for their main workflow so it really depends on you!

Pen displays generally speaking provide better value for money simply because it’s cheaper. Eg a XPPen Artist 15.6 Pro 15.6-inch pen display is around US$370. And there are so many brands to choose from.

(12)

7 Best Portable Bluetooth Wireless Drawing Tablets for laptop and pc

September 8th, 2022

Many photographers, illustrators, artists, and graphic designers often use drawing tablets for digital illustration or photo retouching jobs because it is more convenient and enjoyable than just using a mouse.

By using a drawing tablet and computer program you can select from all sorts of different tools and settings. Choose from endless brushes including watercolour, calligraphy and even chalk. Then there are the limitless colour selections on offer.

The freedom to not only draw with any pen, whether it’s a fine fountain pen or a thick marker, but also edit your designs however you please, whether that’s increasing their size, duplicating sections, or changing colours, the power to create the most amazing designs is at your fingertips.

Drawing Tablets have two types of connections: standard corded and wireless Bluetooth. The main limitation of the cable is the distance in which its transmissions can travel.

You require a wireless portable graphic tablet if you’re operating as an artist or visual developer. This convenient tool lets you mark wherever you are and make digital skills with comfort.

The most reasonable wireless bluetooth drawing tablets for laptop are lightweight, responsive, and make editing effortless. It’s a stage up from your traditional pen and paper, permitting you to perform on the go. Then, you can mail it to customers or transfer it on social media in moments.

Wireless Support

Having wireless connectivity is a very nice feature. It’s both nice if you plan to place the tablet on your lap, or in case you plan to carry it around with your laptop.

It makes it easier to move it around, so you will appreciate it if you plan to use wireless drawing tablet with your laptop on the go.

The Wireless drawing tablet connects wirelessly via the USB dongle or bluetooth. But it still giving users the option to use the wired USB connection when desired.

In case the tablet’s battery needs to recharge, you can still use it while you’re charging it. You can turn wireless off via the switch on the side in case you don’t want to use it as well.

Now to be honest, while wireless connectivity is lovely, especially when it doesn’t cost much. It sometimes doesn’t work as reliably as cable. It depends on the tablet.

Wireless USB vs Bluetooth USB connector

Bluetooth and WiFi (2.4GHz) are extra norms for wireless transmission.

Bluetooth advancement is helpful when communicating data between two or more appliances that are around each other when the pace is not a problem, such as printers, telephones, headsets, and modems. It is excellently done to low-bandwidth applications like driving sound data with telephones or byte data with hand-held computers (transmitting files) or keyboard and mice.

Wi-Fi (2.4GHz) is excellently done for working full-scale webs because it enables a more direct link, more helpful content from the ground station and more useful wireless protection (if configured correctly) than Bluetooth.

Different wireless tablets like the XP-Pen Deco Mini7w links utilize a wireless USB receiver. The receiver ought to be bonded to the USB port of your tablet.

This gets to the foremost point, the enclosed wireless connector has a USB type A plug, which is fast disappearing from most of the current laptops.

Most computers and portable appliances marketed nowadays come only with a Type-C USB port. This implies you have to utilize a dongle or a USB Hub, which is not an excellent answer.

Wireless drawing tablet with screen

Classic pen display monitors like Wacom Cintiq series and XPPen Artist series must be connected to a computer before you can draw.

Portable standalone drawing tablets like the iPad Pro, Surface pro, samsung Galaxy Tab that use a self-powered input device and active pen to transmit signals directly to your tablet.

In other words, standalone tablets cut out the middle man, enabling the best possible finishes on your digital artwork, even when you’re on the go. All without a piece of bulky equipment in sight!

However, standalone tablets can be expensive, with prices rising up to $400 or more for pro-level models. So, before you buy a graphics tablet, you need to have a clear idea of exactly what you need.

About XPPen

When it comes to drawing tablets or pen displays, Wacom is the first name to come to mind. Wacom is still “king of the hill” but they are flipping expensive.

If you are looking to get started with Digital Painting on a budget, then check out XPPen Drawing Tablets.

XP-Pen is a one of the leading brands when it comes to drawing tablets. Their products are ideal for digital artists and photographers alike, making the process of creating art on a computer a more enjoyable and seamless experience.

The main selling points for the XPPen screenless tablets are the battery-free stylus with high pen pressure levels and tilt recognition, bluetooth connection and nice looking design.

Here are our top picks for the best XPPen wireless drawing tablets:

1. XPPen Star 05

The XPPen Star 05 is a beautiful device. It is a sleek off-black, and very smooth. The beveled edges are a nice touch. It’s overall design is very minimalist, it is just so good looking.

The 2.4 GHz wireless feature well is worth every penny as it is highly responsive. For those who want finer detail control without having to zoom in constantly on your work: this is your graphics pad. It’s very solid and has good battery life when charged and not tethered for use.

In regards to size, the Star 05 is 11.7 x 7 x 0.4 inches. With an Active Area of 8 x 5 inches, it is pretty large- which in this case is a good thing! While it isn’t the biggest tablet, it’s not too small; nearly perfect in size actually.

Instead of shortcut buttons, this tablet has 6 touch-sensitive shortcut keys! You can customize two keys to switch between options like zoom in/out, undo/redo, or even increase/decrease brush size! It’s very handy.

The lightweight feel and simple shape of this stylus pen may feel a bit strange at first, however the P03 stylus has no battery and never needs to be recharged.

With 8,192 levels of pressure sensitivity, the stylus is very responsive. the pen movements are very accurate. You can make the tiniest lines, like quotation marks, and they will show up just where you wanted them.

2. XP-Pen Star 06

Its massive drawing area of 10 x 6 inches, sleek form factor, excellent stylus, and overall good drawing performance are the main selling points of XPPen Star 06 tablet.

The haptic and overall built quality seems very good. The 4 rubber feet on the back design to prevent it from moving around on the table. The drawing surface itself duels good too, its not slippy and has a little grip while you draw on it.

The 2.4GHz wireless function works well with excellent 1050mAh lithium battery life. harging does not take long and battery life up to 16 hours is satisfactory.

If you’re someone who does a lot of zooming and brush size changing, the wheel function is a life-saver. Thanks to the fact that the 6 hotkeys lay on the side, access is convenient. Making workflow easier.

The included P01 battery-free stylus enables uninterrupted drawing. 8192 pressure sensitivity does feel different. It’s convenient to get broad strokes.

Unless you need tilt or touch support along with all these functions, there’s no need to get the pricey Wacom Intuos Pro. It works the same way.

3. XPPen Deco Mini7W

XP-Pen Deco mini7w Wireless tablet is one of the most pocket-friendly drawing tablets in the market.

The XPPen Deco Mini7w comes with an active drawing area of 7 x 4.37 Inches. This is considered a ideal size for both working on laptop screens and external monitors.

The tablet feels solid which does not even flex on pressing. It has round corners and beveled edges with four large rubber pads at the back help the tablet to firmly grip the surface.

The Deco Mini 7W drawing tablet provides up to 10 hours of wireless use and takes 2 hours to charge. The Deco Mini 7W drawing tablet has stable, 10-meter range wireless connection, thanks to using 2.4Ghz radio frequency connection.

The P05D digital pen feels solid and has 8192 levels of pen pressure sensitivity which allows you to easily make variable pen strokes when drawing. It also offers 60 degrees of tilt which means you can add shade just like a real pencil.

The battery-free stylus covered with a rubber material that’s very soft, which makes the whole drawing experience much more comfortable. It feels very nice in your hands and also easier to grab..

You can now use Chrome OS & Android OS on your XPPen Deco mini7W, allowing you to write and create digitally effortlessly.

With its compact size and wireless connectivity available at a budget price, there’s no need to worry about budget or workspace.

4. XPPen Deco 03

The design of XPPen Deco 03 looks sleek and minimalist. Design and build quality are Really solid!

The working area is 10 x 5.62 inches and it comes with large bezels that you can rest your hands on. Drawing surface is matte and has a nice texture to draw on.

The red dial is responsive and a really distinct aspect of the table, it really gives it personality. The other 6 buttons are clicky and give nice feedback when pressed.

Talking about wireless it comes with a small 2.4 Ghz dongle like if it was a wireless mouse, and there is no input lag at all!

The P05 Stylus is well built, sturdy and has a nice weight. The surface is smooth matte and the grip section has a matte rubberised texture to it.

The battery-free stylus comes with 8,192 levels of pressure sensitivity, which is very sensitive, the lines are smooth and tapers nicely when drawing.

The Deco 03 is one of the higher-spec graphics tablets in the XP-Pen range and offers a feature-set comparable to market-leaders, with the exception of tilt-detection on the pen — something that’s only really relevant to professional digital artists and illustrators, and is available in the newer XP-Pen Deco series.

5. XPPen Deco MW

A beautiful tablet, in both size and color. The XPPen Deco MW comes in four color variants: Black, blue, green and pink. It’s active area is 8 x 5 inches.

The XPPen Deco MW tablet is compact, thin, light weight and bluetooth enabled. And the fact that you can still use it while it is charging makes it worth it right there.

8 Programmable function keys work a treat and can be customised in the driver for different software packages. makes it easy to open apps, change brushes, swap through open apps, etc., it’s perfect.

X3-Smart-Chip is a bonus, enhancing the pen performance across the board. which comes with a more subtle initial pressure sensitivity and a much shorter tip retraction.

The Deco MW tablet is compatible with mac, Windows, Linux, chromebook, and android OS. and works great for drawing, photo editing, comic and manga artwork.

This is a great tablet for retouching photos pen point accuracy, long lasting battery and conivent in tight spaces and on the go.

6. XPPen Deco LW

The XPPen Deco LW tablet’s build quality is fantastic, and comes in four color options: Black, blue, green and pink.

Thin, lightweight yet well-built tablet with large drawing area of 10 x 6 inches. the drawing surface is slightly rough, providing a pencil-on-paper feel.

Enjoy the convenience of wireless creating with built in Bluetooth connection, so it’s simple to use almost anywhere.

The Deco LW tablet comes with 8 express keys, you can apply different settings on a per application basis giving you access to the hotkeys you use most in whatever software you are using.

The pen is powered by the same X3-smart-Chip inside which supports tilt and 8192 levels of pressure sensitivity. Its initial activation force is just 3g which captures every nuance of pen pressure.

This is a beautiful pen tablet with Bluetooth and fantastic drawing performance. Ergonomic pen and tablet, for both right- and left-handed artists.

7. XPPen Deco Pro SW & Deco Pro MW

XPPen improves on its excellent Deco Pro tablet by adding relatively seamless Bluetooth connectivity.

The XPPen Deco Pro SW & Deco Pro MW is a nice looking tablet with solid build quality that also performs really well at drawing.

The metal body and wonderful finishing make this feel like a premium product. The build quality for the whole tablet feels sturdy and classy, high end.

The Deco Pro, available in two size variants: small version ( 9 × 5 inches of active area) and medium version (11 × 6 inches of active area) , gives pro and amateur artists and photographers enough working space.

One additional cool way XPPen Deco Pro has made it different is their creation of the double Dial wheels ! the Dial is an accessory built for your non-drawing hand. It functions as a navigational device for your application tools.Helping you pick colors, changes brushes or brush size and much more.

The PA1 battery-free stylus provides 8192 pressure sensitivity and 60 degrees of tilt function, It’s pleasant to use and makes editing fine details easier thank to the 8,192 levels of pressure. With tilt sensitivity you can change the angle of the pen to control things like opacity.

The XP-Pen Deco Pro is a great tablet that is an absolute bargain at its price point (especially when compared to offerings from Wacom Intuos Pro).

Final Words

It is without a doubt that pen tablets are among the most useful photo editing and retouching tools for photographers, graphic artists, and illustrators.

The ability to use it as a precision tool to make specific changes in the same way that we illustrate with pen and paper has an irreplaceable value.

Online teaching or distance learning is aided by the wireless drawing tablet. Teachers can annotate, write comments, solve Math problems, and draw with the tablet while students can easily take down notes with it.

Pen tablets come in a wide range of sizes that aim to fit the preference of individual users. Generally speaking, you’ll want the graphic tablet size to be close to the size of your monitor.

The advanced technology doesn’t necessarily mean that it is a better option because in creative tools, user preference and experience is still the most important factor.

For those looking for a simple and affordable alternative to the Wacom Intuos and Intuos Pro line, the XPPen Star & Deco series is highly rated amongst artists.

Easy to set up, Very portable, Can be used wirelessly via Bluetooth or dongle. Using a XPPen wireless drawing tablet to help expand the types of images you create.

Overall, XPPen tablets are a good way to get into digital art. Particularly if you want something affordable, or if you just don’t want a Wacom tablet.

(9)

XPPen Artist 16 (2nd Generation) Awesome Drawing Screen Review

June 28th, 2022

There is nothing like drawing and painting directly on screen! Which allows you to work directly on your images via a display and pressure-sensitive stylus, giving you a real-world, natural-style workflow for painting and retouching that’s hard to beat.

XPPen offer quality pen display drawing pad for Beginner and Professional Artists. and both of their premium lines of tablet are highly respected – Deco, their screenless tablets, and Artist, their display tablets.

With a Deco, there is a hand-to-screen disconnect to get used to, moving your hand on the tablet to imitate brushstrokes while looking at your screen to see the results.

The Artist line, cranks it up a notch. It’s the same tablet experience, except you are drawing directly on screen. Using a Artist feels more like real drawing and painting.

I have used a XPPen Artist for a number of years owning the 22″ and then the 24″. These tablets always retailed for over $1,000.

I just received the new XPPen Artist 16 (2nd Generation) and it has far exceeded my expectations. The response-rate is fast, the pen tip accuracy is better, it’s lightweight and it’s the perfect size for me.

This is my third product from XP-PEN and I am completely impressed with the brand’s performance and pricing.

In this Article, I’m going to look at the product more from a design perspective.

Introduce

XPPen Artist 16 (2nd Generation) is a 15.4″ creative pen display designed to help you make your imagination come to life in rich color and sharp detail.

It comes with the super responsive X3-Smart-Chip Stylus – so you can create with incredible control and high accuracy and offers the familiar feel of pen on paper with the boundless potential of digital creativity.

The 2nd Generation version of the XPPen Artist 16 is a refresh of the previous generation and costs $399.99. XPPen took a lot of the feedback from users and used it to improve upon the device.

The Artist 16 (2nd Generation) is a fantastic tool for digital sketching, illustration and technical drawing and incorporates XPPen’s many years of experience and know-how in building products that make creativity more natural and productive.

Click here to visit the XPPen’s official site if you want more information: https://www.xp-pen.com/product/1203.html

Unboxing

The packaging just felt fancy, super high quality, and really pretty to boot.

Once open, the first thing you find inside the box is the tablet. The tablet is covered in a plastic bag.

This tablet also comes with Stylus, Quick Guide, 18 months warranty card in the US, 3-in-1 USB Cable, USB Extension Cable, Power Adapter, 3 Power Plug, Cleaning Cloth, Black Drawing Glove and 8 additional standard nibs.

The ACS05 foldable adjustable tablet stand, Protective Case and the single USB-C to USB-C Cable are optional which not included.

Overall, I’m extremely happy with the tablet and the addition items in the tablet.

Design

The XPPen Artist 16 (2nd Generation) includes an attractive but compact design, making it easy to incorporate the tablet into a workspace.

The enclosure is machined from a solid piece of plastic, giving it a very durable and professional feel.

Four gorgeous colors are available to fit your personal style: Black, blue, green, and pink. the green one is really aesthetic.

There are eight shortcut buttons on the display’s left side that can be programmed to carry out simple tasks.

On the right side, you’ll find several buttons and connectivity options. There is the power and a pair of dedicated brightness buttons starting from the top. Below are two USB-C ports connecting the pen display to the computer.

Behind the tablet are 4 large rubber feet to prevent it from sliding around on table.

I was a little shocked by the weight of the tablet, I figured it would be super light and slight playable which is a big plus for transport.

If you’re looking for a pen display to use on the go with a laptop, you should definitely check the Artist 16 (2nd Generation) out – you won’t be disappointed.

Connections

The connections are fantastic, including USB type-c. not providing a USB-C to USB-C cable with the tablet seems like an oversight.

The USB-C to USB-C cable for connection shoule be full-featured. In this case, “full-featured” means a cable that’s rated for power, video, and data transfer.

With the apple Macbook Pro, I can easily use the USB type-c cable to connect the XPPen Artist 16 (2nd Gen) tablet. So easy and convenient.

I can also use the pen display with the desktop computer with the HDMI connection (3-in-1 cable).

The included 3-in-1 cable is USB-C port on the pen display’s end and has a separate HDMI and two USB-A (power and data) plugs on the other.

The HDMI plug and black USB Type-A plug need to be connected directly into your computer. However, the red USB Type-A plug is only used for power delivery. The USB extension power cable gets you about three extra feet of reach.

If you don’t have an extra USB port on your laptop, you can use a simple USB-C adapter.

Driver Download and Install

Once I downloaded the driver from XPPen’s official site, installed, and restarted, it didn’t take long at all to get started at all.

The driver functions as expected, allowing pen calibration, canvas area and pen pressure customization, and setting up the dedicated shortcut buttons.

Of those, we get eight on the tablet and an additional two on the pen. these buttons can be programmed to activate shortcuts and other commands.

Compatibility

The XPPen Artist 16 (2nd Gen) will work with pretty much any computer. It’s compatible with Windows, Mac, Chrome OS, Linux, and even Android OS. If your device has the necessary ports, you shouldn’t have any issues. The same is true for your software. You can dig right in and start working in all Adobe software, GIMP, MediBang, Krita, and others.

The operating systems I’ve tested are MacOS and Windows 11. I have seen reviews of people using this with a Android phone or another tablet out and about on the go, but I don’t use it with Linux and Android devices so I can’t say much.

Screen Technology

The XPPen Artist 16 (2nd Gen) have a beautiful, vibrant screen. which is pleasant and really smooth.

This pen display uses a 15.4-inch IPS panel that supports 1920×1080 resolution. the high-definition provides outstanding clarity and color.

The screen response is fantastic, thanks to it being fully laminated, eliminating any air gap between the screen and the touch-sensitive sensor.

The tablet can reproduce 94% of the Adobe RGB color range, equivalent to 90% of NTSC or 127% of sRGB. It means a screen with colors you can trust compared with a regular monitor. which is an extremely useful function when you publish a lot on the internet.

XPPen Artist 16 (2nd Gen)’s wide color fidelity improves a photographer’s workflow and helps guarantee better results every time. Photo prints that always look right make this a photographer’s favorite.

Even out of the box, the colors look accurate. Of course, I recommend you calibrate the monitor before starting to work with it. I use X-Rite i1 Display to calibrate my monitors, and after the calibration, I can say that the display looks even better. The contrast and sharpness are both perfect for photo editing.

It has a glossy display and, rather than an etched glass screen, but it comes with an anti-glare textured matte screen protective film.

The onscreen feel is a very personal choice. the matte screen protective film makes drawing more natural and can help deal with glare issues.

The Screen protector also protect screen from irreversible damage such as scratches, dings, and harsh cleaning chemicals.

Stylus with X3 Smart Chip

Its companion stylus, the X3 Elite, provides 8,192 levels of pressure sensitivity, a low activation force, and tilt recognition of even the lightest pen strokes. As with other pens in the XPPen family, you don’t have to charge it.

It reacts to as little as 3 grams of Initial activation force with ten times better sensitivity, so “artwork can be produced with a featherlight stroke.

The nib has less retraction of about only 0.6 mm when pressed against the screen, and lines appear instantly upon the slightest touch of the surface. The pen is also very light and handles perfectly.

This new X3 smart chip technology certainly makes the stylus very responsive that shows while carefully crafting sun-shadow ink line transitions or adding rapid brush strokes for color texturing.

The super precise pen is combined with virtually no parallax and just enough screen resolution, allowing the artist to achieve exact line placement when needed!

Drawing Performance

For the past few weeks I have been using the Artist 16 (2nd Gen) Display Tablet by XP-PEN and I must say I was really impressed by the drawing experience.

This product’s build is elegant, The screen feels so nice to glide the pen on. There’s very little parallax, and the beautiful matte etched screen protector creates a drawing experience that feels natural.

It has such a high color accuracy and such good contrast that – when combined with the provided pixel density – it makes you completely forget that you’re working on a screen.

The tablet runs smoothly – of course this also has to do with the computer you plug it into – it has no lag, working on the screen surface is really comfortable & the pressure sensitivity is really great.

Having used XPPen tablets since the 22″ Artist 22 (2nd Generation), I have become used to the fluid drawing experience that the EMR (Electro Magnetic Resonance) pens provide. The pens don’t have batteries and are well balanced with a comfortable feel and never need to be charged.

When in Photoshop, there are so many tools that take advantage of pressure sensitivity, that I can’t image drawing or retouching without one.

The pen has minimal initial activation force. As long as the pen tip touches the drawing surface, even without any pressure applied, you can get a line. The pen is very sensitive at low pressure levels.

Lines can transition from thin to thick and back smoothly. Curves turn smoothly. It’s easy to maintain consistent pressure. Drawing performance is consistent and predictable.

I did not experience any glitches with various drawing software I’ve tested, namely Adobe Photoshop, Adobe Illustrator, Affinity Photo, Affinity Designer, Medibang Paint Pro, Clip Studio Paint and Krita. Pressure and tilt sensitivity work as expected.

The overall drawing experience is excellent. Lines come out exactly the way I expect them to.

The Digital Artwork made by this tablet:

The shortcut buttons are such a life saver! They don’t wobble, are large, and have a delightful, rubbery feel with a satisfying click when pressed.

The included Drawing Glove is made of Lycra which is an elastic material that provides comfort and flexibility, it fits my hand perfectly, keep sweat off of my tablet and help me draw smoothly.

XP-PEN’s attractive design and attention to detail are admirable, especially considering the company’s target user base at this price point.

Final Verdict

XPPen Artist 16 (2nd Gen) is a good looking graphic tablet with solid build quality. I really love my new tablet so much, it has given me the ability to create the art I’ve always wanted.

The Drawing performance is consistent and predictable, in other words, excellent. I did not encounter any glitches with the various drawing software I’ve tested.

My overall experience is very positive. The product works as expected so this review is easy to make.

The only downside is perhaps the limited number of physical shortcut buttons. If you need more than 8 buttons, you can purchase the optional XP-Pen AC19 Wireless Shortcut Remote.

So if you’re interested in looking to get more hands-on with your work in a digital way, with one of the best and most affordable pen tablets on the market right now I think you are really going to like this product.

You can decide whether this is worth the money based on the experience I’ve shared.

(11)