XPPen Artist 24 Pro vs Wacom Cintiq Pro 24 Comparison

December 12th, 2023

Want to get serious about digital art? Want to upgrade from a non-screen tablet, a small pen display, or an old wacom cintiq model?

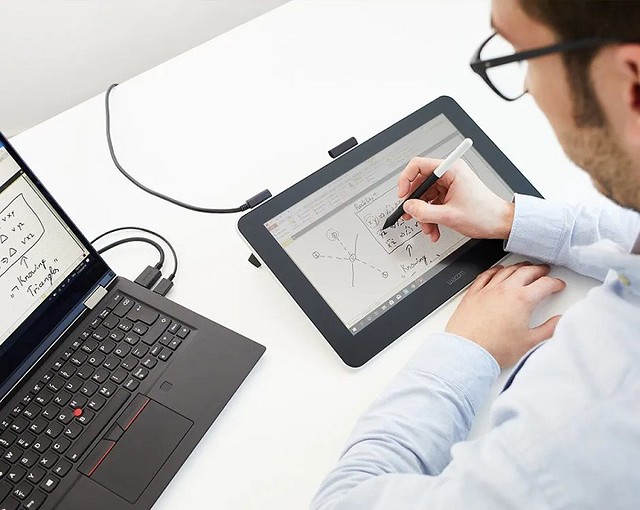
The 24-inch pen display monitor is a great tool for professionals and mid-level artists who want to take painting to the next level and draw directly on the big screen.

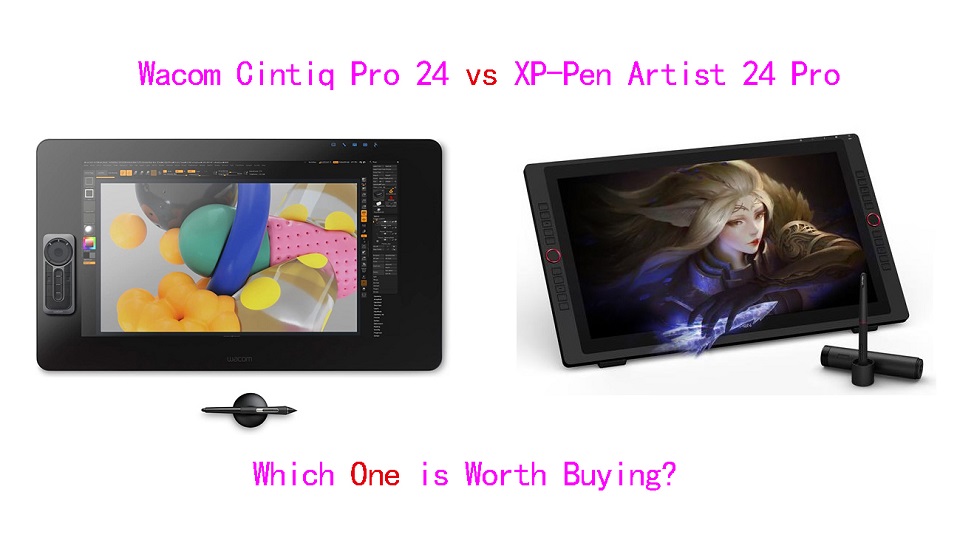
XP-Pen Artist 24 Pro is what many artists calls a budget alternative to the Wacom Cintiq Pro 24—a much more expensive and feature-rich tablet for the pro market.

Which one has better screen quality, best drawing experience & longer life span? and Which one is worth buying? Is Wacom Cintiq really better than XP-Pen Artist?

In this article, we would discuss the key differences between them and help you decide which one will fit your needs better.

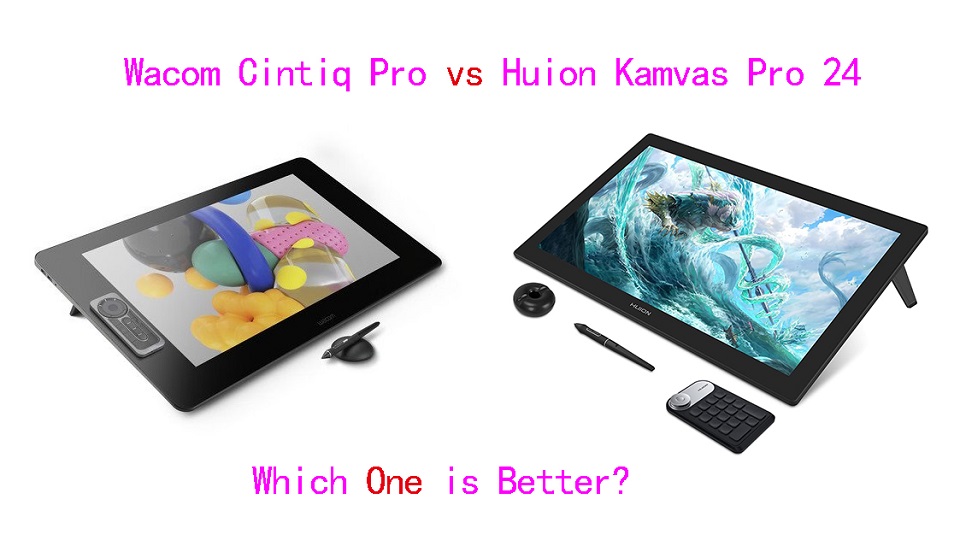
Wacom Cintiq Pro 24 vs XPPen Artist 24 Pro Comparison– which one is worth buying?

Taking a closer look at the specifications of the two tablets, it gets easy to spot the key differences between them.

Below is a more in-depth analysis, These will help us better understand the pros and cons in each case.

Design and Build Quality

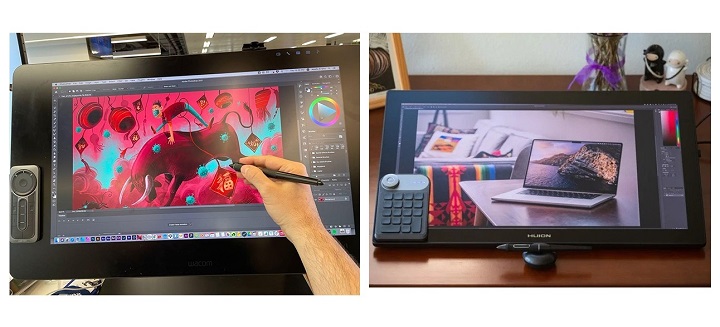
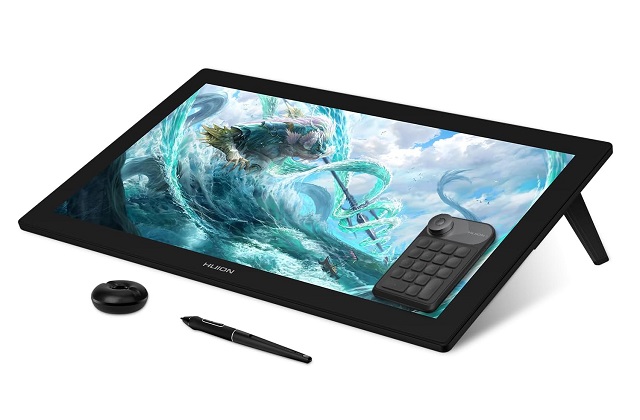
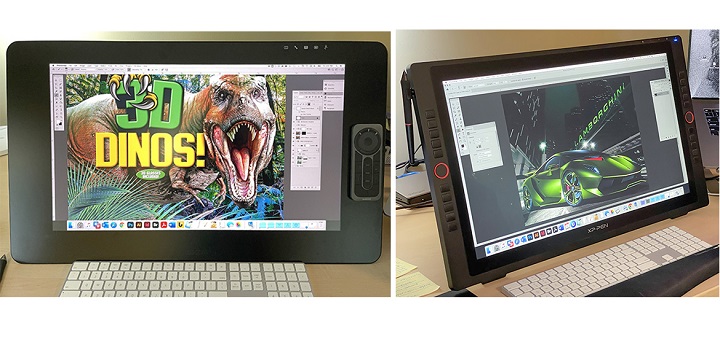
XP-Pen Artist 24 Pro is composed of a vast 23.8-inch glass screen, side buttons and an immense adjustable stand. Build quality is great and doesn’t look and feel cheap.

The massive Wacom Cintiq Pro 24 feels robustly built and features a clean “minimalist” design aesthetic. You will notice that there is a lot of empty space around the 23.6-inch screen (bezels).

This leads to the tablet taking a lot more space on your table. But it’s also incredibly comfortable to lay your arm on, and you can travel the full surface of the display without interrupting your pen stroke.

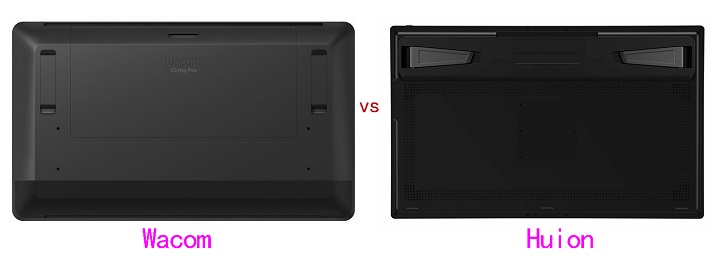
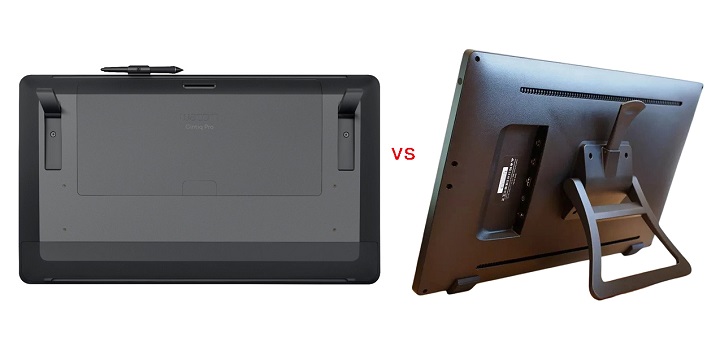
Cintiq Pro 24 has no ExpressKeys built into the sides like the Artist 24 Pro does. It also doesn’t include an adjustable stand instead 2 folding legs at the back that will raise it up to a 20 degree angle.

Both tablets are big and heavy, less portable. If you’re going to invest into a graphics tablet this size, make sure you have sufficient desk space to accommodate it.

Screen Resolution, Brightness and Color Gamut

Artist 24 Pro features an IPS display with 2K (2,560 x 1,440-pixel) resolution at 123 PPI, 250 nits max brightness, 16.7M colors and 90% Adobe RGB color gamut.

The screen looks nice and sharp, Colors are bright and vibrant. you can zoom around and work on the small details of your art.

However, the Cintiq pro 24’s display offers higher 4K (3840×2160-pixel) resolution at 188 PPI, a billion colors, 350 nits max brightness, and covers a wider color accuracy of 99% Adobe RGB.

This means sharper and truer color representations illustrations, photographs, and video on Cintiq Pro 24.

In addition, Wacom Cintiq Pro 24 comes with a screen calibrated in the factory, meaning that you don’t have to mess around with calibration hardware.

You will likely need to perform some calibration with the XPPen Artist 24 Pro, the same as you would for a monitor.

Screen Lamination

Cintiq Pro 24’s screen is fully laminated, This means an improved display quality, reduced glare, wider viewer angle, more accuracy (no cursor offset/parallax from the pen tip), and better overall usability or user experience.

In contrast, Artist 24 Pro does not come with a laminated screen, But parallax is improved with newer screen technology, which is very minimal. After calibration, you can get the pen cursor to appear directly beneath the pen tip.

Surface Texture

Surface texture makes a huge difference in your drawing experience.

This is one of the main differences between the two tablets.

Cintiq Pro 24 has a matte etched glass surface, whereas the Artist 24 Pro uses a matte screen protector.

The etched glass will have a bit more paper-like texture, and even less slippery. Matte screen protectors are less durable, and have a much slicker feel.

Multi-Touch

It is worth noting that the XPPen Artist 24 Pro is not a touch screen.

There are two models of the Cintiq Pro 24, with and without multi-touch. The touch version costs $500 more than its sibling.

The most useful gestures were two-finger actions: pinch to zoom in / out and rotating the canvas. These two commands worked almost flawlessly.

But any action that required more than two or three fingers became quite cumbersome. of course you can always disable them by press the button.

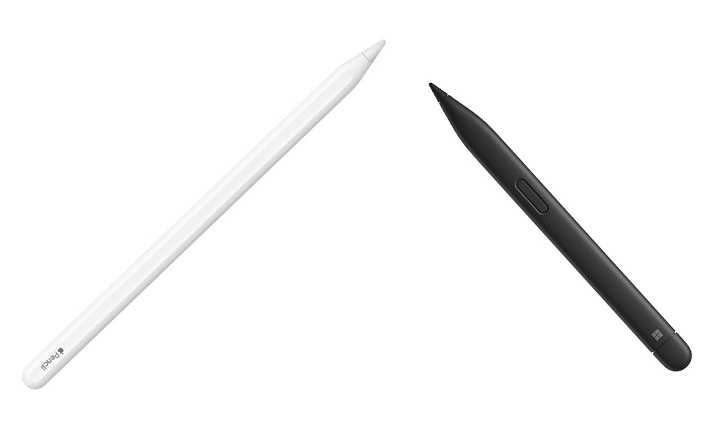
Wacom Pro Pen 2 vs XPPen PA2 Stylus

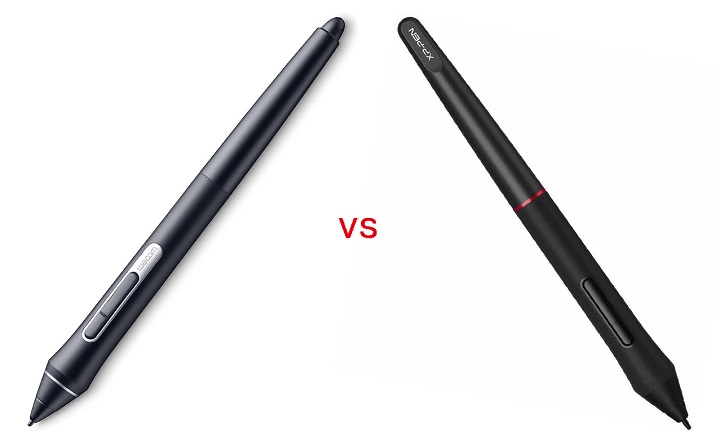
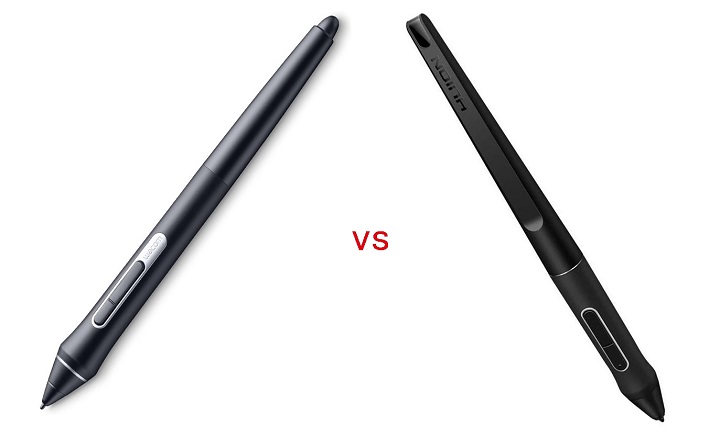
Wacom Pro Pen 2 and the XPPen PA2 stylus look very similar to each other. They both have a rubber grip at the front body for a better hold.

Wacom pen has two buttons on the side and an eraser at the back whereas XPPen stylus has two side buttons with no eraser at the back.

XPPen Pa2 stylus is light and more front heavy. Wacom pen is more back heavy and more heavily weighted in general.

Both styluses are battery-free, doesn’t require charging, supports 8,192 levels of pressure sensitivity and 60 degrees of tilt recognition.

This means that it’s easy to draw a line that smoothly varies between thick and thin as pressure is applied—or not—much like a brush.

The main difference was that XPPen PA2 stylus seems to take slightly more initial activation force than Wacom to draw, Tilt sensitivity is also sometimes a bit flaky.

In contrast, Wacom Pro Pen 2 feels more natural and accurate, it responds more predictably to the pressure you apply to it.

Overall the XPPen PA2 is a good stylus, but the Wacom Pen offers better drawing experience.

Shortcut Buttons

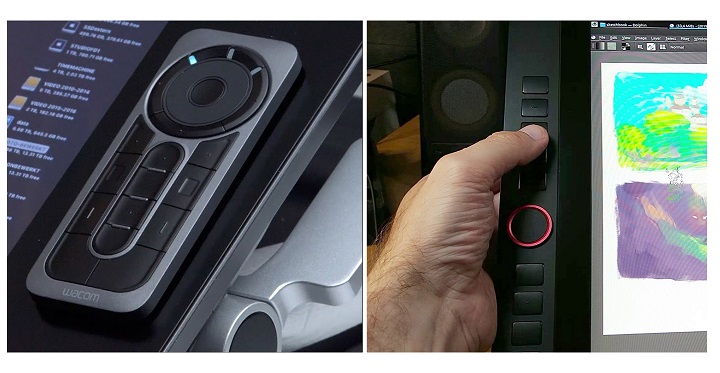
The Artist 24 Pro has two sets of keys, a red roller wheel and ten buttons on each side, making life equally convenient for lefties, righties, and the ambidextrous.

They mirror each other, so there are a total of 20 programmable keys and 2 dials. These are all on the outside, slightly raised.

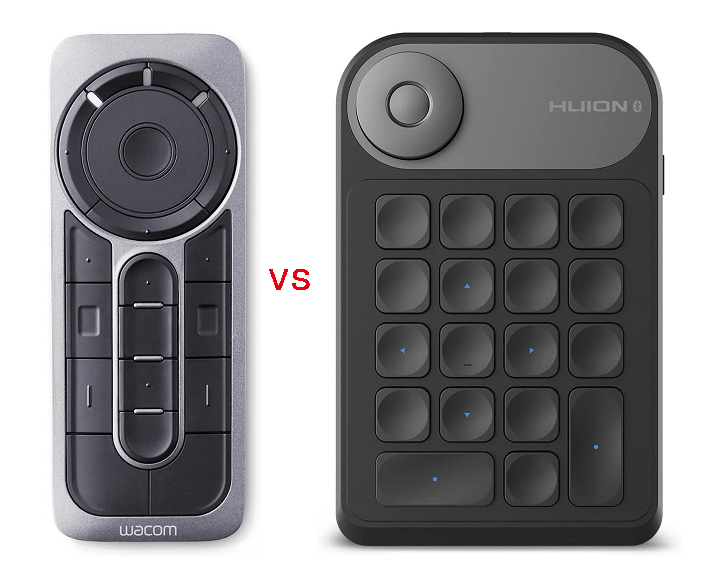
The Cintiq Pro 24 has no Express Keys, But it comes with a wireless Express Key Remote via 2.4GHz Wifi.

This hand-held device provides 17 programmable shortcut function keys while working. There’s a rotation wheel at the top that allows zooming in and out (or other customizable functions).

The remote is perfectly balanced for either right or left-handed people. It will magnetically stick to either side of the display keeping it handy at all times.

Compatibility and Connectivity

Both Cintiq Pro 24 and Artist 24 Pro are compatible with the popular operating systems Windows, Mac and Linux. They works well with a multitude of software packages that range from popular professional suites such as Photoshop and ZBrush, to freeware such as Krita and Blender.

The Cintiq Pro 24 and Artist 24 Pro can be connected as a display through HDMI, or USB-C, if your computer supports the ports.

If you are connecting the display through HDMI, you’ll also need to connect one cable for power, and an additional USB-A cable for the pen data transmission, total 3.

The USB-C connection only requires 2 cables: a single USB-C cable + one cable for power.

Drivers & Software

Both units come with windows, mac and linux drivers to communicate with your computer. You need to download them from their official site.

The driver from Wacom is one of the most reliable options on the market. It comes with some advanced shortcut controls that are easy to understand and quick to setup.

The driver from XPPen may not be as advanced as the Wacom driver and may count more issues in some cases. but nothing you couldn’t work around or just ignore.

XPPen driver has plenty of customization options. You can use it to customize physical shortcut buttons, calibrate the onslaught of the pen and screen, set the work area and export / import your settings.

Something we did notice is that both Wacom and XPPen driver software have 3-point calibration for the stylus’ pressure sensitivity, which is great to get your pressure just right.

Tablet Stand & VESA Mount

The size of these 2 tablets are massive, so be prepared to make a bit of desk space available.

If you don’t have much desk space, you might need to buy a VESA mount or arm to hold up the monitor in a comfortable position to draw on.

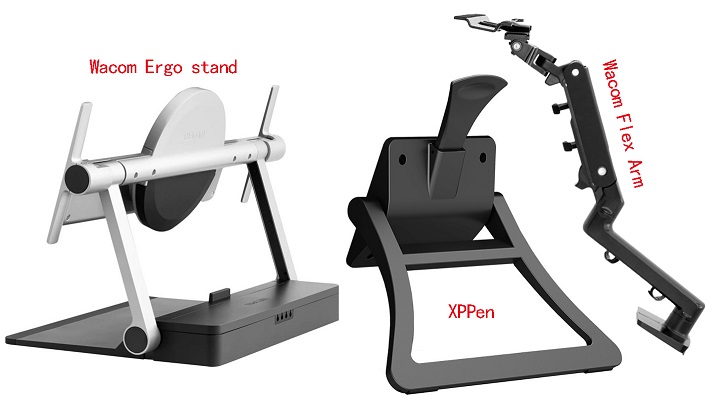
Artist 24 Pro’s adjustable stand is strong, wobble-free, and already attached. Both the stand and bottom of the display have rubber feet to help prevent slipping on a desktop—a thoughtful touch.

The stand uses a standard 100 x 100 mm VESA mount, so it can be easily removed for attaching the display to a VESA arm mount if desired.

Even though Cintiq 24 Pro does come with the 2 legs to help prop it up, it’s still not enough. Having to hunch over when you draw/animate does numbers on your back.

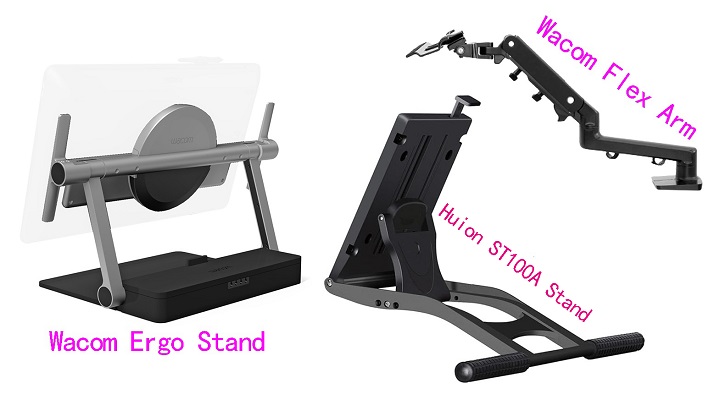
Luckily, An optional $500 Wacom Ergo stand or $400 Wacom Flex Arm is available – It has an unique 80x495mm hole pattern at the back.

Wacom Ergo stand has raise, tilt and rotate mechanisms for adjustable positioning, so you can change angles easily while working on complex illustrations.

The Flex Arm allows the Cintiq Pro 24 to be positioned just about anywhere you want at any angle you want.

Wacom Pen Stand vs XP-Pen Pen Holder

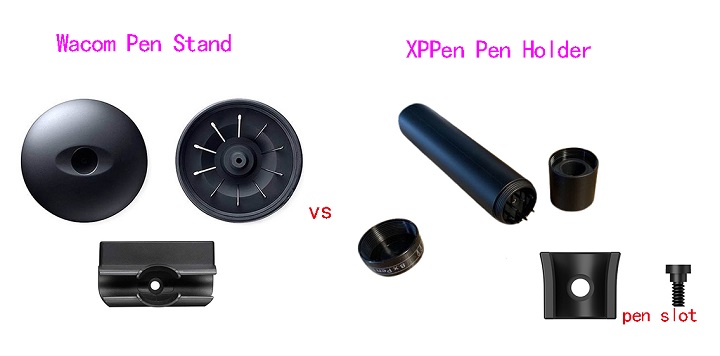
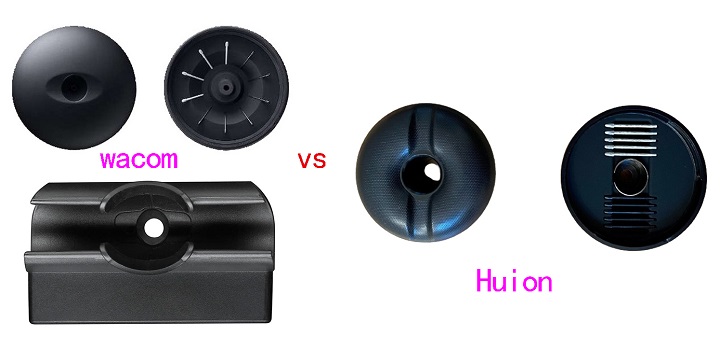
Cintiq Pro 24, comes with a pen stand, which is shaped like a donut. It allows you to keep your stylus in a horizontal or vertical position when not in use.

Opening the top cover you get a total of 10 extra pen tips: 6 standard and 4 felt. There’s also an extra pen holder that snaps to the top of the display.

With Artist 24 Pro, you get a cylindrical pen holder, which works as a pen storage.

The front cap of the pen holder works as a pen stand, while the rear cap of the pen holder provides safe storage space for 8 extra standard Pen nibs.

There’s also a small plastic pen slot that screws into the side of the tablet to hold the stylus safely.

Cooling

There is an intermittent fan regulates the temperature of the Cintiq 24 Pro. The fan speed varies depending on the demands placed upon the monitor. Fan is quite loud at times.

XPPen Artist 24 Pro has no fans, so it is quiet with zero fan noise, which will certainly help users stay concentrated without the droning.

Price

The Artist 24 Pro retails for about $899 USD and Wacom’s Cintiq Pro 24 sells for $1,999! That’s quite the price jump to account for.

So let’s just get this right out in the open. There are a lot of people who are looking for cintiq alternatives as Wacom’s tablets are expensive.

Besides,The Huion Kamvas Pro 24 (4K) with cheaper price is also really excellent and almost as good as wacom cintiq Pro 24.

Related Posts: XPPen Artist 22R Pro vs Wacom Cintiq 22 ComparisonWacom Cintiq AlternativesPDF Annotating Tablets.

Conclusion

While it may be bigger than you’d need, The 24-inch pen display is generous enough to feel the freedom of drawing and move your hand with the pen around the screen without any problem.

The Wacom Cintiq Pro 24 simply outdoes the XP-Pen Artist 24 Pro in all aspects because it offers extra features like multi-touch, higher pixel density, longer warranty – 2 vs 1 year, etc.

Only downside is that it’s expensive. If you’re a serious artist, designer or 3D modeller, and money is no object, you’ll struggle to do better than the Wacom Cintiq Pro 24.

The XP-Pen Artist 24 Pro offers amazing value for the money, with everything you’d need to take the next big step in their creative journey. And the price is more than acceptable for most artists.

Ultimately, It really depends on your budget, preference, needs and skill levels. We noticed that for many beginner artists using the Cintiq Pro 24 is unnecessary. Some of them don’t even use the advaned features.

We look forward to seeing how Wacom, and XP-Pen will continue to grow their product line with graphic displays that can attract larger demographics.

Source: https://pctechtest.com/wacom-cintiq-pro-24-vs-xppen-artist-24-pro

(0)

Huion Kamvas Pro 24 vs Wacom Cintiq Pro 24 Comparison

December 10th, 2023

If you’re a pro and do art on the computer, you need a drawing tablet with screen. But a small pen display feels cramped for drawing larger images, requiring a lot of zooming.

There is something really cool to having a giant display tablet to draw on, Which gives you a lot of drawing area to draw to your heart content.

If you have the budget, getting a 24-inch pen display would be terrific. Whether you draw with your wrist or with your arm, this drawing area is more than enough for you for the most part.

Far and away, the biggest name in the drawing tablet space is Wacom and the Cintiq Pro 24 is the Rolls-Royce of display drawing tablets.

Huion usually covers the budget-end of the graphics tablet market, and the Huion tablet that most closely competes with the Cintiq Pro 24 is the popular Kamvas Pro 24 which supports 4K.

Despite how the two device appears too similar, there are quite many differences between them.

One may be wondering whether getting the more affordable Kamvas Pro 24 is the best choice, or whether you will need or benefit from the more features Cintiq Pro 24 offers.

Wacom Cintiq Pro 24 vs Huion Kamvas Pro 24 Comparison: What are the main differences?

In this article, we did a detailed side by side analysis – comparing every single major and minor detail of the tablet. then you will know exactly which tablet is the best on your own.

We will look at the design, some of the specs & screen resolution, the pen, including pen pressure sensitivity, screen parallax, drivers, price and much more.

Design and Build Quality

When it comes to design both the tablet follows a minimalistic design, feels strong and sturdy. The tablet itself is all black quality plastic with a front glass screen.

The different thing is the overall size. The Wacom is bigger – it has a lot more bezel area around the screen. The one on the Huion is a lot smaller and looks more like a monitor.

After using both it is better to have that larger bezel area around the screen to rest your hand on when drawing near the edge.

On the tablet back you have two fold-out tablet legs, VESA mount as well as a number of ports for connectivity.

The main con of a Cintiq pro 24 or a Kamvas Pro 24 is its weight and bulk. Both devices are quite heavy and big —especially compared to smaller pen display, so less portable.

Screen Size and Resolution

With the Cintiq Pro 24 and Kamvas Pro 24 you’re getting a 24 inch diagonal screen at full 4K UHD (3840×2160-pixel) resolution.

At a whopping 188 pixels per inch, the pixels is small and densely packed and you won’t see individual pixels when you work (draw) up close to the screen.

If you’re using a 24-inch screen with 1080p resolution for detailed drawing then you’ll be distracted by how jaggedy your lines look.

In Comparison, having this 4K resolution does make a big difference, it’s much crisper and feels great to see your artwork.

Plus, 2160P screen has significantly more canvas space compared to 1080P, This is great for productivity. You can place a reference photo by the side and still have enough canvas space to draw with.

Screen panel and Color Gamut

With IPS Panel, Cintiq pro 24 have excellent 99% Adobe RGB color gamut, 1000:1 contrast ratio, a billion colours, and the colors do look good right out of the box.

Kamvas Pro 24 uses the QLED technique to increase the color gamut to 102% Adobe RGB (140% sRGB), 1200:1 contrast ratio, 1.07 billion (10bit) colors for a more vibrant and saturated color on the display.

You may find that the colors on Kamvas Pro 24 are very oversaturated but not accurate, you should invest in a colorimeter to calibrate the screen. That said, the most accurate colors are not necessarily the most vivid.

Wacom Cintiq is designed to deliver the most accurate colors instead of over saturated vibrant ones so that when your work is viewed on other peoples’ screens, it looks similar to what you, the artist, intended.

Screen Lamination

Both the tablets come with the exact same laminated screen, which means less parallax while drawing.

To give you an idea on what that is, Laminated screen is the screen that’s made so that the top glass, digitizer, and the display are made of one flat piece.

This offers multiple advantages over non-laminated screens: preventing dust from getting under the screen glass, as well as having a thinner display. The most notable one is the reduced parallax.

Drawing Surface

Both Cintiq Pro 24 and Kamvas Pro 24 has an etched glass surface that gives the pen a slight tactility when drawing on it that would not be there if the screen were glossy.

You will also appreciated the glare reduction on the matte etched screen, which prevented the light from obstructing your vision.

In contrast, glossy screens reflect the world around them, which can be distracting and distort color accuracy unless you are working in a dark room.

Multi-Touch

The Cintiq Pro 24 comes in two variants – one with multitouch and one without it. You will have to pay extra for this feature.

The Huion Kamvas Pro 24, on the other hand, does not come with any touch support – whatsoever.

Being able to perform shortcuts such as zoom, pan, scroll and rotate using touch-based gestures can be very convenient.

But Multitouch support on the Cintiq Pro 24 is pretty terrible. Its palm rejection is bad and the overall touch experience feels laggy and unreliable.

Most artists simple choose the tablet without the multitouch or just stop using it after a while.

Wacom Pro Pen 2 vs Huion PW517 Stylus

Both the Cintiq Pro 24 and Kamvas Pro 24 comes with a very comparable stylus. They have two buttons on the side and a soft rubber grip at the front half.

But Wacom Pro pen 2 has an eraser at the back whereas Huion PW517 stylus doesn’t have an eraser at the back.

They are battery-free, comes with 8192 levels of pressure sensitivity, 60 degrees of tilt recognition, fast response time and accurate tracking that provide an equally good drawing experience.

However, The Huion PW517 pen has a higher Initial Activation Force than Wacom pro pen 2. It require you to press down ever so slightly more to get it to register.

In addition, The tilt of Huion stylus can cause the cursor to move a little when you don’t want it to and it can be really annoying.

Overall Huion stylus is good, but the Wacom Pen is the best.

Tablet Stand & VESA Mount

The fold-out feet of both tablets can only prop up the pen display at a fixed angle of 20°, If you want a comfortable angle to work with for drawing, then you will need a proper stand.

The back of the Kamvas Pro 24 comes with a 100 x 100mm standard VESA mounting holes, it’s compatible with a wide variety of arms, stands, and brackets.

Unfortunately, Cintiq Pro 24 can’t be mounted with VESA mount, as it has a weird 80x495mm hole pattern, which only supports Wacom’s own stand.

The Huion ST100A multi-adjustable stand is an extra-cost option ($49.99)—highly recommended.

Wacom has two options with the Ergo Stand and the Wacom Flex Arm, with both compatible with the Cintiq Pro 24.

Wacom’s stands are a bit expensive for some artist, the Ergo stand retails for $500 alone, and the Wacom Flex Arm retails for $379.

Wacom Expresskey Remote vs Huion Keydial Mini K20

Neither display comes with built-in express keys, and instead including their handy express key remote.

Both will magnetically stick to either side of the display keeping it handy at all times. This is more flexible, allowing you to freely place it on the screen or the desktop.

Wacom’s Expresskey remote has a total of 17 buttons and a touch ring. It connects wirelessly via 2.4GHz Wifi to the computer.

The Huion’s mini keydial K20 remote has a similar design to the Wacom with 18 buttons on the bottom, and a circular button on the top. But It connects wirelessly via bluetooth to the computer.

All the buttons on both Expresskey remotes can be assigned to any shortcut of your choice, making the workflow more fluid. It works across all the drawing, editing and modeling programs.

Pen Holder

The Wacom Cintiq Pro 24 has a pen stand that holds 10 extra pen nibs (they do wear down with use, 6 standard, 4 felt). There’s also an extra pen holder that snaps to the top of the display.

As for Huion, The doughnut-shaped pen holder is a secure place to keep the pencil when not in use, and it contains ten extra pen nibs, of which five are felt nibs intended to simulate drawing on paper.

Compatibility and Connectivity

Both Cintiq pro 24 and Kamvas pro 24 are compatible with various operating systems, including MacOS, Windows and Linux. They also works with a range of software including programs from Adobe, Autodesk, Affinity, Corel and more.

Cintiq Pro 24’s Connectivity is excellent. You’ll find twin USB-A ports on its right and left sides, plus a standard 3.5mm audio jack and full-sized SD card slot. Round the back is USB-C port plus HDMI, and DisplayPort connectors.

Several connectivity options are lined up on the back of the Kamvas Pro 24, such as USB-C, Display Port, and HDMI. It also equipped with two USB-A ports and a 3.5mm headphone jack.

You can connect both devices to a PC/Mac using the DisplayPort, USB Type-C sockets, or HDMI. There are two cables: one for power, and one USB-C/HDMI cable for video data.

Driver Software

Once you’ve got everything plugged in you’ll need to download the latest drivers from the Wacom or Huion official website.

Whilst you’re in the settings menus of wacom driver software you’ll notice there’s an enormous amount of customisation available to you.

As well as setting shortcut keys on the Remote, you can even set your own pressure sensitivity curves and click thresholds.

Each application can have its own settings, and you can save your custom settings as different profiles, for almost limitless flexibility.

Huion has less fully featured driver software as Wacom’s, for example, You can’t set application-specific settings.

Huion’s driver work fine, reliability has improved quite a bit, except for some crashing and minor issues.

Cooling

There is a fan on Cintiq Pro 24, which keeps the display from ever getting really hot. But many users were not fond of the level of noise that the Cintiq Pro fans make when running.

There are no fans with Huion kamvas Pro 24 so no fan noise. And the unit doesn’t get hot at all, the thermals are pretty decent.

Price

Huion kamvas Pro 24 is the clear winner if we take the price into account-1,299.00. Wacom Cintiq Pro 24 cost more at $1,949.95, leaving many artists out of the market.

There are a number of other 24-inch tablets that you can look into such as the – Huion Kamvas Pro 24 (2.5k) and XP-Pen Artist 24 Pro, which is cheaper but has a slightly lower resolution of 2.5K.

Related Posts: Huion Kamvas 13 vs Wacom One 13 ComparisonHuion Kamvas Pro 16 vs Wacom Cintiq 16 ComparisonXPPen Artist 22R Pro vs Wacom Cintiq 22 Comparison .

Conclusion

Both are top-quality display tablets, the screen is extremely clear and the colors are vivacious, probably the best that money can buy.

The 24 inches of diagonals really allow you to go into details very easily, and especially without straining the eyes.

If you’re the one that paints and draws from the shoulder with big arm movements and if you can afford it, this is your tablet.

Despite some flaws, Huion Kamvas Pro 24 is a better option, it manages to finely balance having a good selection of features at a reasonable price.

But We also recommend saving up more for Cintiq Pro 24 if line quality, durability and longevity is concern.

For something that is used in a professional setting or even an advanced hobbyist the Wacom is a must.

Source: https://pctechtest.com/wacom-cintiq-pro-24-vs-huion-kamvas-pro-24

(0)

Beginner Guide to Become a Digital Artist

December 8th, 2023

Nowadays, it seems that digital art is everywhere on the internet. There are dozens of types of digital art, ranging from digital painting to 3D animation.

Have you ever wondered how you can turn your creative ideas into stunning digital art? Anyone can be an artist in this digital age.

But getting started can be overwhelming. How do you begin? Fear not— it’s easier than you think!

By providing an easy-to-follow beginner guide to start digital art, this article empowers newcomers to understand the types of digital art, choose the right tools and software, and where you can proudly display your masterpieces.

What is digital art?

Digital art is a contemporary artistic medium that encompasses a wide range of creative works produced using digital technology.

It is the fusion of traditional art techniques with the digital tools and techniques made available by computers, graphic tablets, and software applications.

Digital artists use these tools to create, manipulate, and enhance their artwork, resulting in a diverse spectrum of visual expressions.

The fundamental characteristic of digital art is the use of a digital canvas, such as a computer screen or graphic tablet, combined with digital drawing tools like styluses and pens.

This allows artists to paint, draw, sculpt, and design with remarkable precision, flexibility, and efficiency.

The artistry in the digital realm comes to life through the manipulation of pixels, vectors, and layers, making it a versatile and dynamic medium.

Different types of Digital Art

There are many different types of digital art, including animation, drawing, photo manipulation, 3d modeling, and more.

1. Photo Manipulation

Photo Manipulation is pretty simple — editing an image to whatever you want it to look like. Since you’re using photos, this is a pixel-based, or raster, type of digital art.

There are subtler versions of it, like touching up a family portrait and fixing lighting and a few facial blemishes, and more prominent versions of photo manipulation, like combining a picture of a pirate ship and some planet images into a space pirate sci-fi scene.

2. Digital Illustration

Digital illustration, graphic design, and vector art is all around you, even if you don’t notice it. It’s in apps and app icons, websites, manuals and brochures, and even books.

This type of digital art is made of shapes all layered together to create an image like a flat illustration — shape/vector based, not pixel based. It’s often used for branding and logos, and creates clean and crisp art.

3. Digital Painting

Digital painting is probably what pops into your mind when someone says ‘digital art’. It’s raster/pixel-based, like photo manipulation, but unlike photo manipulation, which combines and edits images to bring them together.

with digital painting, you’re creating something from a blank canvas. It’s basically just drawing/sketching/painting digitally, and usually depicts characters, landscapes, and scenes.

4. Animations

Moving images or a series of drawings that come together to create motion. This includes everything from animated movies to GIFs you see online.

5. 3D Art

3D art is becoming more and more popular — it’s graphics are being used in websites, apps, and interfaces in every category and subcategory.

3D modeling also has a huge role to play in the video game industry, as well as animated shows and movies. 3D models are digital objects that can be rotated and viewed from all angles. They’re often used in games, movies, or product designs.

Choosing the hardware to get started with digital art

First thing you’ll need when you want to get started making digital art, is hardware. There are two main options: computer + drawing tablet, standalone pen tablet.

1. Computer

If the art program is heavy, your computer may use too many resources and you may end up getting lags while drawing.

This depends on the specifications of your computer; if it is a high-end one with the best in class CPU, GPU and copious amounts of RAM, then no need to worry!

Depending on your software, you would generally want a computer with:

-At least 16GB of RAM

-A discrete GPU separate from your CPU

-At, least an Intel Core i5 or Ryzen 5, or something equivalent

-You can also ignore all of these if you have a apple Mac with the M1 or M2 Processor.

2. Drawing Tablet

You can make digital art with a mouse, But a pen tablet with pressure sensitivity will give a much more natural feel when drawing.

Some things you want to focus on are: Drawing surface size, Pen, Pressure sensitivity, Express Keys, and Price.

There are two main categories of graphics pads for beginners: tablet without screen, tablet with display.

A non-screen graphic tablet have two components: a touch-pad, and a stylus. It works a bit like a mouse and needs to be attached to your PC or laptop.

In order to use the tablet, one needs a good sense of hand-eye coordination. These types of tablets are usually cheaper, but offer everything you would need to draw digital art.

Display tablets function like graphic tablets, but with a built-in monitor. You can draw directly onto a screen, which feels more intuitive, accurate and nature.

They are usually $200+ more expensive than graphics tablets, size range from 10-inch to 32-inch. But they still need an extra laptop or computer to plug your tablet into – these are essentially a screen monitor.

There are a number of brands for Drawing tablets, but the good 3 name brands you need to know are: Huion, XP-Pen or Wacom. Most tablets that these have to offer are really good, some being more expensive than others.

Wacom was meant for professionals, hence it has an expensive price. Huion and XP-Pen are brands generally bought by beginners and enthusiasts, because they have really good value for money. Other Best Wacom Alternatives include Veikk, Gaomon, and Ugee.

3. Standalone Pen Tablet

You can always use other standalone tablets, like the famous Apple iPad Pro (iPad OS), Microsoft Surface Pro (Windows) or Samsung Galaxy Tab lineup (Android).

All these tablets have pen input support, in-built computer and screen, This makes them very portable – you can take them anywhere, such as sketching on the couch or out in a cafe.

The downside is that they are more expensive, and you have a very limited selection of software available to you.

Choose a digital art software that suits you

This can be drawing software, or it can be 3D modeling software, or even animation software. Whatever works for you.

Each program has its unique strengths and features that can enhance your ability to create your own digital art.

Also, the choice of digital art software depends on your hardware and operating system, because not all software is compatible with all devices.

1. Photo Editing Software

To get started with photo manipulation, you need a photo editing program. While the industry standard is Adobe Photoshop, it’s monthly recurring fee can be a bit steep for those just starting out.

Affinity Photo is a powerful and affordable image editor that is directly competing with Photoshop for enthusiasts and professional users.

A great free alternative that still has great function and a good amount of online tutorials is the desktop software GIMP.

Photopea, Canva or Pixlr Editor is perfect if you want to have a browser-based, online way to edit your photos.

2. Digital Illustration Software

As for Digital Illustration software, the most popular digital illustration app is Adobe Illustrator, but as with Photoshop, it’s monthly cost isn’t all that appealing to beginners.

Coreldraw is another popular Illustration software for print ready graphics and illustrations, the UI is very user friendly and easy for graphics designers.

In terms of function and style, Affinity Designer is an impressive, low-budget alternative to Adobe Illustrator.

Good free alternatives to Illustrator is Inkscape, great to draw beautiful drawings, very fast and light weight.

3. Digital Painting Software

Many artists use Photoshop for digital painting because of Photoshop’s wide range of brushes and tools, but there are also some other great alternatives with a cheaper price tag.

If you want to get into digital painting without spending a few hundred dollars every year. This includes Clip Studio Paint, Procreate, Corel Painter, Paint tool SAI, Sketchbook, and free drawing apps like Krita, Medibang Paint, Firealpaca, Mypaint, Artweaver, etc.

4. Animation Software

2D Animation Apps: For those who like drawing and creating 2D animation, Toon Boom Harmony, Adobe Animate, Moho Pro, Synfig Studio, Opentoonz, Pencil2D and TVPaint are all well-known and high-quality animations tools.

3D Animation Programs: For 3D animation, Start with any of the software – Blender , 3ds Max, Autodesk Maya, Cinema 4D, Houdini, Modo, Daz Studio, Cascadeur any one of them .

5. 3D Modeling Software

Maxon Cinema 4D, Autodesk Maya and 3DS MAX are three of the most famous 3D modeling software which artists and studios often use in many fields.

Pixologic ZBrush is a digital sculpting tool that combines 3D/2.5D modeling, texturing and painting.

Blender is the most popular 3D creation platform which is free, open-source and powerful. It supports the entirety of the 3D pipeline—modeling, rigging, animation, simulation, rendering, compositing and motion tracking, even video editing and game creation.

How to start Digital Art?

If you guys are a complete beginner with no art experience you should start with drawing by traditional methods first(pen and paper method).

We know that this is not the thing you were expecting but at least do some basic exercises which will give you the flow to draw in the drawing tablet or a iPad or any other gadgets you name it and it requires the skills.

Practice the Art

After getting comfortable with the basics, hardware and software, start your art journey by practicing art.

First choose your Niche or art of your interest and start working towards it. because in the field of art you will improve only when you practice daily or at least practice two to three days a week.

Once you started practicing you will see the results as time goes by and trust us guys it will give you a satisfaction which makes you happy and gives you motivation to draw more and practice more.

Best Digital Art Sites to Share Your Artwork

In the digital world, authenticity and connection are key.

Are you ready to show the world your artwork? These well-known online art sites are the right places to share and explore new digital art Ideas:

DeviantArt: The place to discover millions of works of art in every shape, size, and style. You can also join art tribes and make your voice heard.

Behance: Here you can exchange ideas with other digital artists, show off your portfolio, and let the community boost your creative ego.

ArtStation: For professionals and aspiring artists alike, especially those in gaming, film, and entertainment. Show them what you’ve got!

Dribbble: If you are interested in digital design, illustration, or animation, this is your stage to shine. It’s also a place where you might land a gig.

Pinterest: Here you’ll find an endless treasure trove of ideas and inspiration for all your digital art projects. Create boards, save pins, and unleash your creativity.

Medium: Not just for reading, but also your platform for sharing your stories, especially those related to digital art. Immerse yourself in the world of Blogging Guide, Digital Art, and Pixel Vision.

In addition, Utilize social media to your advantage. Share your art on platforms like Instagram, Facebook, and Twitter. Engage with your audience, and post behind-the-scenes glimpses into your creative process.

Conclusion

We hope our post gave you a better guide on digital art. Enjoy the process and not the destination so that you will feel the satisfaction guys.

Getting started with digital art can feel like an overwhelming task, but don’t let the stress get to you.

Adjust your expectations, and watch some tutorials. Your goals won’t seem so formidable once you get the hang of things.

If you can do that, you’ll be well on your way to mastering a new skill set.

Source: https://pctechtest.com/beginner-guide-to-start-digital-art

(2)

10 Best Photo Editing Software

December 6th, 2023

Photo editing programs are an easy, fun and creative way to make your images pop!

In this article, I want to share with you some really cool photo editors that will enhance your images and position your brand more strongly on your social feeds.

Some photo editing apps are better than others, some are free others are paid. Just keep in mind the free ones can be limiting and not offer what you need.

10 best Photo editing software

Several photo editing options are available, catering to various skill levels. Here are some popular choices:

1. Photoshop CC

Adobe Photoshop CC is known for its ability to create a wide range of images from scratch. It is used by many professional photographers and graphic designers.

It allows users to do things like crop images, adjust lighting, add effects like gradients or shadow boxes, change background colors and more.

It can also be used to create animations like time-lapse videos or stop motion animations using layers.

The software also allows users to create their own custom brushes and filters which they can use on any image they wish including photos taken with their smartphone!

Photoshop comes with many other features such as layers which allow you to stack up different saved images on top of each other without losing any quality or detail when overlaying them onto another image.

2. Lightroom CC

Adobe Lightroom CC is a powerful tool mainly used by photographers but it’s relatively easy to pick up and play. It has a variety of features that help to curate, process, and showcase photos.

Lightroom lets you work with the raw files from your camera as well as support other file types.

It also lets you adjust the photos with a wide range of tools like editing and retouching tools, noise reduction tools, different filters and presets that can be applied to your photo or video, photo layout options for print or web publishing, and many more features.

3. Snapseed

Snapseed is an easy-to-use photo editor that is available on both iOS and Android devices. It has a variety of editing tools that can be used to give photos a professional look.

It has a wide range of filters, textures, tools, frames and more. It also has an in-app camera for taking new photos from different angles or perspectives.

A user can edit the same photo with Snapseed for several hours without getting bored of it.

4. Affinity Photo

Affinity Photo is a powerful image editing program with capabilities that can easily rival Photoshop.

From its vast array of tools like RGB color sliders, exposure, tone curve and sharpening controls, to its modern editing features like Live Blend Modes and Clipping Masks, Affinity Photo is one of the most comprehensive image editing suites available.

While Photoshop might have a larger library of features, Affinity Photo comes close if not surpassing it in many areas.

It is well accepted by professionals and common users due to its high performance and low price.

5. Canva

While primarily a graphic design tool, Canva also offers basic photo editing features. It’s easy to use and great for social media graphics.

The interface is simple with all the necessary functions to create advertisements, posters, invitations, presentations, websites or social media posts.

There are also function buttons that allow you to change the layout, size and color of your design. There are various templates available for different types of projects as well available in different languages.

6. Pixlr

Pixlr is a cloud-based set of image tools and utilities, including a number of photo editors, a screen grabber browser extension, and a photo sharing service.

The suite was intended for non-professionals, however the apps range from simple to advanced photo editing. It has a free version and a more advanced paid version.

7. Fotor

This online photo editing tool offers a range of features, including filters, retouching, and graphic design elements. It has a user-friendly interface and offers pre-made templates as well.

Everyone has the ability to design any form of graphics and covers, limited only by their imaginations.

8. PhotoScape X

PhotoScape X is mainly dedicated to photo editing and cropping, with which you will be able to retouch all the images you want in a very simple and fast way.

Especially now when it is very important to have good photos to share through social networks.

There’s a free version available. However, it should be noted that PhotoScape is not yet as popular as other editing programs.

9. GIMP

GIMP is a great tool and generally has almost the same features as the photoshop has.

It includes many advanced editing capabilities, including layers, plug-ins, painting, text, filters, selection, and masking.

Counting that its free and supported on linux, it can be great for students and anyone who’s not ready to pay for Adobe subscription.

10. Darktable

Darktable is a free and open-source photography workflow application that works well for managing and editing raw images.

Rather than being a raster graphics editor like Adobe Photoshop or GIMP, it comprises a subset of image editing operations specifically aimed at non-destructive raw photo post-production.

It’s a bit clunky and lacks some of the latest features of Lightroom / Lightroom Classic.

Conclusion

Many people will recommend Adobe Photoshop and Adobe Lightroom. Both are really great programs and the industry standards. But they are not for beginners and they are expensive.

For beginners I suggest starting with something free or very inexpensive just to get the basics of photo editing. Then go a little more advanced.

Remember to explore these options based on your specific editing needs and skill level.

FAQs

Do I need a drawing tablet for Photo editing?

Yes, it’s far superior than a mouse for editing and retouch work in Photoshop. more details here: Pen tablets for Photoshopdigital tablets for GimpGraphics Pads for photo editing.

You can get a low priced pen tablet that will do very nicely for this. You will find that you just have so much more fine control this way. It’s good to have it as an option.

It also will help speed up your workflow significantly better than a tablet in Lightroom. In LR you want to minimize how much you use the mouse. So editing controller and hotkeys are the way to go.

In addition, You can use it with note taking appsgraphic design program and digital drawing software. I can’t imagine going back to just using a mouse, especially sacrificing pressure sensitivity.

How to choose the best photo editing software?

There is no one-size-fits-all answer to the question of what’s the best photo software for your needs. It depends on your skill level, your needs, your preferences, and your goals.

The best way to choose the best photo software for your budget is to try them out for yourself. Most photo software offer free trials or demos that allow you to test their features and functions before you buy them.

You can also read reviews and watch tutorials online to get a better idea of how they work and what they can do.

Ultimately, the best photo software for your budget is the one that suits your style and helps you achieve your vision.

(0)

Best Wacom Graphics Tablets you Should Consider Today

December 5th, 2023

A high-quality drawing tablet is essential for producing professional-quality artwork and designs. For many photographers, animator, artists and designers, there has only been one reliable name in tablets, Wacom.

Wacom is a very professional and reliable brand. Their graphics tablets are of incredible quality and are industry standard in the animation, gaming and film industries.

Are you thinking of buying the best wacom tablet for digital sketching, drawing, photo editing, online teaching, and more?

Since the company has such a vast array of models and types, It can be difficult figuring out what to pick for your needs.

To help in that regard, we’ve collected what we believe to be the best of its offerings right now. We have Included options for every type of user so whether you are looking for the best budget.

What is Wacom?

Wacom is a Japanese company that specialises in graphic tablets and related devices. It was established in 1983 in Japan.

From cinema and animation to auto-design and manga, Wacom comprises many creative customers worldwide.

Wacom also provides revolutionary user interface technologies and solutions to successful medical, educational, and other companies.

Wacom owns the pro market. Meanwhile, It has filled out the more affordable end of its range, with budget tablets to tempt those who don’t have huge amounts to spend.

Is a Wacom tablet worth buying?

Nowadays, There are many other options out there, cheaper ones, such as HuionXPPenUgeeGAOMONVeikk, etc. However, Even though Wacom tablets are relatively expensive, they are well worth buying.

Wacom tablets are often seen as being of more features and better performance. For example, the Cintiq Pro range display has wider color accuracy, higher resolution, and provides 27-inch and 32-inch screen size that other brands doesn’t have.

Thanks to a combination of solid build quality, extremely high-quality components. Every wacom tablet is built to last, which means you’ll be creating stunning works of art for many, many years to come.

Wacom produce the most precise, lag-free, responsive styluses in the industry that require no batteries to work. These pens comes with a lower activation force and can recognizes light pen strokes.

Wacom pen tablets and displays are built with artists’ needs in mind. they comes with good compatibility with practically every operating system and piece of artistic software.

Wacom have taken longer time to refine and hone their drivers within their tablet products. This, along with their features and design, mean they have a lot of extra capabilities that other brand’s products do not yet offer.

There’s lots of help and support online for almost anything you need because most artists use Wacom, so there’s a lot more info available for you compared to other lesser known brands.

We recommend saving up more for wacom if drawing quality, durability and longevity is concern.

What are the different types of Wacom tablets?

1. Drawing tablet without screen

Wacom Intuos and Intuos pro series are a really good pen tablets for beginners who getting started in digital art.

The main reasons for this is that they are much more affordable and quite durable.

They don’t have a built-in screen, so you will need to look at your computer screen while drawing on the tablet.

2. Drawing tablet with screen

Wacom Cintiq and Wacom Cintiq Pro series are drawing tablets with screen, which is ideal for illustrators and those doing a lot of line drawings.

Here, it pays to be able to look at what you are drawing as you draw it, exactly as if you were using paper.

In general you pay more for this privilege, but many prefer screened pen tablets for their ease of use, more natural and intuitive.

They still need to be plugged in to your computer to work, and will use your computer’s resources to work.

3. Standalone Drawing Tablet

Portability is crucial as you will probably draw, edit and write on the go. The Wacom MobileStudio Pro is a unique standalone graphic tablet for creative professionals who want the freedom to create anywhere.

You don’t need a laptop or a desktop to use it, as everything (screen, computer, and stylus) is within one handy box. Of course, they are the most expensive in general.

10 Best Wacom Drawing Tablets

Let’s go over the 10 different Wacom tablet models that are now in the market and see which one is the right for you!

We selected this list based on Price, features, specifications, and performance.

1. One by Wacom

2. Wacom Intuos

3. Wacom Intuos Pro

4. Wacom One 13

5. Wacom Cintiq 16

6. Wacom Cintiq Pro 16

7. Wacom Cintiq 22

8. Wacom Cintiq Pro 24

9. Wacom Cintiq Pro 27

10. Wacom Mobilestudio Pro 13

In conclusion

Wacom is the industry leader in the pen tablet field and with good reason – their products are well designed, well made and customisable in virtually every way imaginable.

This is a brief overview of all the Wacom tablets on the market to help you choose the right one for you based on your current skill level, your preferences and your budget!

If you’re a beginner who is looking to utilize a tablet for recreational use, you’ll likely be better off saving some money and choosing to one of the regular Wacom Intuos tablets.

If you’re a professional who is looking to invest in a tablet for multimedia manipulation, we highly recommend Wacom Cintiq display tablets.

If you are an advanced artist who is constantly on the go, and you don’t want to be stuck in one place. The freedom and portability of Wacom Mobilestudio Pro gives you will be worth that investment and more.

Whether you’re an artist, teacher, designer or photographer, these devices have a lot to offer.

Frequently Asked Questions about Wacom

Which Wacom tablet is the best for beginners and professionals?

The Wacom Intuos, Intuos Pro and entry-level wacom cintiq is a fabulous choice if you are getting started with digital art. They are compatible with many platforms and has essential features you need.

The Wacom Cintiq Pro and Mobile Studio models adapt well to professional environments. They bundle many premium features like a vast color gamut, 8k levels of pressure, tilt recognition, multi-touch function, higher resolution, radial menus and etc.

How many pressure levels do you need with a Wacom tablet?

The number of pressure sensitivity levels indicates how realistic and natural your drawing experience will be.

The more pressure sensitivity a graphics tablet has. The more you will be able to vary the size of your strokes with pressure.

Most wacom tablets have a pressure sensitivity of at least 2,048 levels, which is adequate for most users.

However, if you want to achieve more realistic and expressive effects, you may want to look for a higher pressure sensitivity, such as 4,096 levels or more.

How do I install the drivers for my Wacom tablet?

To install the drivers for your Wacom tablet, visit the Wacom official website and download the appropriate drivers for your operating system. Follow the installation instructions provided.

Is it possible to connect a wacom tablet to an Android smartphone or tablet?

Wacom tablets are primarily designed for use with computers, but some models are compatible with certain Android smartphones or tablets. Ensure to check compatibility before purchasing.

Can I replace the pen that comes with a Wacom tablet?

Yes, you can usually purchase replacement pens for Wacom tablets. Check the Wacom website or authorized retailers for compatible pen options.

Can I use a Wacom tablet without a computer?

Wacom Intuos and Cintiq tablets require a computer or compatible device to function since they are input devices.

Only Wacom Mobilestudio Pro can work without a computer.

Source: https://pctechtest.com/best-wacom-drawing-tablets

(0)

IPad Pro vs Surface Pro 9 Comparison

November 30th, 2023

For artists, photographers, designers, students, and other creative professionals, a tablet can be a handy second device for getting work done.

In the portable and handy tablet market, Surface Pro 9 and Apple iPad Pro (6th Generation) are two dominant players, Because they comprise powerful hardware, sleek design, and diverse features.

Both are impressive. But, what’s the differences between them? which one is better and best suited to meet your preferences/needs?

In this article, we shall be opting for an exploration of their strengths along with their weaknesses. It will further help you reach a fair decision.

IPad Pro vs Surface Pro 9 Comparison: Which One is Better?

We will take a look at the hardware, OS, pen input support, performance and many more features of these 2 devices: iPad Pro vs Surface Pro 9 Comparison.

Design

The 12.9-inch iPad Pro measures 11.04 x 8.46 x 0.25 inches and weighs 682 g. The Surface Pro 9 comes in at 11.3 x 8.2 x 0.37 inches and weighs 879g.

Both iPad Pro and surface pro 9 tablets are super slim, feature an anodized aluminum body, and pack a large, immersive display.

But the bezels on the iPad Pro are much slimmer and consistent all the way around. The bezels on the Surface Pro 9 are similarly narrow on the sides, but the top and bottom borders are thicker.

Both tablets are very close when comes to portability, They are still very compact and easy to bring around compared to the smaller 9 to 11-inch model, but when it comes to one-handed usage, the experience with the smaller model is significantly better.

The Surface Pro 9 comes in four colors: Platinum, Forest, Graphite, and the Sapphire option. The iPad Pro, on the other hand, is offered only in two colors: Silver and Space Gray.

Screen Panel

Both Surface Pro 9 and iPad Pro sport high-quality displays powered by proprietary technologies. Microsoft’s Surface Pro 9 uses PixelSense Flow while Apple’s iPad Pro relies on Liquid Retina XDR.

The difference is backlighting. Apple’s iPad Pro features mini LED backlighting that gives better contrast and HDR quality than the Surface Pro’s conventional IPS LCD panel.

iPad Pro’s display has a contrast ratio of ​​1,000,000:1, which is impressively capable of producing deep blacks while maintaining a high brightness of up to 1600 nits, while the Surface Pro 9 maxes out at 450 nits and has a 1,200:1 contrast ratio.

This means that the iPad Pro is more colorful, brighter and better suited for outdoor use.

Screen Size and Resolution

Surface Pro 9’s screen comes at 13-inch with a 2,880 by 1,920-pixel resolution, giving it a pixel density of 267 PPI.

The iPad Pro is available in two sizes, the 11-inch and the 12.9-inch. The 12.9in model offering a 2,732 by 2,048 resolution, delivering 264 PPI.

That 3-pixel difference aren’t worth fussing over. At this pixel density, the display will look perfectly sharp.

The Surface Pro 9 has a 3:2 aspect ratio, while the 12.9-inch iPad Pro has a 4:3 aspect ratio. Both are fine and suited for viewing videos and working in documents, but the 3:2 aspect ratio is a bit longer in portrait mode.

Color Accuracy

The Surface Pro 9 has a color accuracy of 75.1% DCI-P3, while the iPad Pro has a wider color gamut of 100% DCI-P3.

This means that the iPad Pro is more accurate, vivid and vibrant when displaying colors.

Refresh Rate

Both displays have a 120Hz refresh rate, which makes content in motion on the screen smoother, crisper, and more responsive for scrolling, drawing, gaming, watching movies, and more.

Moreover, It dynamically adjusts the screen refresh rate up to 120Hz and down as low as 24Hz on an iPad Pro and 60Hz on the Surface Pro 9.

Performance

Microsoft’s Surface Pro 9 relies on the 12th gen Intel processor found in laptops (i5 or i7), while Apple’s iPad Pro is powered by its own proprietary M2 processor.

The cellular variant of the Surface Pro 9 uses a Microsoft-exclusive ARM CPU developed by Qualcomm. It will have a slower performance than Intel, but a superior battery life.

12th gen Intel processor can provide a speedy performance and should be ideal for productivity tasks like note taking and some light creative work (Photoshop or, say, Lightroom).

However, Since the Surface Pro 9 relies on Intel Iris Xe graphics instead of a discrete graphics card, you’re going to have a rough time for advanced gaming, 3d modeling and animation.

Apple M2 SoC is renowned for both power and efficiency. It is faster than the Surface Pro 9, able to run more intensive tasks such as video editing and gaming with ease.

Memory and Storage

The iPad Pro start with 128GB of storage, with options for 256GB, 512GB, 1TB, and 2TB. The non-terabyte capacity models have 8GB of memory, while the terabyte ones have 16GB.

Microsoft’s Intel models are available in configurations with 8GB, 16GB, and 32GB of LPDDR5 RAM, while the SQ 3 version has 8GB and 16GB LPDDR4x variants.

Microsoft also includes 128GB, 256GB, 512GB and 1TB storage options across all model.

iPad OS vs Windows 11 

The Surface Pro 9 runs a full version of the Windows 11 operating system. This gives it more customizable features, access to an open file system, and access to powerful software, including the desktop versions of Office and Photoshop.

But Windows 11 is not as smooth as iPad OS, and the tablet mode is bad. The UI is very hard to use and nothing is optimised for touch as the iPad.

On the other hand, the iPad Pro uses the tablet-exclusive iPadOS, which have apps that are designed for a touch-based computer. So it is very limited for normal desktop OS functions eg multi-tasking, file manager.

There are really great apps on the iPad, and some are pretty much iPad exclusive, like, for example, Procreate, which is one of the best drawing apps out there.

However, most of the time, the mobile version of the app like photoshop, is not as feature-rich as Windwos desktop version.

The OS & software you use comes down to what you need. If you need a full operating system, then the surface is the obvious choice. As for consuming content, scrolling through the web, and such the iPad is great.

We don’t recommend Surface Pro 9 SQ3 version, because some areas of Windows 11 and 64-bit apps aren’t optimized for ARM-based chipsets. It should still be great for web browsing and other day-to-day activities while other apps like Photoshop might not work quite as well.

Apple Pencil 2 vs Surface Slim Pen 2

Neither The Surface Pro or iPad Pro comes with a pen but they are both pen compatible. It’s an additional $100 and $ 120 respectively.

Surface Slim Pen 2 has 4,096 levels of pressure sensitivity and precision tilt detection, which allows for a natural writing and drawing experience.

Slim Pen 2 is really comfortable to hold on and it is also the only one of the two styluses to sport an eraser on its back. You could erase stuff by just flipping the pen around.

Still, when it comes to the overall drawing experience, Apple Pencil (2nd Generation) is the best active stylus on the market.

with a 9ms response rate that makes it feel responsive in use, It has a handy Hover feature, decent tilt sensing and pressure detection too.

Use it to take quick notes, use it for drawing, use it for general browsing even, it all feels great.

Apple Magic Keyboard vs Microsoft Signature Type Cover

The Surface has a built-in kickstand, which is pretty useful. The iPad doesn’t have a built-in stand, but of course, you can get a keyboard case that can double as a stand for it.

Microsoft’s Signature Type Cover Keyboard has three levels of white backlighting and enough up-and-down key travel for satisfying tactile feedback. It also has an easy-to-use glass touchpad and room to put away the Surface Slim Pen 2 and recharge it.

Apple’s Magic Keyboard Attaches magnetically to iPad, It folds smaller than most other keyboard cases, wrapping tightly around the iPad. With scissor-switch keys, Typing on it is comfortable and convenient.

The keyboard is a necessity if you want both tablets to replace your laptop. Apple charges $329 for its Magic Keyboard, while Microsoft’s Signature Type Cover Keyboard costs $130.

Cameras

The Microsoft Surface Pro 9 doesn’t pay much attention to its camera. You get a 5-megapixel camera on the front for video calling and Windows Hello authentication, with a 10MP autofocus camera on the back.

The iPad Pro, in contrast, is the significantly winner. You get two cameras at the rear (12MP and 10MP wide angle) along with a LiDAR sensor for depth mapping.

Combined with features like auto image stabilization and TrueTone flash, the iPad Pro’s cameras are great for casual photography and 4K recording at 60fps.

The front camera sports a 12MP resolution with cinematic video stabilization. The Ultra Wide lens along with TrueDepth technology renders even the front camera footage high quality.

Luckily, the front cameras of Both tablets are able to do panning and zooming to make sure you’re in the frame. Apple called “Center Stage”, while microsoft called “Automatic Framing feature”.

Audio

Surface Pro 9 comes with dual far-field microphones that pick up your voice clearly and a set of stereo 2W speakers. It is a superb device for video calls, then, but less so for entertainment.

It’s hard for two speakers to beat four speakers on a tablet. The iPad Pro’s quad-speaker setup produces loud and surprisingly balanced audio, whether you’re streaming Pandora or immersing yourself in a flick.

Furthermore, The collection of five “studio-quality” microphones dotted around the iPad Pro’s enclosure is paired with the speakers.

Connectivity

For local wireless networking, both Apple and Microsoft include support for Wi-Fi 6E, which will be handy when on appropriate networking infrastructure.

Apple does use Bluetooth 5.3 in the iPad Pro, while Microsoft use Bluetooth 5.1 in the Surface Pro 9.

Apple includes 5G cellular support in its iPad Pro as a paid extra, which supports both sub-6GHz and mmWave connections.

Microsoft limits its 5G connectivity to models sporting the SQ3 chip- ARM-equipped Surface Pro 9, You cannot get cellular on the Intel models.

On to physical connectivity, and this is where Microsoft pulls ahead.

Surface Pro 9 have two USB-C/Thunderbolt 4 ports, a Surface Connect port, and a Surface Type Cover port.

Apple includes a single USB-C/Thunderbolt 4 port, though it also has a Smart Connector for connecting with accessories.

This makes it easier to connect a hub and attach multiple peripheral devices to the Surface Pro 9.

Battery Life

If battery life is a huge priority, the iPad Pro might be the way to go.

The iPad Pro’s battery lasted around 10 hours of continuous browsing or 8 hours of drawing on Procreate with the 2nd gen Apple pencil.

On the other hand, Surface Pro 9’s battery offered 8 hours of web surfing or 6 hours of drawing on Sketchable with the Surface Slim pen 2.

The main reason behind the iPad Pro’s better battery life is its less power-hungry M2 chipset. Surface Pro 9’s 12th Gen Intel CPU is less efficient in battery consumption.

Price

Microsoft Surface Pro 9 starting at $1,099.99, This model comes equipped with an Intel Core i5 processor, 8GB of RAM, and a 256GB SSD for storage.

Retail prices for the 11-inch iPad Pro start at $779.97, while the 12.9-inch iPad Pro starts at $1,049.00. This model is equipped with M2 processor, 8GB of RAM, and 128GB storage.

Similar Posts: Samsung Galaxy Tab S9 Ultra vs iPad Pro Comparison ,Wacom Cintiq vs iPad Pro Comparison , XP-Pen Artist 22R Pro vs Wacom Cintiq 22 Comparison.

Conclusion

Surface Pro 9 is a great 2-in-1 device for productivity and compatibility in terms of Windows software.

iPad Pro excels in terms of touch-based interfaces, creative abilities, battery life, integration with the Apple ecosystem, and more.

With their many features and capabilities, the Microsoft Surface and iPad Pro are both excellent options for anyone looking for a powerful device.

Both are great for watching videos, browsing the web or video conferencing. They also each have solid touch screens you can draw or write on.

Ultimately, Whether you choose the iPad Pro or the Surface Pro 9 depends on your preferences and specific needs.

Source: https://pctechtest.com/ipad-pro-vs-surface-pro

(0)

Adobe Photoshop vs Illustrator Comparison

November 28th, 2023

Photoshop nd Illustrator are two of Adobe’s massively popular graphics programs.

If you’re working on a new project, you might have a hard time figuring out which of the two programs will work best for you, since on the surface they seem so similar.

We’ve compiled some of the main differences between Photoshop and Illustrator to help you get started.

Photoshop

Photoshop is one of the most popular Photo Editing Programs for modifying already created images or graphics, like photos, and is Adobe’s most popular program.

Photoshop is raster-based and uses pixels to create images. so if you’re scaling something up or down, it can lose its quality very quickly.

Photoshop is a popular choice for web graphics, photo editing and designs since those projects will stay at a fixed size.

Editing photos is awesome in Photoshop, because it includes a lot of unique filters, special effects and tools.

Another great benefit of Photoshop is that you can have complete control of your projects, since you can edit your graphic pixel-by-pixel.

Illustrator

Adobe Illustrator is an advanced vector-based Digital Drawing Software. So, unlike Photoshop’s pixel-based format, it uses mathematical constructs to create vector graphics.

In Illustrator, a line is composed of two dots connected by a computer algorithm, instead of just a line of pixels. Because of this, Illustrator is used often to create logos or anything that may need to be printed or displayed at different sizes.

A vector graphic will never lose its quality if it’s scaled up or down. Illustrator will also give you a better print output since it’s not resolution dependent.

A drawback of Illustrator is that it can’t be used easily to modify images that are already created, since there are limited filters and image editing tools available to you.

Do You Need a Drawing Tablet for Photoshop and illustrator?

Using a stylus on a drawing tablet makes editing and drawing much more natural than using a mouse, and allows you to work faster and more accurately too.

Pen Tablets for Photo Editing help a lot to people who suffer from carpal tunnel, no matter how long you work with a stylus, you’ll never feel tired or get a soar wrist.

While using a mouse you only have your wrist movements whereas while working with a pen you get a full range of motion with your arms and wrists.

Graphics Pads are absolute positioning devices while mice are of the relative positioning variety. Your clicks and selections will be accurate with a tablet as your pen cursor position will be mapped precisely to your screen.

Drawing Pads have pressure sensitivity, something a mouse simply does not have. so you can draw like a pen or pencil, applying thicker or thinner strokes as you go. This makes it better suited for photoshop and illustrator especially when you are doing detailed work.

You can also control the shape of the strokes by simply tilting the pen, a feature that is better for high-end professionals.

The shortcut keys on tablets reduce the need to switch between tools, allowing you to concentrate on the work at hand. This enables you to work faster and eliminates the tedium and strain that come with performing seemingly repetitive tasks.

Investing in a graphics pads for photoshop and drawing pads for illustrator can help you take your digital art and design skill to the next level.

Conclusion

You’ll come to find that some people just prefer to use one software over another, but sometimes it’s best to use Photoshop and Illustrator together.

For example, you may need to add some text to an image you need to edit. Maybe you need to add a watermark to a photo for your blog or over an image for your portfolio.

It’s best not to add any text to an image in Photoshop since it can distort, so transferring the edited photo to Illustrator and then adding the text there will give you the best result.

One is definitely not better than the other, they’re just different. Understanding the basic differences between Photoshop and Illustrator will help you make the decision about which software is best for your next project.

Photoshop’s primary use is for the correction, manipulation and compositing of photographic images while Illustrator’s primary use is for creating, manipulating and compositing vector illustrations.

Both are extremely useful and serve their own purposes well.

Which you need depends on the type of work you intend on doing. Here’s a very short list that might help you.

Illustrator can import photos but it is primarily an illustration tool mainly for drawing and creating raster images for art, advertising and website illustration.

(12)

Best Alternatives to Wacom Tablets

November 22nd, 2023

The graphic tablet is one of the most necessary accessories in the graphic artist’s studio.

It allows artists to use a pen to make creative design such as incredible artwork, illustrations, and animations onto the computer screen.

In addition, it speeds up workflow, improves precision and offers greater ergonomics than a mouse.

Wacom is a well-known brand in the world of digital art, but their tablets can be quite expensive.

Fortunately, there are some best wacom alternatives that offer the same quality and performance without breaking the bank.

Why is Wacom considered the Best?

Wacom is considered by many to be the industry standard. Wacom has been creating drawing tablets for years. They are well known for creating reliable, long-lasting products, with a lot of key tech.

In the industry, most artists use Wacom products because of their quality, durability and superior accurate and precise.

Wacom is known for providing quality driver support. Their tablet drivers continue receiving updates long after a product is released.

Is the Wacom worth the Money?

Wacom tablets are very expensive, It costs twice as much as some of its counterparts in the market.

However, the brand is renowned for its high quality, And their tablet offers an accurate and pleasant drawing performance. In addition, there are some brand premiums.

If you are professional and have a flexible enough budget, then you shouldn’t think twice about getting the Wacom.

What types of tablet does the Wacom Offer?

Wacom provides intuos pen tablets for beginners, Cintiq interactive pen displays, and MobileStudio Pro standalone drawing pads to equip and inspire everyone to make the world a more creative place.

Wacom Intuos and Intuos Pro are drawing tablets without a screen, so you need to draw on the tablet while looking at your computer screen.

These drawing tablets aren’t as powerful as others but they are the most affordable. This makes them the best option for budding artists who want to start doing digital art without spending too much on a tablet, for now.

Wacom Cintiq has an Integrated screen that comes in various sizes and provide a pen-on-screen experience for precise and natural drawing.

Although the Cintiq models have a screen of their own, they are not “standalone tablets”. They need to be plugged in to your computer to work, and will use your computer’s resources to work.

Wacom MobileStudio Pro is a computer and a portable small Cintiq, much like a Microsoft Surface, iPad and samsung galaxy tab.

Therefore, they don’t need to be connected to your computer to be able to work with them. It’s portable, easy to use, and allows you to draw on the go.

Still, they have one noticeable flaw: the price.

What brand competes with Wacom?

There are a hand full of really good competitive brands out there, and it’s really hard to beat prices. Lots of features for a fraction of the Wacom price.

1. Huion

Huion is a chinese company, which was established in 2011. Its logo is a representation of 3 pencils. The number three symbolizes in the Chinese culture “stability, balance, the tripartite confrontation and development”.

Huion uses independent innovations to build digital panel and screen systems, stylus pens and other professional product lines.

At this moment, it has a total of three series: Inspiroy, Kamvas, and Kamvas Studio. They all have very iconic characteristics and you can select the right model that fits your demand.

2. XP-Pen

XPPen is another Chinese brand that makes great drawing tablets. It was originally founded in Japan in 2005 and is now affiliated with a parent Chinese company, Hanvon Ugee.

It is a professional and reliable supplier of graphic tablets, pen display monitors, stylus pens and more digital graphical products.

XP-Pen has a huge variety of graphic tablets as well as drawing accessories. Right now, the company provides tablets from 3 different series: Star Series Tablet, Deco Series Tablet, Artists Series Display tablet.

XP-Pen is currently the only company which offers company-developed Linux drivers (still in beta testing). As a comparison, Wacom’s Linux drivers are community-developed, and are not actually official drivers.

3. Gaomon

Gaomon is a Chinese high-tech enterprise that is known for independently researching and developing core technology such as animation products and handwritten input digitizer products.

Since our establishment in 2011, GAOMON has developed over ten digital products that have found applications in various fields.

4. Ugee

Ugee is a professional manufacturer specializing in research, development, production, and sale of pen tablets and pen displays.

Founded in Shenzhen, China in 1998, they also established UGEE online drawing school, which served to help young artists learn about and improve their digital drawing skills.

5. Veikk

Founded in china in 2009, Veikk has been dedicated to the research, design, R&D, production, and marketing of digital pen tablets and we have obtained more than 60 product patents.

6. Xencelabs

Xencelabs is a new company which seems to be created by many veterans in the tablet field, such as developers with prior experience in Wacom and other such tablet companies.

Xencelabs developed about 5 different tablet models, 1 of them have a display surface.

How to Choose the Best Wacom Alternative Graphics Tablet?

When considering an alternative to Wacom, it’s essential to consider factors such as pen pressure sensitivity, display quality, size, compatibility with software, and overall user experience.

Reading reviews, comparing specifications, and considering your specific requirements and budget will help you find the best alternative that meets your needs.

12 Best Wacom Alternatives in 2023

In this list of the best Wacom alternative models you will find on-par performance whether you need Wacom Intuos alternatives, Cintiq alternatives, or the MobileStudio alternatives, you will find it here!

1. Gaomon S620

2. XP-Pen Deco 01 V2

3. XP-Pen Artist 12 (2nd gen)

4. Huion Kamvas 13

5. Ugee U1600

6. Huion Kamvas Pro 16

7. Huion Kamvas 22 Plus

8. XP-Pen Artist 24 Pro

9. Huion Kamvas Pro 24

10. Apple iPad Pro

11. Samsung Galxy Tab S9

12. Microsoft Surface pro 9

Conclusion

In the end, you’re just trying to reduce cost and get decently cheap products to make simple art, not to pay more to get the most performance tablet for professional drawing.

Wacom alternatives are not equal to wacom, but it’s close. Every year their products get better and bette.

It’s worth looking for good, affordable Wacom alternatives. For the rest of us hobby artists, spending that much is just not in the cards. But it’s perfectly possible to find a suitable alternative without sacrificing quality.

With 10 tablets to choose from, Now you should be able to find the best Wacom alternative without going over budget. We hope you’ll find this list useful!

Having a great pen tablet is always a good investment for an artist. Once you get used to using your device, you’ll never want to use a mouse ever again.

Source: https://pctechtest.com/good-cheap-alternatives-to-wacom

(0)

Using Pen Tablets for Interactive Online Teaching

November 17th, 2023

In the ever-evolving landscape of education, online teaching has become an integral part of the learning process. Educators around the world are adapting to virtual classrooms to provide quality education to students.

As this mode of teaching continues to gain traction, it’s essential to explore innovative tools that can enhance the online learning experience. One such tool that holds significant potential is the use of pen tablets.

In this article, we’ll delve into the ways educators can leverage pen tablets to create interactive and engaging online teaching environments.

Enhancing Visual Communication

Visual communication plays a crucial role in online teaching. Through the use of pen tablets,such as wacom, huion, xppen, gaomon, ugee, veikk, etc. educators can seamlessly illustrate concepts, annotate content, and create diagrams in real time.

This enhances the clarity of explanations and makes complex topics more accessible to students. By incorporating visual aids directly into their virtual classrooms, educators can foster better understanding and engagement among students.

Real-Time Problem Solving

One of the challenges of online teaching is the lack of immediate interaction.

Pen tablets for online teaching address this challenge by enabling educators to solve problems in real time. They can work through mathematical equations, scientific experiments, and other practical tasks while students follow along.

This interactivity bridges the gap between physical and virtual classrooms, providing students with an experience similar to traditional in-person learning.

Personalized Feedback and Assessment

Effective feedback is a cornerstone of learning. Pen tablets allow educators to provide personalized feedback on assignments, quizzes, and projects directly on the students’work.

This personalized touch not only enhances the learning experience but also helps students identify their strengths and areas for improvement.

The use of pen tablets in assessment encourages a more holistic understanding of students progress.

Creating Dynamic Presentations

Static presentations can sometimes lead to disengagement. Pen tablets enable educators to create dynamic and interactive presentations.

They can use annotate pdf with digital tablet, highlight key points, and draw connections between concepts on the go.

This dynamic approach captures students’attention and encourages active participation, making the online learning experience more vibrant and memorable.

Fostering Collaboration

Collaborative learning is a vital aspect of education. Pen tablets facilitate collaborative activities by allowing educators and students to work together in real time.

Whether it’s a group brainstorming session or a collaborative project, the ability to sketch, draw, and write together fosters teamwork and a sense of shared accomplishment, even in a virtual environment.

For educators teaching in diverse settings, language barriers can pose a challenge. Pen tablets offer a visual way to overcome these barriers. Educators can use them to explain concepts without relying solely on language.

Visual representations transcend linguistic differences, ensuring that all students can grasp the content effectively.

Adapting to Hybrid Learning Models

As education transitions into a hybrid model that combines in-person and online teaching tools, pen tablets become even more valuable.

Educators can seamlessly switch between traditional teaching methods and digital interactions using pen tablets.

This adaptability ensures a smooth learning experience, regardless of whether students are attending class in person or remotely.

FAQs

Q1: Do I need any specific software to use pen tablets for online teaching?

While some pen tablets come with proprietary software, many are compatible with popular online teaching platforms and whiteboard applications.

Q2: Can pen tablets work with different devices?

Yes, pen tablets can be used with computers, laptops, and even some tablets, offering flexibility in your teaching setup.

Q3: Are pen tablets suitable for subjects beyond art?

Absolutely. Pen tablets are versatile tools that can be used across various subjects, from mathematics to science and even language arts, such as graphics pads for pixel artdrawing pads for tattoo design and etc.

Q4: Do students need their own pen tablets to participate?

No, students can follow along and engage with the content even without their own pen tablets. Educators can share their screen and interact using their tablet.

Q5: Are pen tablets user-friendly for educators who aren’t tech-savvy?

Yes, many pen tablets are designed with user-friendly interfaces, making them accessible to educators of all tech levels.

(1)

Best Graphics Tablets for MediBang Paint

November 14th, 2023

MediBang Paint Pro is a free lightweight digital painting program for illustrators and comic book artists.

MediBang Paint supports graphics tablets from popular brands such as Wacom. So you can use a pen tablet or display to draw directly in MediBang software.

Drawing tablet is a computer input device that enables a user to hand-draw images, animations and graphics, with a special pen-like stylus, similar to the way a person draws images with a pencil and paper.

If you work with a graphics tablet, you can control painting tools with pen pressure, or the angle. And that makes drawing in medibang very accurate and precise.

Choosing the best graphics tablets for MediBang Paint is not easy since we don’t have to worry only about size or screen resolution but software compatibility, portability, price, and performance.

To help you buy the right one, pc tech test have drawn up a list of the best drawing tablets available today.

What types of drawing tablet to get for Medibang Paint?

There’s 3 different kinds! drawing tablets without screen, drawing tablets with display, stabdalone drawing tablets.

The classic graphics tablet consists of two main parts: a flat surface that is mapped to your screen and a stylus. You look at your computer screen while drawing on the pen tablet. This takes a while to get used to.

Some have a highly sensitive LCD monitor upon which you can draw directly. so it’s a bit more expensive but amongst the closest to pen on paper action.

Both of these need to be plugged in a computer or laptop to work.

Standalone pen tablets like ipads allow you to draw on the screen, without the need to plug it into another machine.

These are the most expensive, but the benefit is they’re portable, set up is easy, and u can use em for other things.

Taking Medibang Paint to a New Level

Because the drawing tablet is operated with a pen, so it delivers more precision and control than a mouse that’s optimized to work with Medibang Paint to speed workflow.

Tablets help a lot to people who suffer from carpal tunnel, They will always be more ergonomic, nature and comfortable to use than a mouse!

Tablets are absolute positioning devices, so all you have to do is just place your pen on the device’s surface and your cursor position will be mapped precisely to your screen.

Pressure and tilt sensitivity are two amazing features that most good graphics tablets have that allow for perfect translation of pressure and tilt movements from your pen to your artwork.

By applying more pressure to your graphics tablet will result in wider brush strokes while putting less muscle into it will produce thinner strokes.

Most drawing tablets also offers customizable ExpressKeys, which can be assigned to application-specific settings of medibang paint, putting your favorite shortcuts at your fingertips.

What drawing tablet brands are good?

Wacom is still leading brand when it comes to drawing tablets. But good cheap rivals like XP-Pen and Huion are also worth considering.

Apple, Microsoft and Samsung, meanwhile, not only produce some of the best tablets in general, but ones that are increasingly good as drawing tablets too.

What graphics tablet size to get for Medibang Paint?

Drawing tablets come in different sizes, and the size you choose depends on your personal preference and the type of work you’ll be doing.

Generally speaking, you’ll want the graphic tablet size to be close to the size of your computer monitor.

The tablet surface is mapped to the whole screen. That means if you have a small drawing surface, everything you draw will be magnified much larger.

For medium size tablets, the difference of your tablet stroke and screen stroke is not as much, and hence it feels more natural to see your strokes come out the way they are on screen.

For large tablets, the difference is even less. They are great if you have a high budget, and these tend to be used by professional artists.

What drawing tablet is compatible with Medibang Paint?

MediBang is available for Windows, Mac OS X, Android, and iPad OS. So no matter what drawing tablet you get, it will work well with Medibang Paint.

Many similar posts: Graphics Tablets for PhotoshopPen Tablets for illustratorDrawing tablets for Krita, and etc

12 Best Drawing Tablets for Medibang Paint in 2023

For our long research, we found the best tablets for Medibang Paint, which is suitable for animators, graphic designers, and any other artists. Let’s discuss it.

1. Wacom Intuos

2. XP-Pen Deco 01 V2

3. Huion HS610

4. Wacom One 13

5. Huion Kamvas 13

6. XP-Pen Artist 16 (2nd Gen)

7. Ugee U1600

8. Huion Kamvas 22 Plus

9. XP-Pen Artist 24 Pro

10. iPad (10th gen)

11. Samsung Galaxy Tab S6 Lite

12. Surface Go 3

Conclusion

Anyone who has been working with MediBang for a long time will sooner or later consider purchasing a pen tablet for MediBang.

The choice of graphic tablet will depend on the individual’s needs, budget, and preferences, as well as the type of work you will be doing.

From the above list of the 12 best tablets for Photoshop, you can choose one that meets your product specifications and budget.

If you need the portability, We can recommend you to use the surface, ipad and samsung galaxy tab cause they are really awesome standalone pen tablet.

If you are getting into the digital painting from a professional point of view, you should consider investing in a quality pen tablet that will make work easier and improve accuracy.

Source: https://pctechtest.com/best-drawing-tablets-for-medibang-paint

(0)